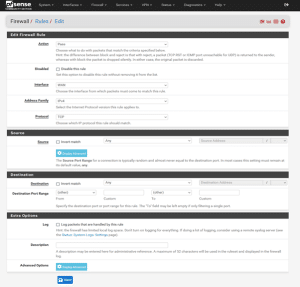
This guide provides a simple-to-follow guide on how to whitelist IP addresses in pfSense. pfSense is a free, open-source firewall and router that features unified threat management, load balancing, multi WAN, and more. This procedure secure your network by allowing only specified IPs through the firewall. If you’re an admin seeking to tighten security, you can follow these step-by-step instructions to configure firewall rules within your pfSense interface.
Step 1: Access the pfSense web interface
Log in to your pfSense firewall via the web interface. To access the pfSense management panel, proceed to your preferred web browser and access the pfSense web panel by running https://[Firewall_IP] in the search bar. Proceed to site when you get a security notification. This is a default message, since the pfSense panel is not secured with SSL certificate by default. You can safely ignore this message.
Step 2: Navigate to firewall rules
Go to Firewall > Rules located at the top menu of the page

Step 3: Add a new rule
Click on the green “add” button to add a new rule at the bottom of the page.
Step 4: Choose an action

In the ‘Action’ field, you can specify to either ALLOW, DROP or REJECT the incoming traffic. Since we want to allow IP addresses, choose ALLOW.
Step 5: Specify a protocol
Under the protocol field, you can specify to which IP protocol the rules should match. For example Any, TCP, or UDP.
Step 6: Define a source
In the Source field, click on ANY and pick the Address or Alias option. Specify the source IP address that you want to whitelist.
Step 7: Choose a destination
In the Destination section, you can leave it “any” if you want to whitelist the source IP address to all servers behind the firewall (if there are more than one). Or choose Address or Alias option and specify the internal IP address of the server.
Apply Changes: Click “Save” and then “Apply Changes” to activate the rule.
Congratulations! You have now learned how to whitelist IP addresses in pfSense.


