In remote desktop environments, using local peripherals like microphones and cameras is often essential for tasks such as video conferencing, voice communication, or media recording. This guide was created using a server instance launched from Kamatera’s preconfigured Windows Server image. It provides a step-by-step walkthrough on how to properly connect, configure, and test your microphone and camera with your server. Whether you’re using Remote Desktop Protocol (RDP) or validating device functionality directly within the server environment, you’ll learn how to adjust permissions, redirect local devices, and ensure everything functions as expected.
Step-by-step guide
Configuring privacy settings for camera and microphone on Windows:
Follow these steps to verify that your camera and microphone are connected, functional, and accessible to the applications you need.
- Verify that your camera and microphone are properly connected.
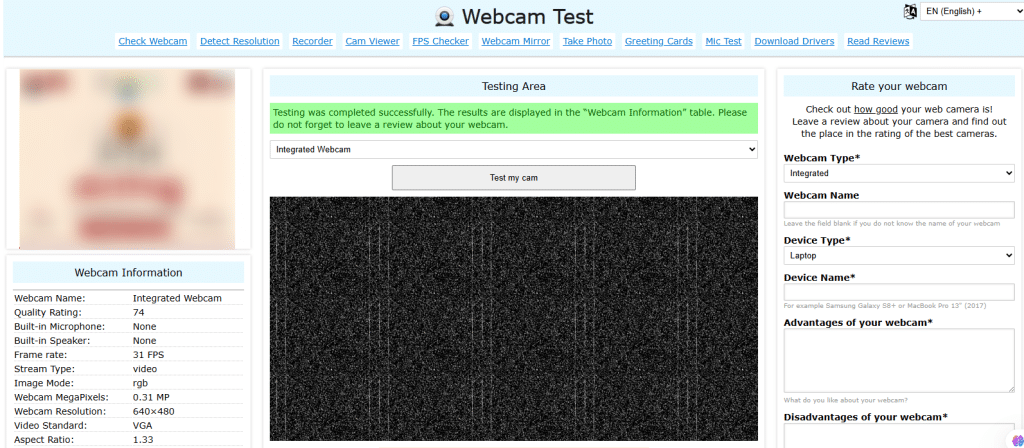
- You can test your camera using a secure browser-based tool: https://webcamtests.com/
Click the Test my cam button and grant browser permission when prompted; if your camera is functioning correctly, you’ll see a live preview, confirming that the camera is working and accessible to browser-based applications.
3. Check if your microphone is working using this online tool: https://mictests.com/check
Click the Check my microphone button and allow microphone access when prompted by the browser, then speak into your microphone- you should see visual indicators confirming that your microphone is working and being detected.

4. To allow camera access for desktop apps, go to Settings-> Privacy & security-> Camera, ensure that Camera access is turned ON, and scroll down to confirm that Allow desktop apps to access your camera is enabled. This setting allows traditional (non-Microsoft Store) applications like Zoom, Chrome, Microsoft Teams, and others to use your camera.
Note: You might not see Desktop App Web Viewer or other app names listed unless they have recently accessed the camera, this is completely normal.
5. To allow microphone access for desktop apps, go to Settings-> Privacy & security-> Microphone, make sure that Microphone access is turned ON, and scroll down to ensure that Allow desktop apps to access your microphone is enabled.
Note: You might not see Desktop App Web Viewer or other app names listed unless they have recently accessed the microphone, this is completely normal.
6. Ensure that any specific apps you’re using are granted permission to access the camera and microphone.
Configuring your remote desktop connection
Remote Desktop Protocol (RDP) allows you to remotely access and control another Windows computer over a network connection. It provides full desktop experience, enabling you to use applications, transfer files, and perform administrative tasks as if you were sitting in front of the remote machine. RDP is widely used for managing servers, accessing virtual desktops, and supporting remote work environments.
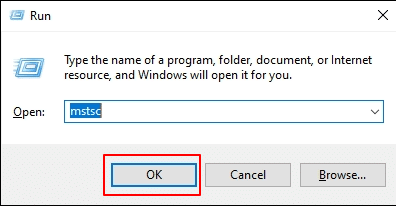
- On your local computer, open the Remote Desktop Connection application. You can do this by pressing Windows + R, typing mstsc, and hitting Enter or OK as shown in the screen below.
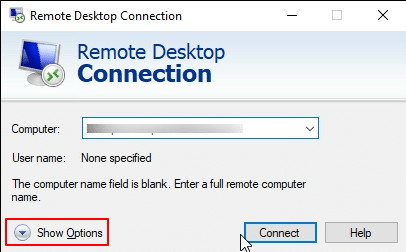
2. In the Remote Desktop Connection window, click on Show Options to reveal additional configuration settings.
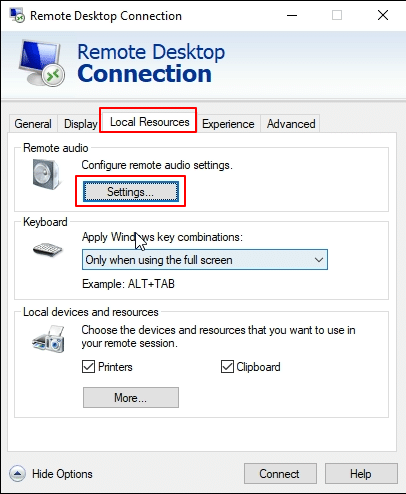
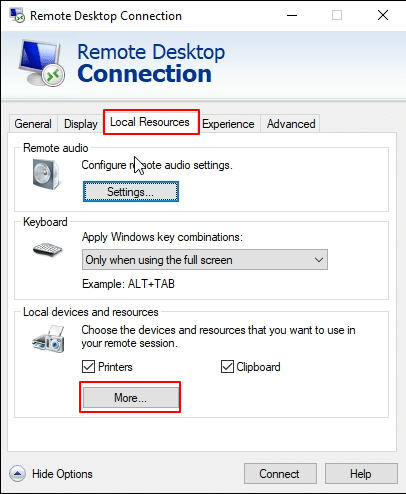
3. Click on the Local Resources tab. This section allows you to control which local devices and resources like printers, clipboard, drives, and audio will be available during your remote session. For the microphone, click the Settings button located under Remote audio.
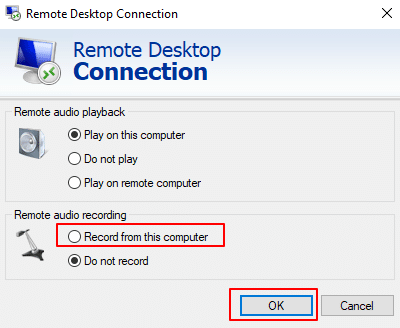
4. In the Remote Audio Settings window, make sure to select Record from this computer under Remote audio recording. Then, click OK to save the settings and return to the Local Resources tab.
5. Click on More under Local devices and resources to expand additional options for sharing local drives, devices, and peripherals during the remote session.
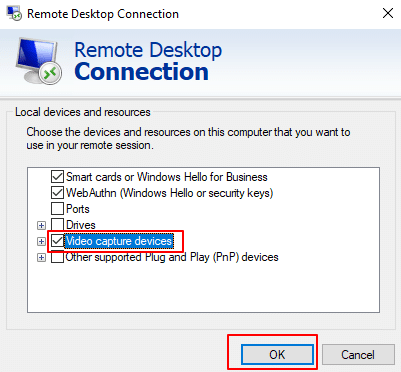
6. Check the box next to Video capture devices, then click OK to confirm and enable access to your local webcam during the remote session.
After configuring the local resources (microphone, webcam, drives, etc.) and verifying all settings, click Connect in the Remote Desktop Connection window to establish a remote session with the server.
Server-side configuration
-
- Search for Server Manager in the start menu.
- From the dashboard, click Add Roles and Features. Alternatively, click Manage in the top-right corner and select Add Roles and Features from the dropdown menu.
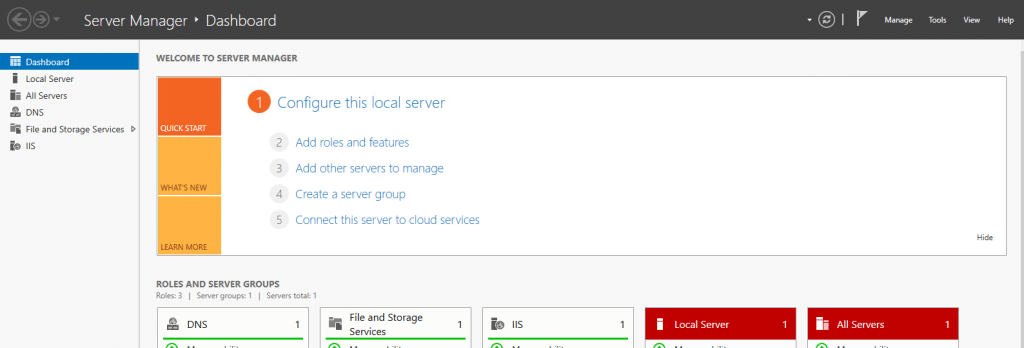
3. The Add Roles and Features Wizard opens. At Before you begin step, click Next.

4. At Select Installation Type step, select Role-based or feature-based installation. Click Next.

5. At Select Destination Server step, choose Select a server from the server pool. In Server Pool, make sure that your local computer is selected. Click Next.

6. At the Select Server Roles step, check the box next to Remote Desktop Services.

This will expand additional options, check the boxes next to Remote Desktop Connection Broker, Remote Desktop Gateway, Remote Desktop Virtualization Host, and Remote Desktop Web Access. Then click Next to continue.

7. Next, you’ll be prompted to add the required features. The Add Roles and Features wizard opens. Click Add Features to proceed.

8. Click Next and monitor the installation progress, it may require a system reboot.
9. Once the installation is complete, reboot the VPS to apply the changes.
10. Now, test the functionality of the webcam by opening the Camera app on the server. This will allow you to verify that the device is properly connected and working as expected.
And that’s it! You have successfully configured your microphone and camera on your Kamatera server.


