


Linux powers many of today’s IT infrastructures thanks to its exceptional stability and reliability. Whether you’re hosting websites, deploying applications, or managing databases, running Linux servers on Kamatera’s infrastructure delivers optimal performance with streamlined management.
Here is a step by step guide to set up a Linux server on the Kamatera platform.
Create your Kamatera account
- Enter your credentials to access the Kamatera management console. Click Login.

2. Navigate to My Cloud on left-hand side. Select Servers.
On the left-side navigation menu, click on Create New Server or use the Create New Server option on the right-hand side.

3. Choose the zone from the following options:
- Asia
- Australia
- North America
- Europe
- Middle East
Depending on the zone you select, the available countries will be displayed. For this setup, we used the Asia server domain.

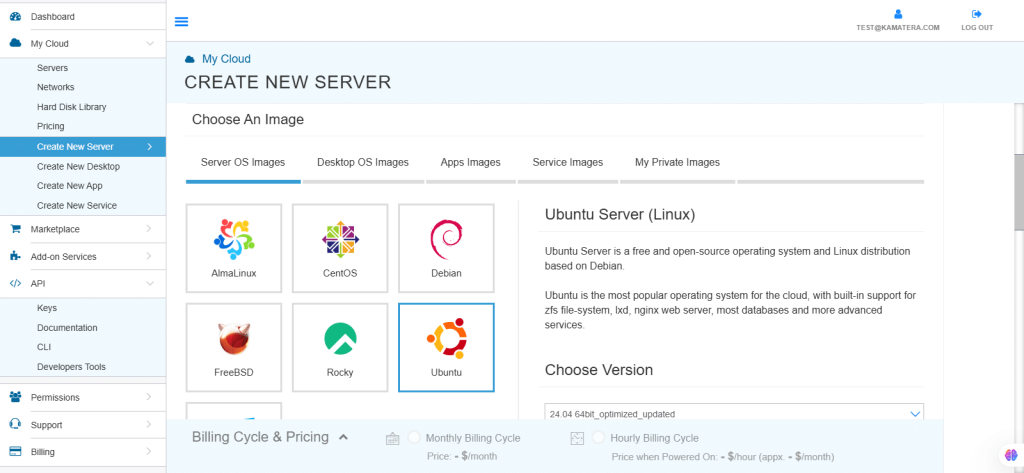
4. Kamatera offers a variety of app and server images to help users set up preconfigured resources. Users can explore options including:
- Server OS images
- Desktop OS images
- App images
- Service images
- My private images
For this example, we will choose Server OS Images and select the Ubuntu server.
5. Under “Choose Version”, select the latest version of Ubuntu Server version 24.04 LTS (Noble Numbat) 64-bit.
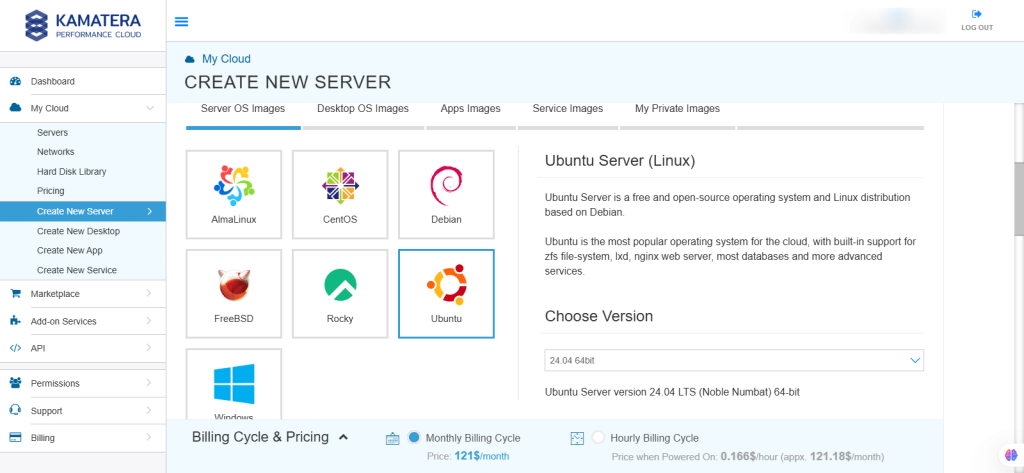
6. After selecting the version, toggle the Detailed view button to ‘on’ to view the detailed description, including the price.
Choose server specs:

| Field | Description |
| Type | Type B-General Purpose: Server CPU are assigned to a dedicated physical CPU thread with reserved resources guaranteed.
Type D–Dedicated: Server CPU are assigned to a dedicated physical CPU Core (2 threads) with reserved resources guaranteed. Type T-Burst: Server CPU are assigned to a dedicated physical CPU thread with reserved resources guaranteed. Exceeding an average usage of 10% will be extra charged for CPUs usage consumption. Type A-Availability: Server CPUs are assigned to a non-dedicated physical CPU thread with no resources guaranteed. Note: More information on CPU types is available on the My Cloud-Pricing page. |
| CPU | Choose the number of vCPUs that will be installed on the server. Type B/T can be configured with up to 104 vCPUs per server. Based on Intel’s latest Xeon Processors, 2.7 GHz+. |
| RAM | Choose the amount of RAM that will be installed on the server. Type B/T/D can be configured with up to 512GB RAM per server. |
| SSD DISK | Choose SSD Storage Size. You can add up to 15 SSD Disk. SSD Storage includes unlimited IOPS and unlimited storage bandwidth, free of charge. |
| Daily Backup | Toggle the switch to enable extended daily backups of your server’s storage to external backup storage. |
| Management Services | Toggle the switch to enable Management Services to the server’s operating system by Kamatera Technical Support Team. |
7. Choose networking
Users can select the network they wish to use, whether it’s a public Internet network or a private local network.

| Field | Description |
| Public Internet Network | Check to connect the server to a network interface connected to Public Internet Network. |
| Private Local Network | Check to connect the server to a network interface connected to Private Local Network. |
8. Advanced mode

| Field | Description |
| NIC #1 | Select WAN from the options available in the drop-down menu.
Select auto from the options available in the drop-down menu.
Select auto from the options available in the drop-down menu.
|
| WAN Traffic | Select 5000 GB per month/ on 10 Gbit per second port. |
9. Advanced Configuration
Hide: If you want to hide the advanced configuration.
Show: If you want to see the advanced configuration.

| Field | Description |
| Install Script | Enter the script here to execute, once the server is created.
Note: For Windows system, use Power Shell. |
| Keep Server On Failure | Do not terminate server if start up script or provisioning fails. |
| Server Notes | Enter any server notes to be noted. |
| Tags | Select tags from the drop-down menu and click Add. |
10. Finalize settings
Finalize settings by setting the password, re-validating it, selecting the number of servers, specifying the server name, and enabling the Power On Servers option.

| Field | Description |
| Password | Select password
Password allowed characters: a-z, A-Z,0-9 !@#$^&*()~ and must need the following requirements:
|
| Validate | Re-enter the password to validate. |
| Servers | Select the number of servers. |
| Name #1 | Enter the name of the server. |
| Power On Servers | Switch on the toggle button to see the details. |
11. Billing Cycle and Pricing
You can choose between monthly and hourly billing cycle.
Note: The Server Summary displays the location, operating system (including server specifications), add-on services, servers, and pricing.
Click Create Server.

12. The server is added to the Tasks Queue.

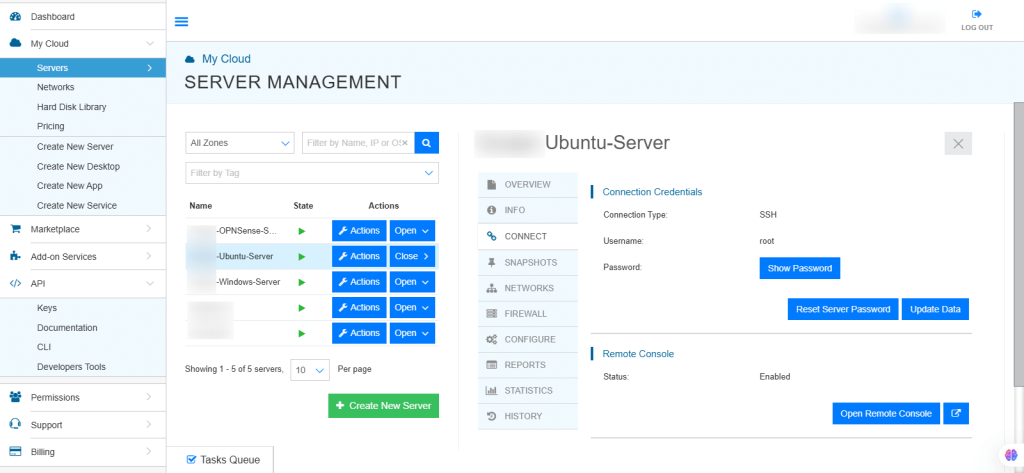
13. Once the server is created successfully, click on Open beside the server’s name.

14. On the right, the Overview of the server is displayed. Click on Connect.

15. Connection credentials like Username and Password are displayed. Under Remote Console, click Open Remote Console.
Install Ubuntu
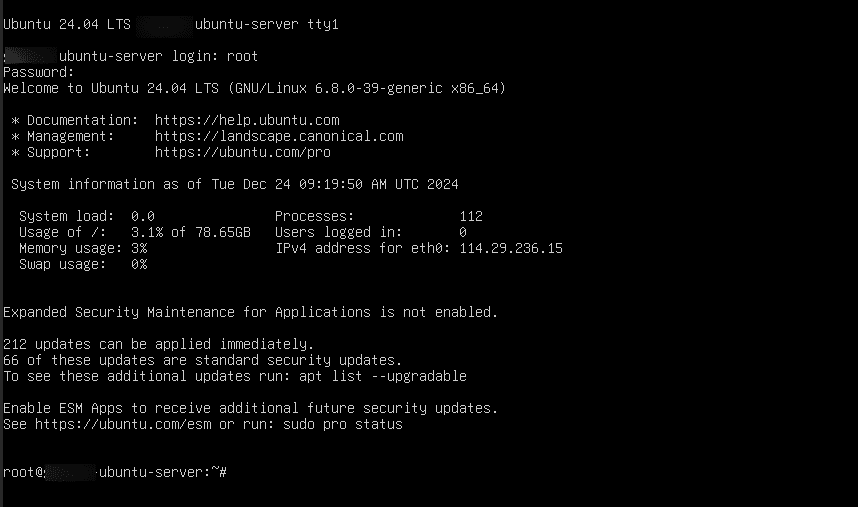
16. You will be directed to Ubuntu terminal. Use SSH to connect. Enter the root password you set during setup.
17. Run the below commands to update the system.
Command:
sudo apt update && sudo apt upgrade -y

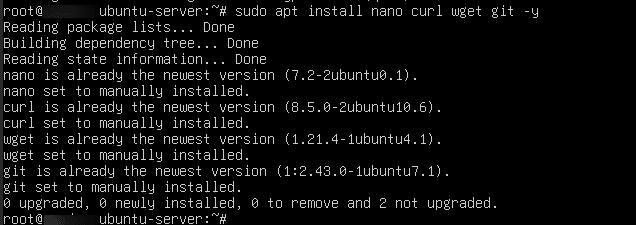
18. Install the essential tools by running the below command.
Command:
sudo apt install nano curl wget git -y
19. Secure the server. You can change the default password later.
Command:
passwd

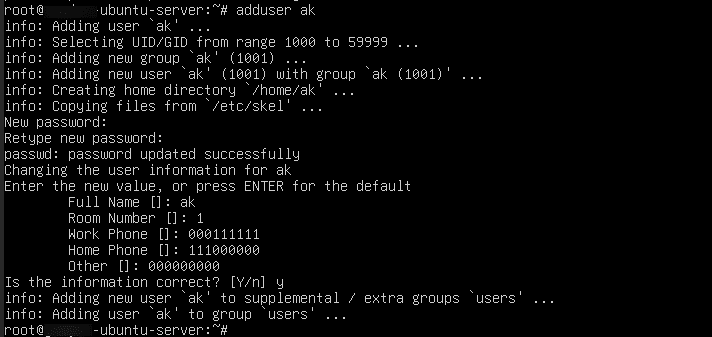
- Create a new user.
Command:
adduser <username>
Command:
usermod -aG sudo <username>
![]()
- Enable SSH Key Authentication (optional for enhanced security)
Generate an SSH key locally: ssh-keygen -t rsa
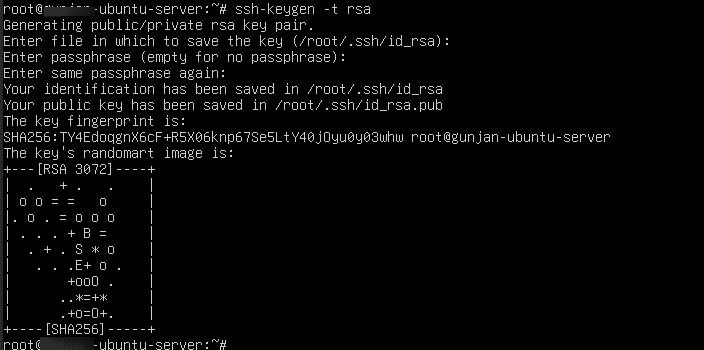
Copy the key to the server: ssh-copy-id <username>@<server-ip>

Install applications
20. Install Applications such as web servers, databases, and Docker.
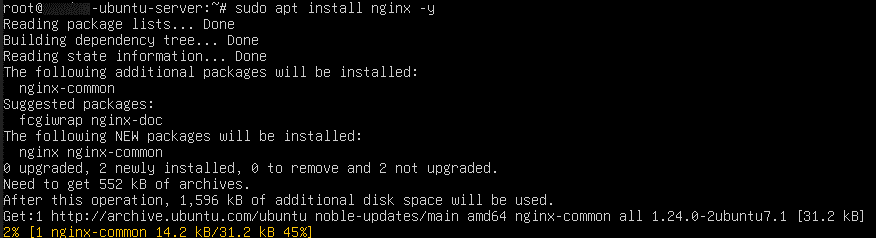
- Web Server:
Install Apache: sudo apt install apache2 –y
![]()
Install Nginx: sudo apt install nginx –y
- Database
Install MySQL: sudo apt install mysql-server –y
![]()
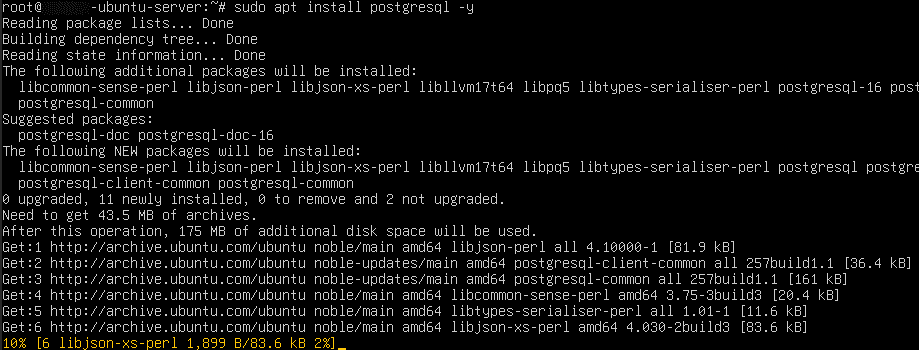
Install PostgreSQL: sudo apt install postgresql –y
- Docker
Install Docker: sudo apt install docker.io -y

Server management
21. Manage the Server
- Reboot or shut down the server.
Reboot: sudo reboot
Shut down: sudo shutdown -h now
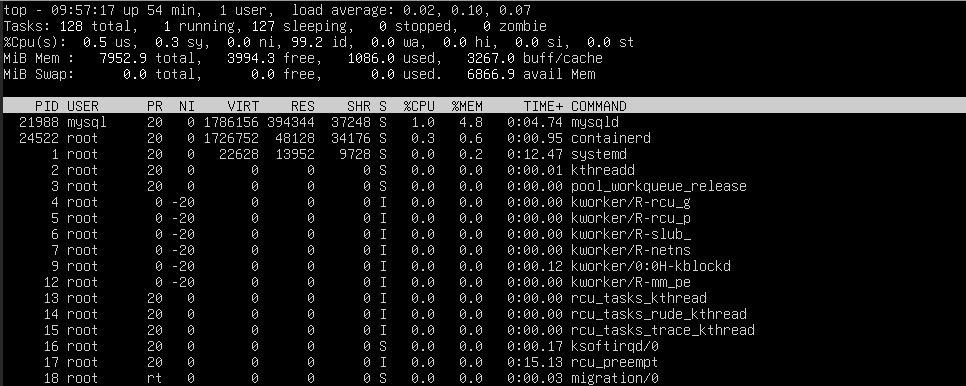
- Monitor resources such as disk usage and system resources usage by running the below commands.
To view real-time system resource usage: top or htop
Note: The top command continuously updates to display real-time system
resource usage. So, to exit and return to the command prompt, simply type exit top
This will bring you back to the shell, enabling you to type the next command.
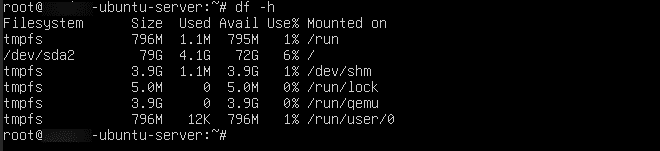
Check disk usage: df –h
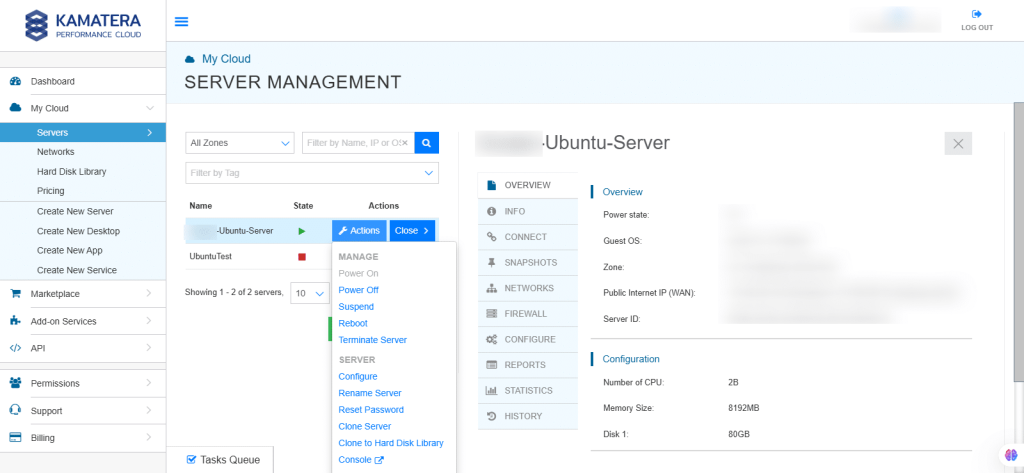
You can even use the Kamatera web console to reboot, resize, or manage the server directly. Go to Server Management dashboard and click on Actions beside the Server’s name.
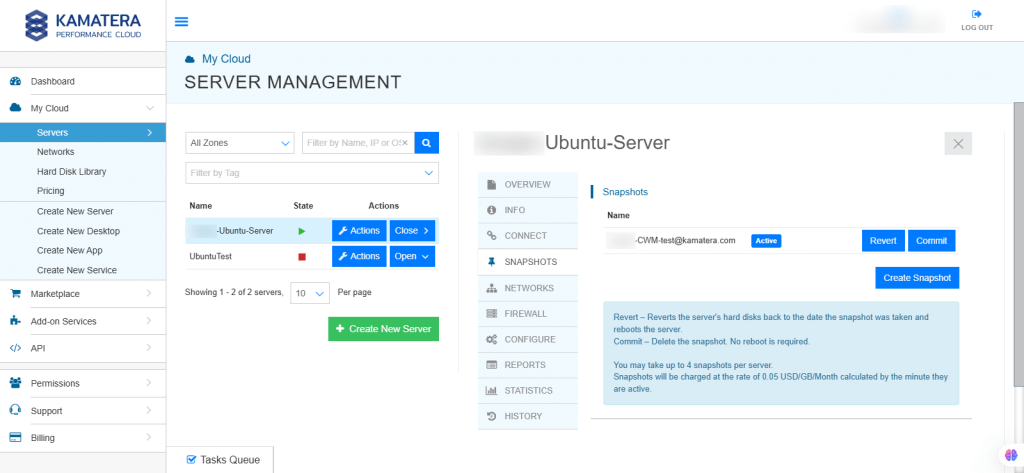
22. Backup and snapshots
A snapshot is a copy of a system at a specific point in time. It will let you save the current state to quickly restore it for later purposes if something goes wrong, like after an update or a failure.
Navigate to the Server Management section in the Kamatera console. Set up automatic backups or manually create snapshots to ensure data safety.
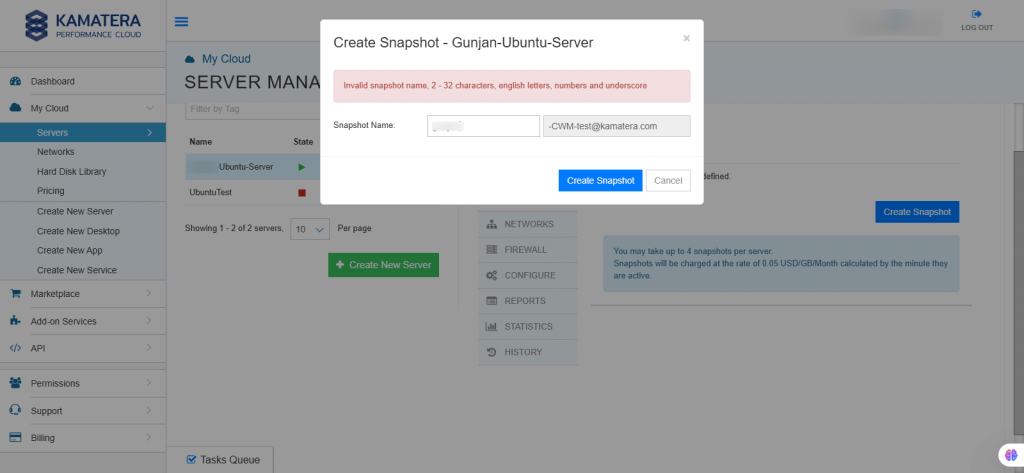
When you click on Create Snapshot, a snapshot is created in the Tasks Queue. Once it is successful, it is reflected on the right side.
Troubleshooting when necessary
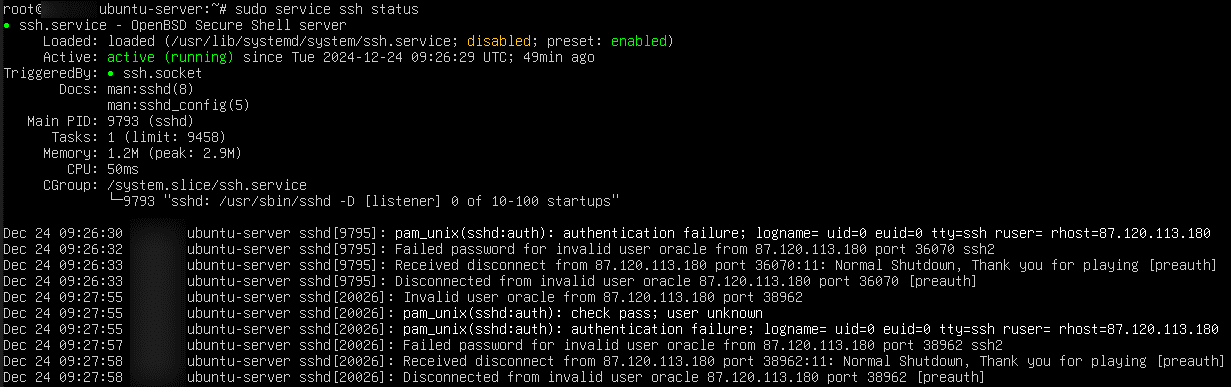
23. Troubleshooting
- No SSH Access:
- Ensure the SSH service is running:
Command:
sudo service ssh status
Check firewall settings:
Command:
sudo ufw allow ssh

Command:
sudo ufw enable
![]()
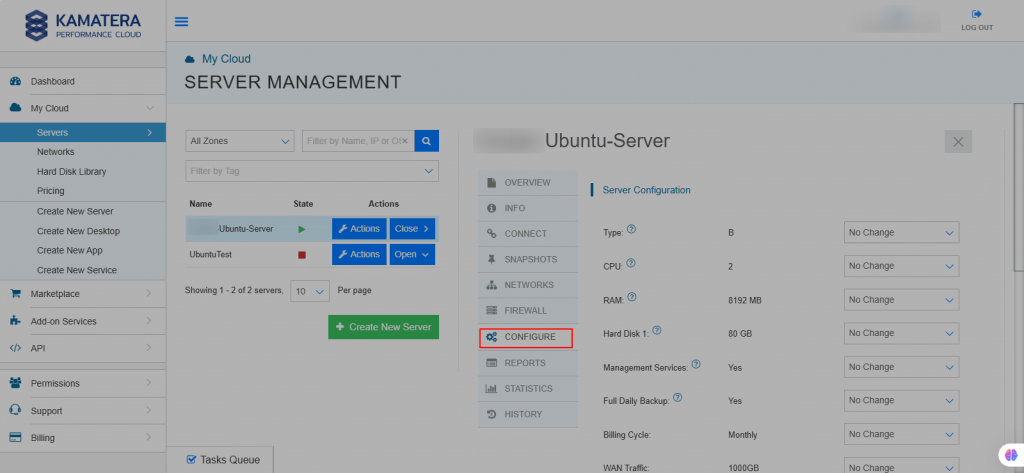
24. Server overloaded: Go to Kamatera’s server management console and resize the server by adding more resources (CPU, RAM).
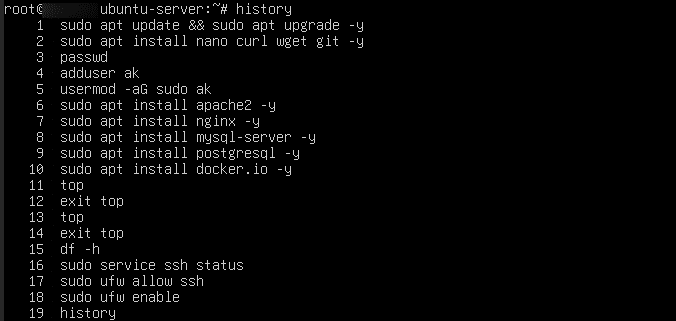
25. The history command displays your past commands. If any user gains access to your machine, they may run the history command and find your server login credentials. But, if you’ve entered the password in a prompt, it won’t be shown to users in the history command.
Command:
history
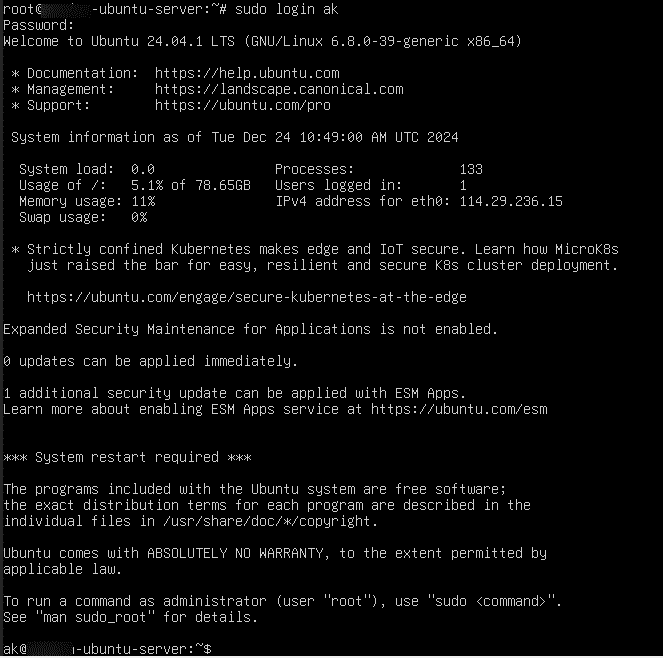
26. You can use the login command to switch to the user inside the server.
Command:
sudo login <username>
Enter the password when prompted.
After entering the password, you are successfully logged in to another user.
27. Simply run the below command to logout of the logged-in user.
Command:
logout
![]()
28. If you and your colleagues are connected as users to the same server using SSH, then everyone can communicate via the terminal.
Command:
mesg
![]()
The response will be either yes or no.
is y: Message access enabled
is n: Message access disabled
29. To toggle this feature, you have to pass the symbol along with the mesg command.
Command:
mesg y or mesg n
![]()
30. There are two commands available to communicate. Both commands take a message from one session and deliver it to other sessions.
Command:
wall
Press Ctrl+D to end input and send the message. This will exit the wall command and broadcast your message.

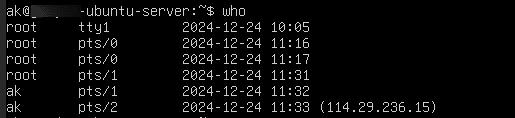
31. Make sure the target user’s session is active and logged in by running who on the root session.
Command:
who
This lists logged-in users and their terminals.
32. To create a file with content run the command below.
Command:
echo “content” > filename.txt
To list all the files in the directory.
Command:
ls -l

33. To know the path of the file, run the command below.
Command:
find /-name filename.txt
![]()
34. In the Linux terminal, we can transfer files using scp command. SCP stands for Secure Copy Protocol. This command allows the user to share the files securely. It uses secure shell to encrypt both your data and credentials. Since this command follows the end-to-end encryption protocol, it uses encryption over an SSH connection. This will protect the files from suspicious attacks.
35. Using the SCP command we can do the following operations,
- Copying the file from our machine to the server machine.
Command:
scp <filepath> user@hostname:<filepath>
- Copying the file from the server machine to our machine.
Command:
scp server_username@<server_host>:<filepath> <local_path>
- Copying the file from one server to another server.
Command:
scp <source_user>@<source_host>:<source_path> <destination_user>@<destination_host>.com:/<destination_path>
Congratulations! You have successfully learned many different commands to operate and manage your Linux-based server on Kamatera’s cloud platform.