Vesta Control Panel is an open-source web-based hosting control panel that helps manage web servers efficiently. With Vesta Control Panel, users handle various server-related tasks such as adding user accounts with different access levels, web server configuration, DNS management, email management, and database management. Because of its ease of use and lightweight nature, it became a popular choice for managing web-hosting environments.
Prerequisites:
Vesta Control Panel supports various Linux distributions like Ubuntu (12.04-18.10), Debian (7,8,9), and RHEL/CentOS (5,6,7).
Root or Sudo access to perform installation and configuration tasks.
Here is a step-by-step guide to install Vesta Control Panel on an Ubuntu server from Kamatera.
Download and install Vesta Control Panel
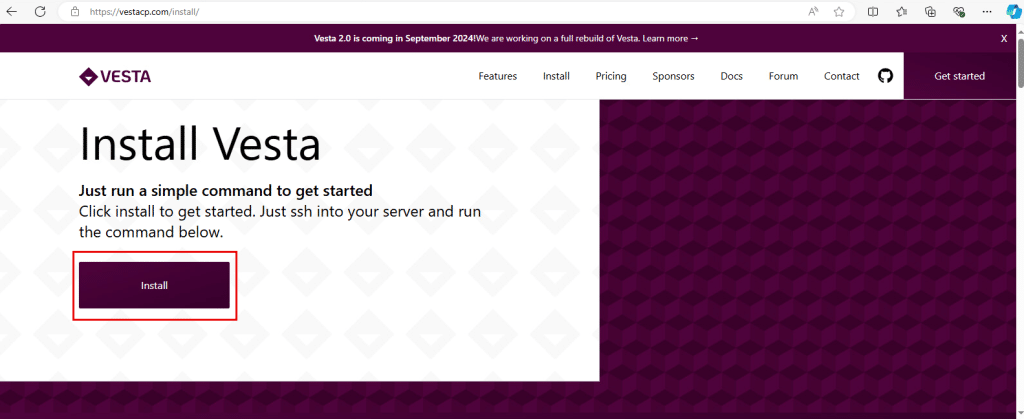
- Visit https://vestacp.com/install, and click on Install.
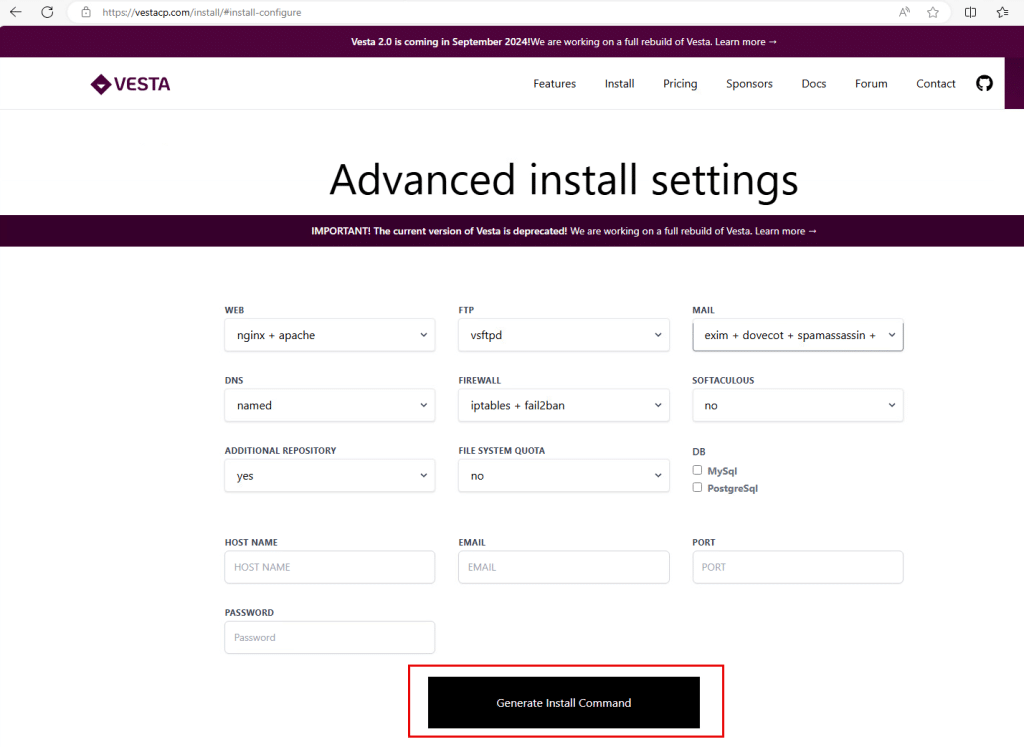
2. It is redirected to Advanced Install settings on the same page. Keep them default or change according to your requirements.
For selection of databases, check the box next to MySQL or PostgreSQL.
Click Generate Install Command.
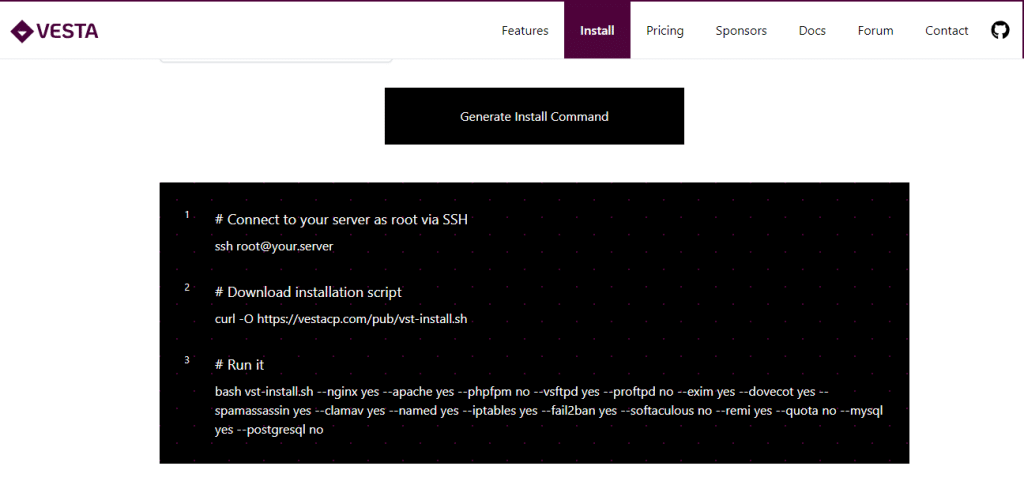
3. It displays the commands to connect to the server and install Vesta control Panel.
Run these commands one by one in the terminal.
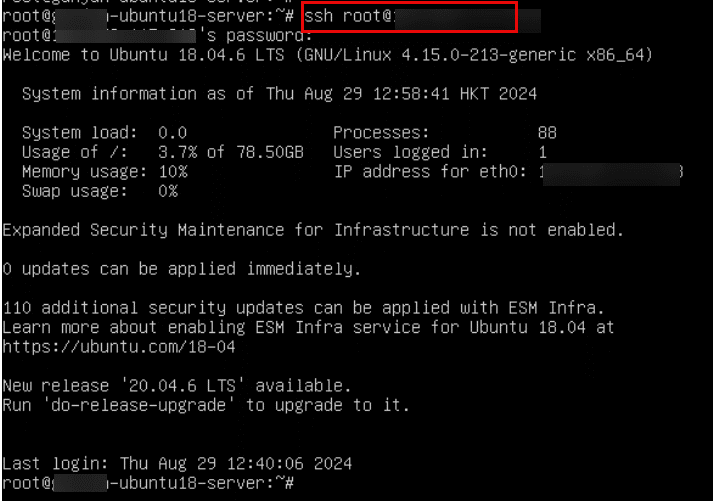
4. Open the terminal and enter username and password.

5. Run the first command given in vesta cp website.
Command:
ssh root@your.server
6. Run the second command.
Command:
curl -O https://vestacp.com/pub/vst-install.sh

7. Run the third command.
Command:
bash vst-install.sh --nginx yes --apache yes --phpfpm no --vsftpd yes --proftpd no --exim yes --dovecot yes --spamassassin yes --clamav yes --named yes --iptables yes --fail2ban yes --softaculous no --remi yes --quota no --mysql no --postgresql no

8. Now, you will see the message the software that is going to be installed on your system.

9. When prompted to continue, enter y.
Enter your admin email address.
Keep the port number default and hit enter (or) change the port number if you want.
Enter FQDN hostname
The installation takes 15 minutes to complete.

Log in and configure Vesta
10. Once the installation is successful, you will see the web UI, username and password.
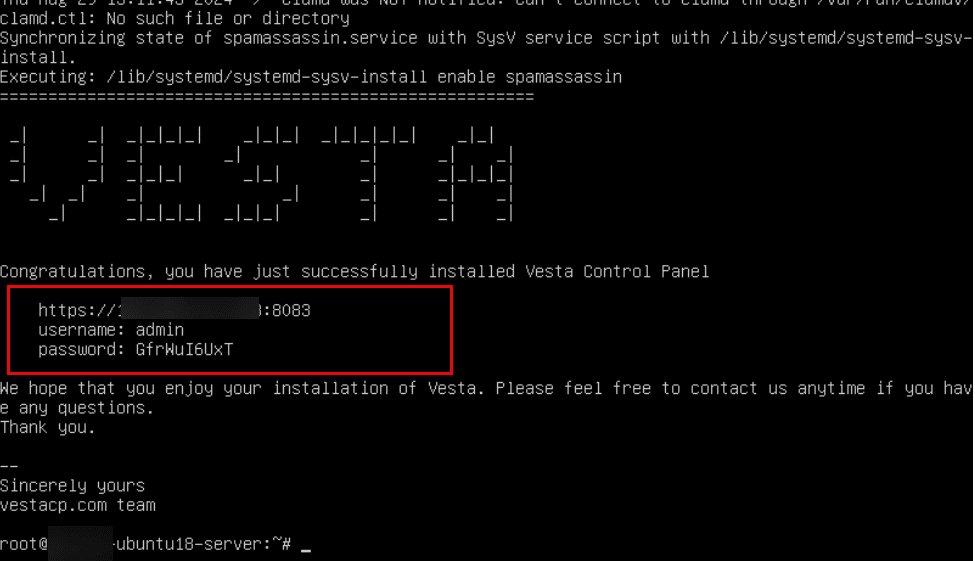
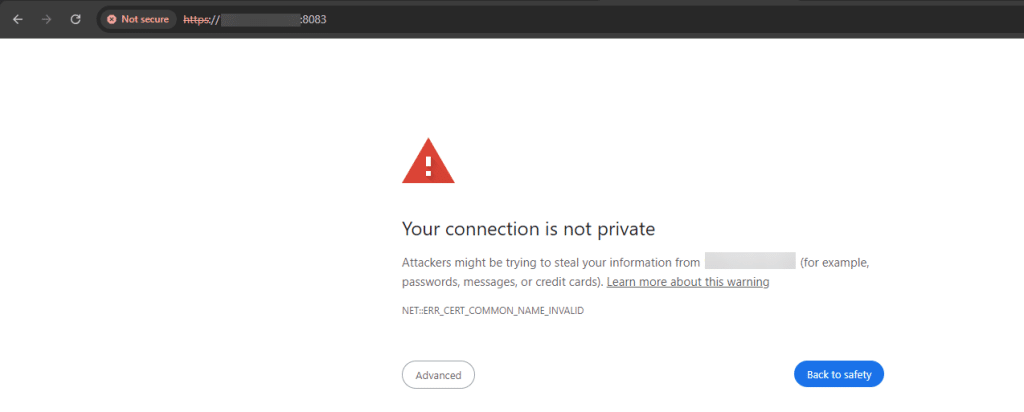
11. Go to web browser, and type https://ip-address:8083 (as mentioned in step 10 screenshot)
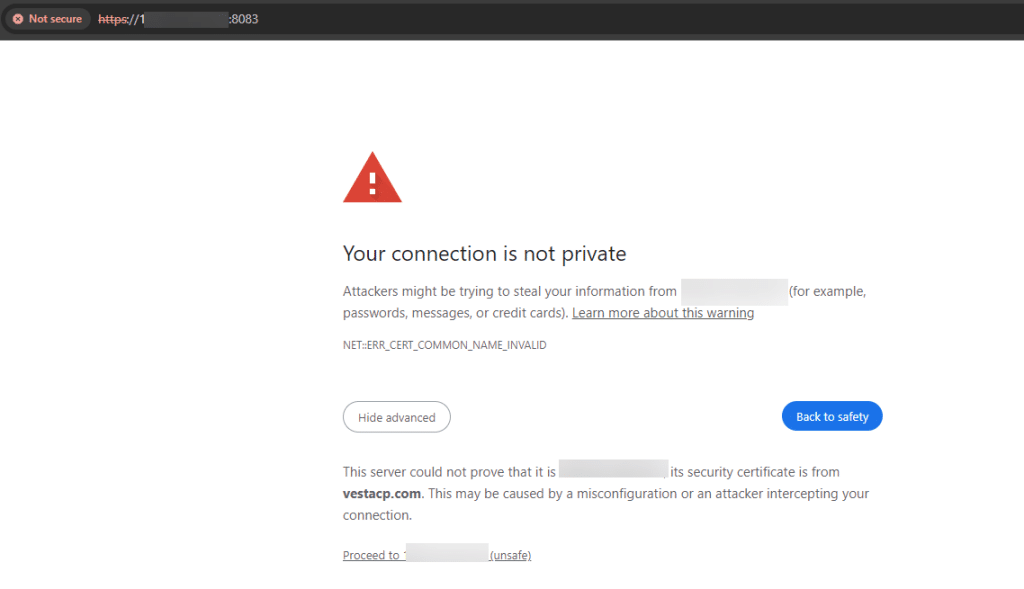
Click Advanced.
12. Click Proceed to xx.xx.xx.xx (unsafe).
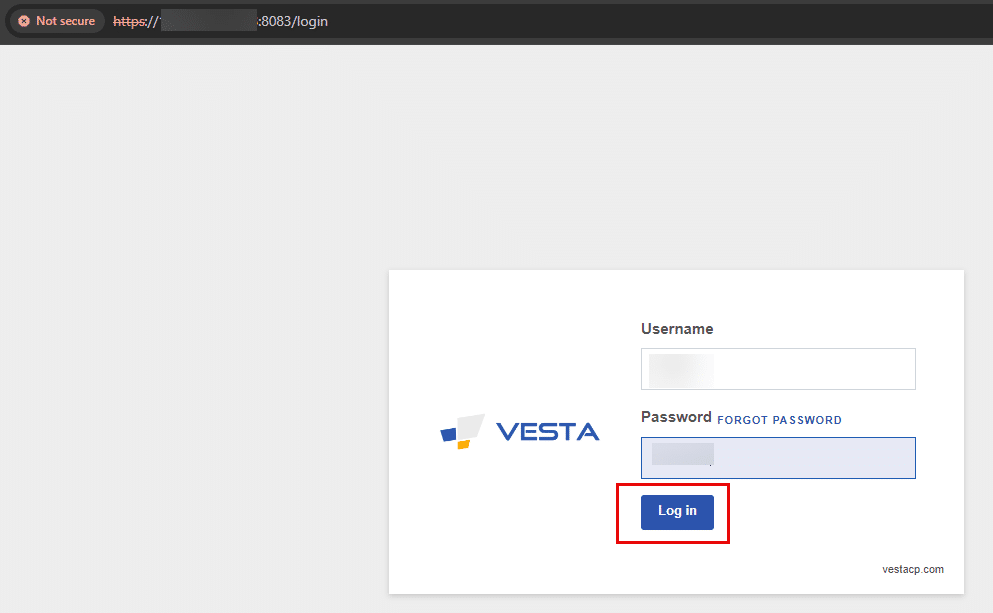
13. To login into Vesta Control Panel, enter Username and Password and click Log in.
14. You can see the Vesta control Panel dashboard.
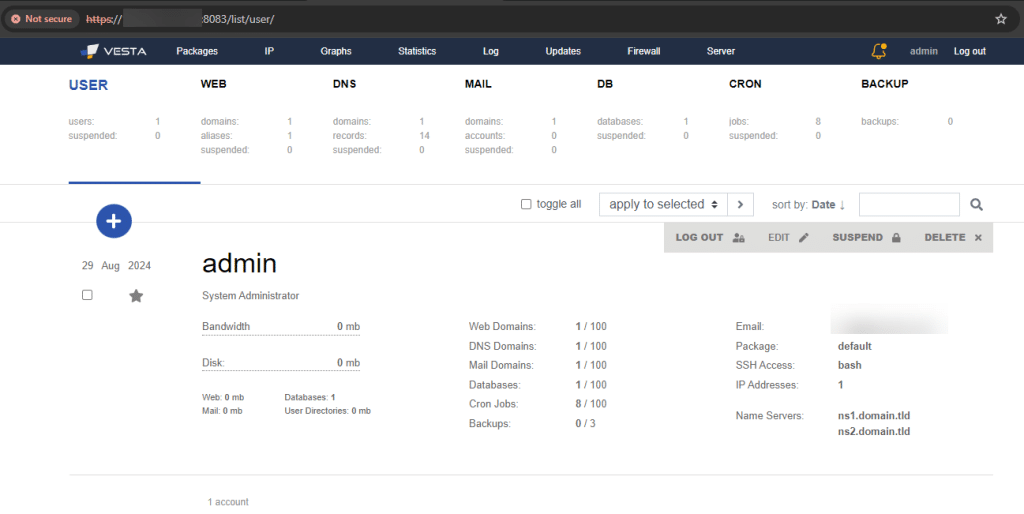
| Field | Description |
| Packages | Manage and deploy different packages or configurations |
| IP | Configures IP addresses and manage network settings |
| Graphs | Generates visual representation of data or metrics |
| Statistics | Displays various metrics and performance statistics about Vesta deployment |
| Log | Logs are used for trouble shooting and monitoring purposes. |
| Updates | Manages software updates. |
| Firewall | Configures firewall rules or network security settings |
| Server | Manage server settings, monitor server status and configure server related parameters. |
| Admin | Gives admin details |
| Logout | To log out of Vesta control panel |
Add users, domains, and configurations
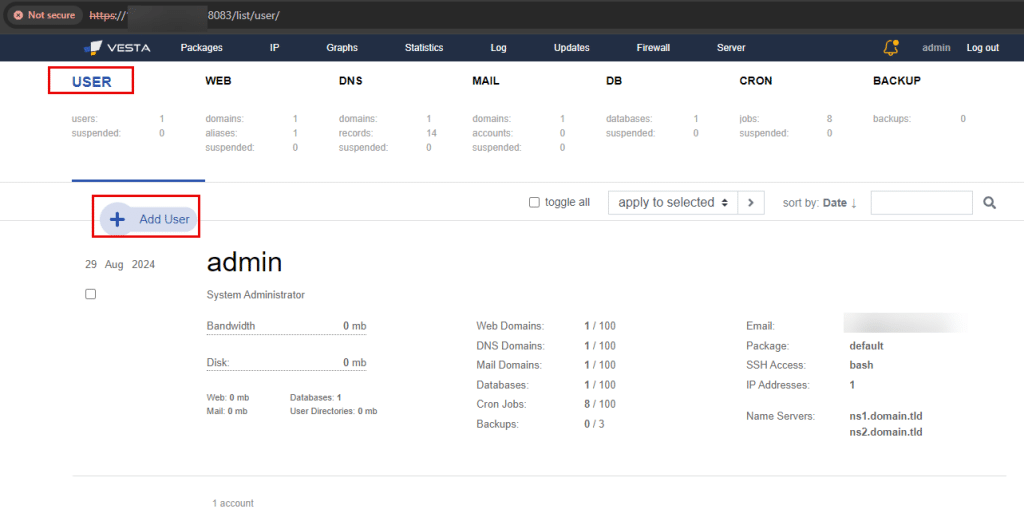
15. If you want to add a new user, then click on USER and click on Add User.
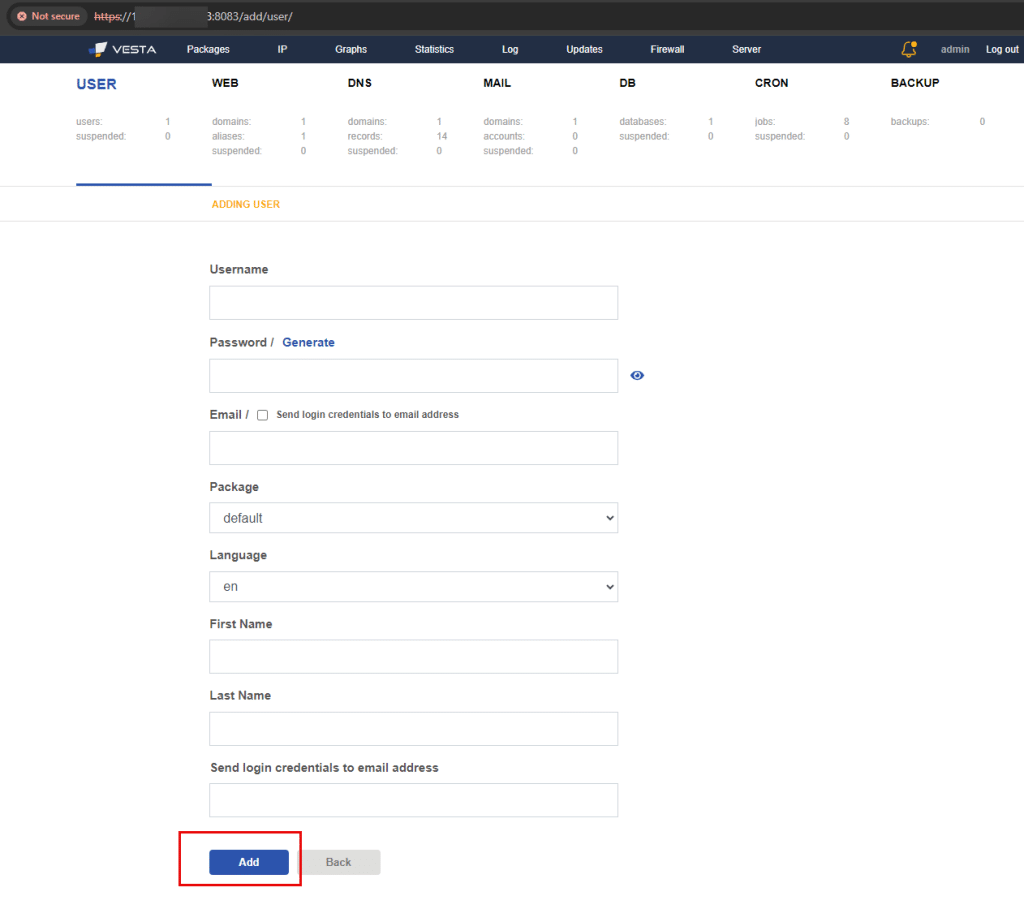
16. Fill in the details and click Add.
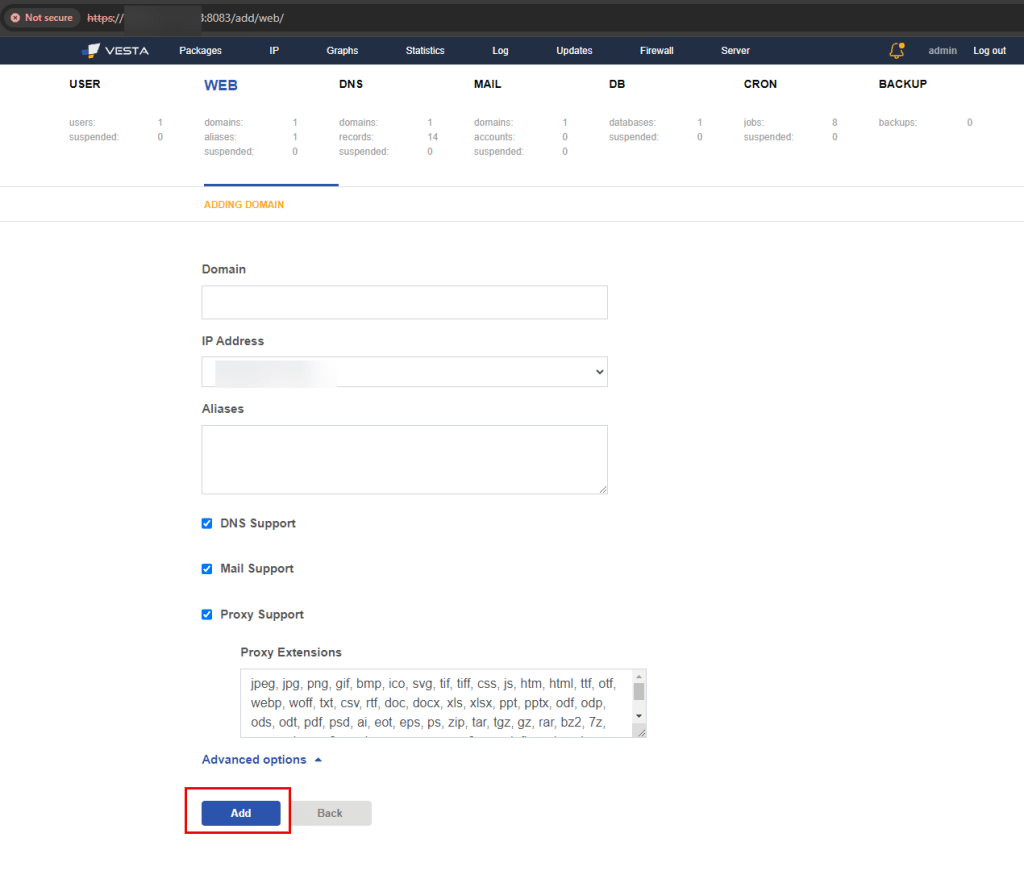
17. The WEB tab refers to add a new web domain, click WEB and click Add Web Domain.
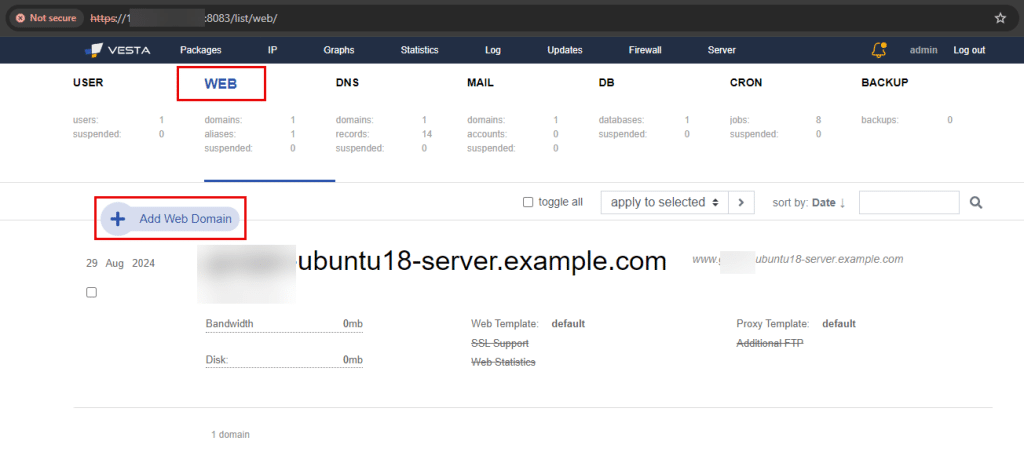
18. Enter Domain name, IP Addresses, Aliases, and check the boxes next to DNS support, Mail support, Proxy support.
Click Add.
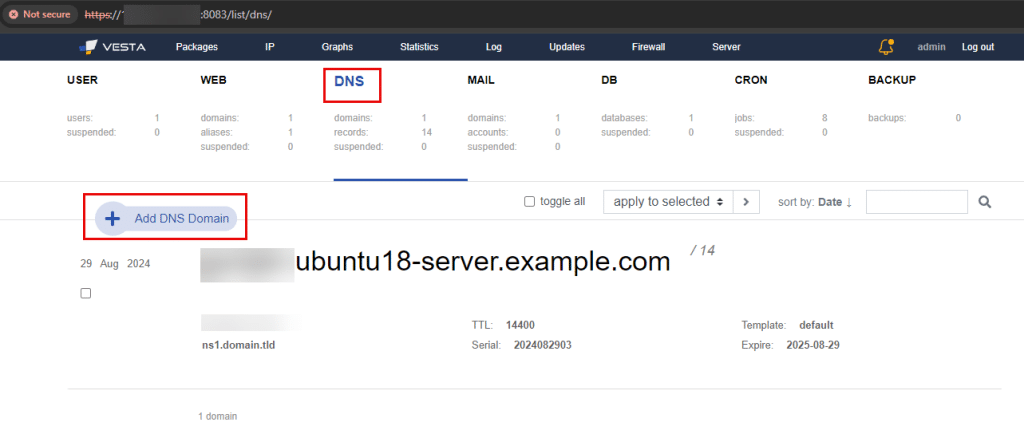
19. The DNS tab typically refers to configuring and managing Domain Name System settings.
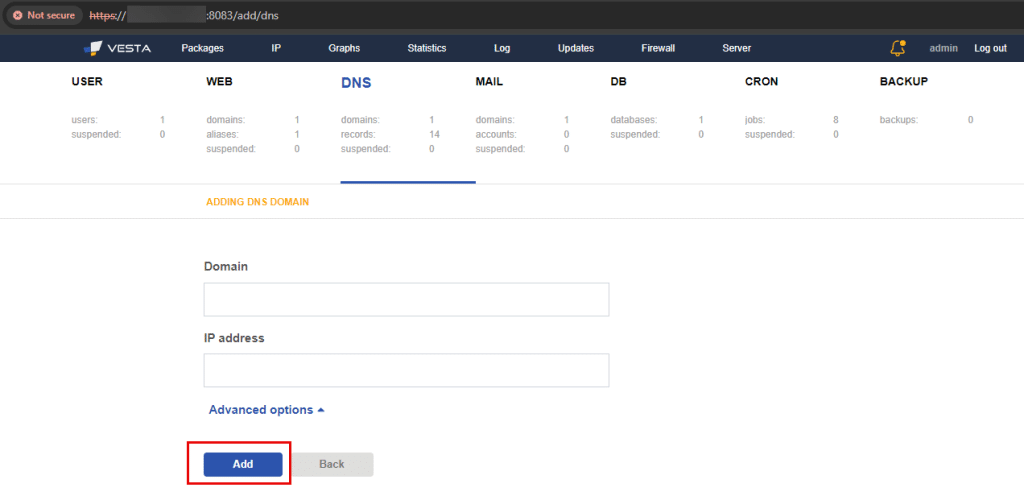
20. Enter the Domain and IP address. Click Add.
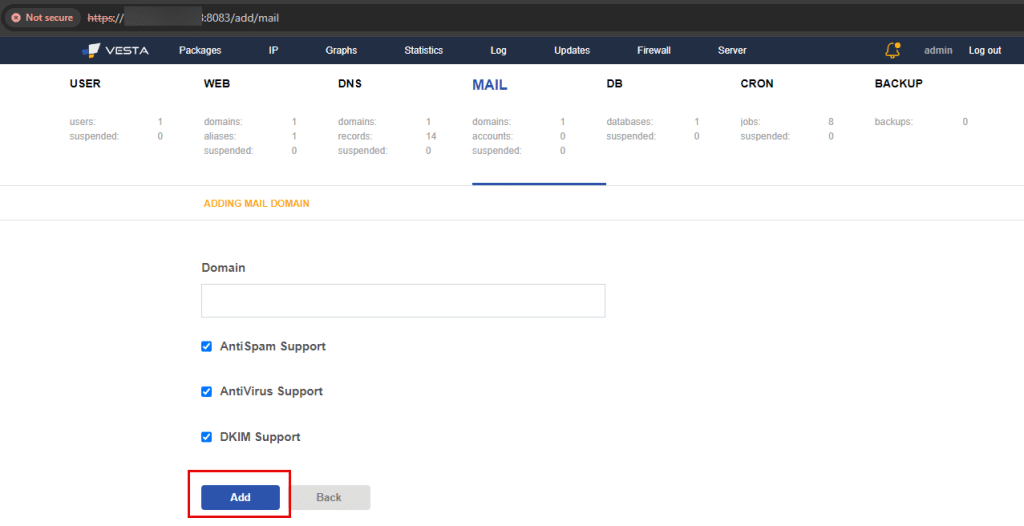
21. The MAIL tab refers to email related settings and configurations. Click MAIL and click Add Mail Domain.
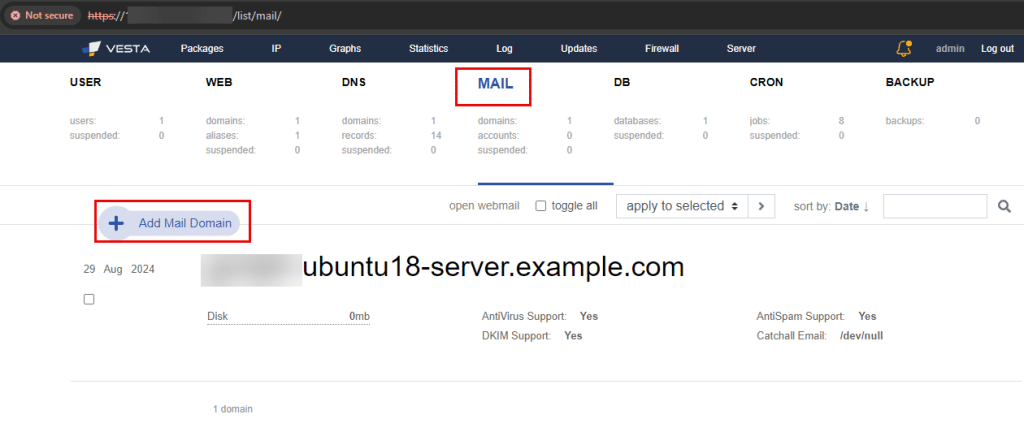
22. Enter the domain name and check the boxes next to AntiSpam Support, Antivirus Support, and DKIM Support.
Click Add.
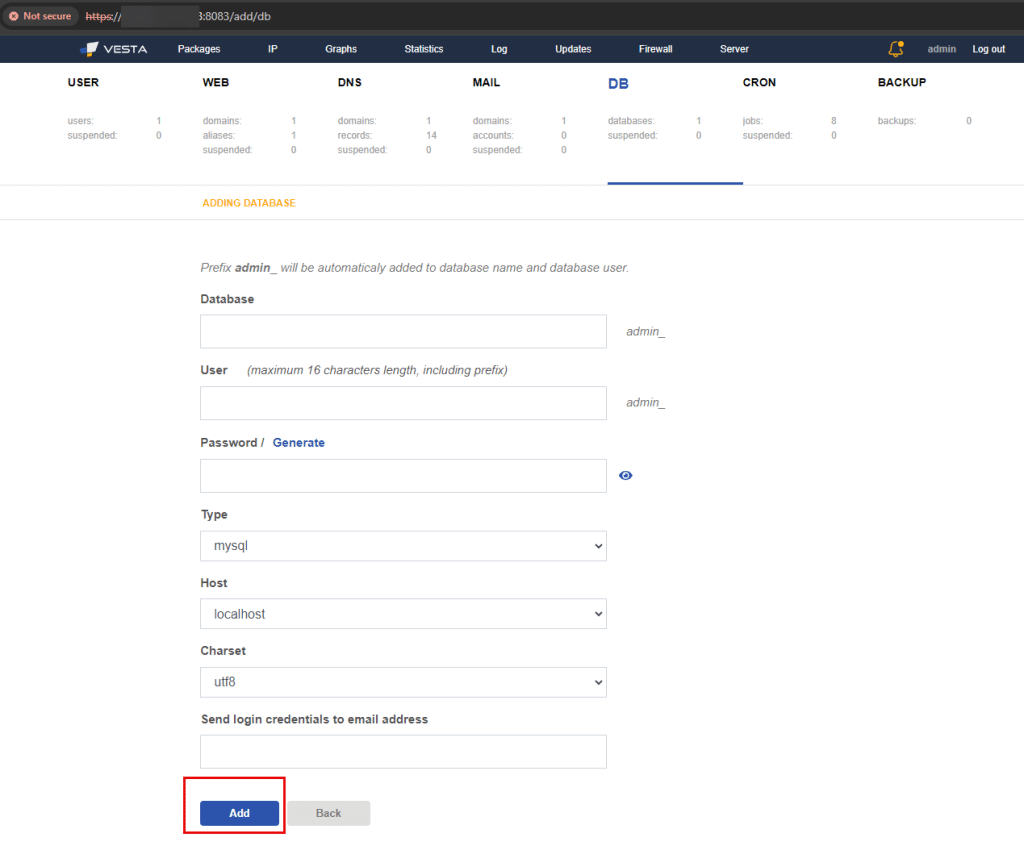
23. The DB tab refers to the database related settings and configurations. Click DB and click Add Database.

24. Fill in the required details and click Add.
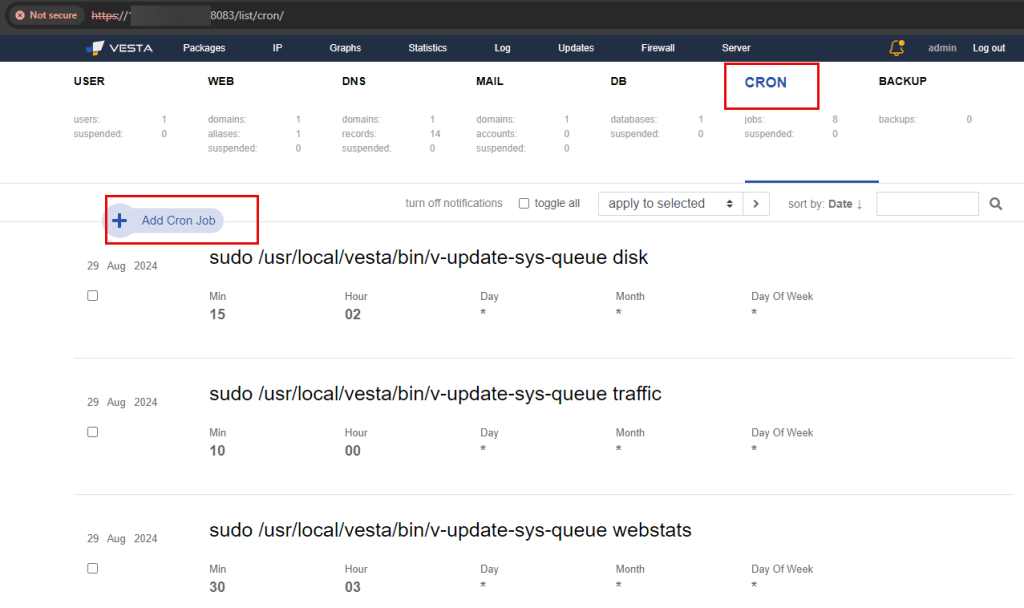
25. The CRON tab refers to scheduling and managing recurring tasks or jobs.
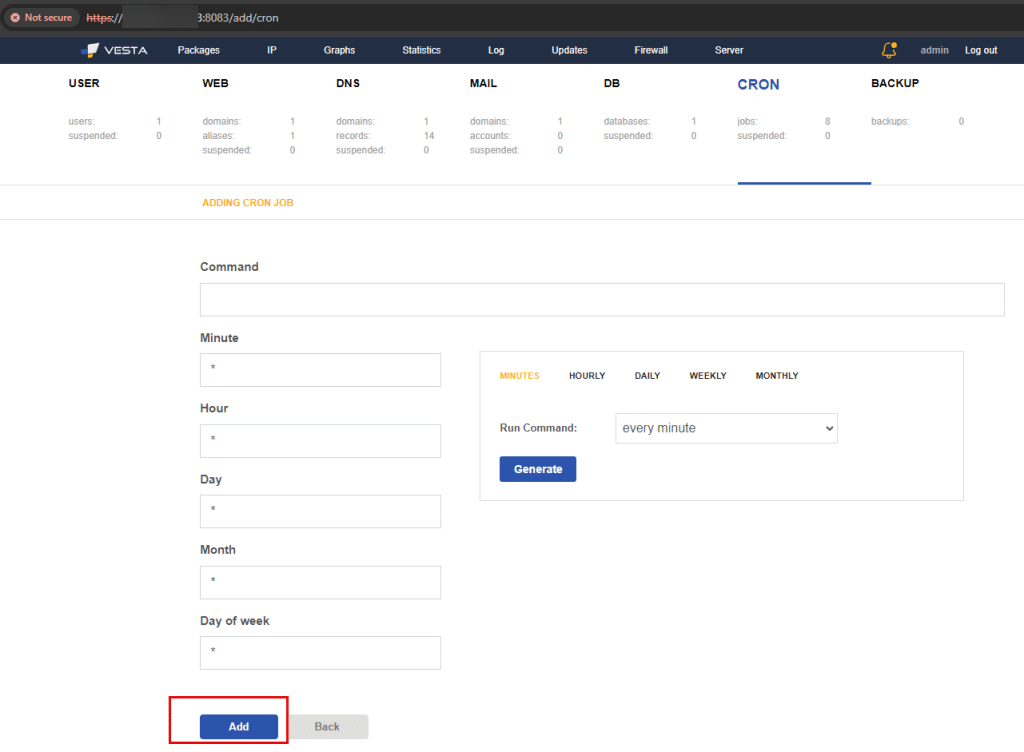
26. Fill in the required details and click Add.
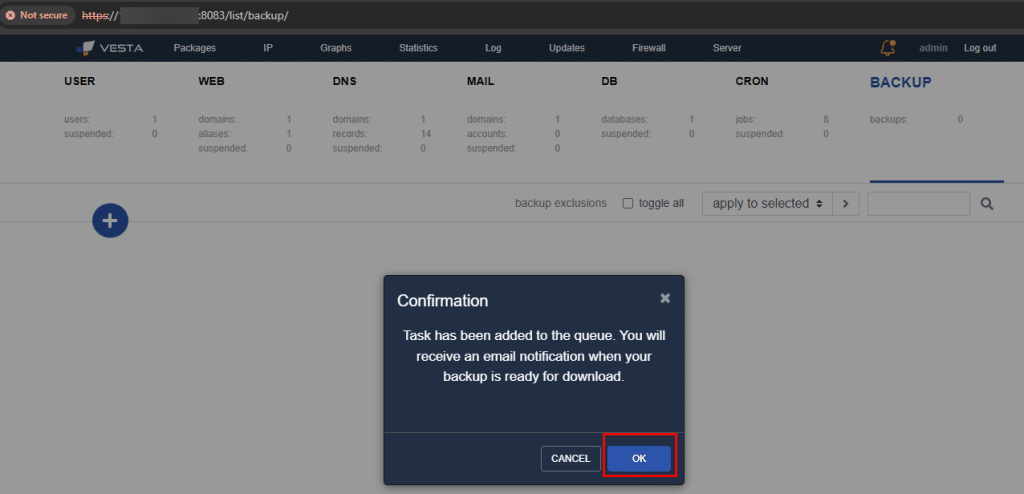
27. The BACKUP tab manages and configures backup operations.

28. When confirmation is sent, click OK.
You have successfully configured Vesta Control Panel, a powerful and user-friendly tool that facilitates effective management of Vesta deployments.


