Apache Tomcat is an open-source web server and servlet container developed by the Apache Software Foundation. It plays a crucial role in the deployment and execution of Java-based web applications by implementing key Java technologies, including Java Servlet, JavaServer Pages (JSP), and Java Expression Language (EL) specifications.
Here is a step-by-step guide on how to install Tomcat on a Kamatera Windows server.
Prerequisites
- Java version
1. Download Tomcat by navigating to http://tomcat.apache.org/
Check which Java version you installed on your computer and download that Apache Tomcat Version.
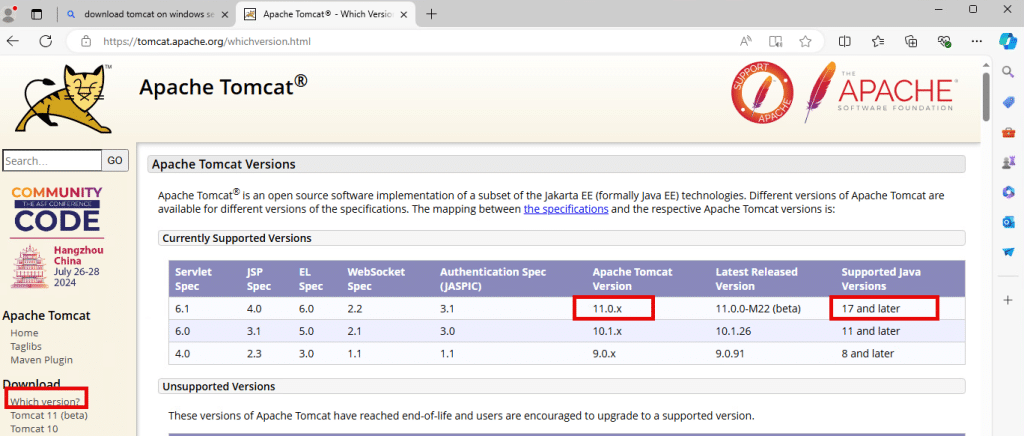
2. You can check the java version installed on your computer by running the below command in Windows PowerShell.
Command: java -version
If you get the message “Java is not recognized as an internal or external command, operable program or batch file,” then Java is not installed on your computer.
3. To install Java on your computer, go to https://www.oracle.com/in/java/technologies/downloads/#jdk22-windows
Under JDK22, select Windows and then click on x64 Installer.
Note: Select according to your Tomcat version requirements.
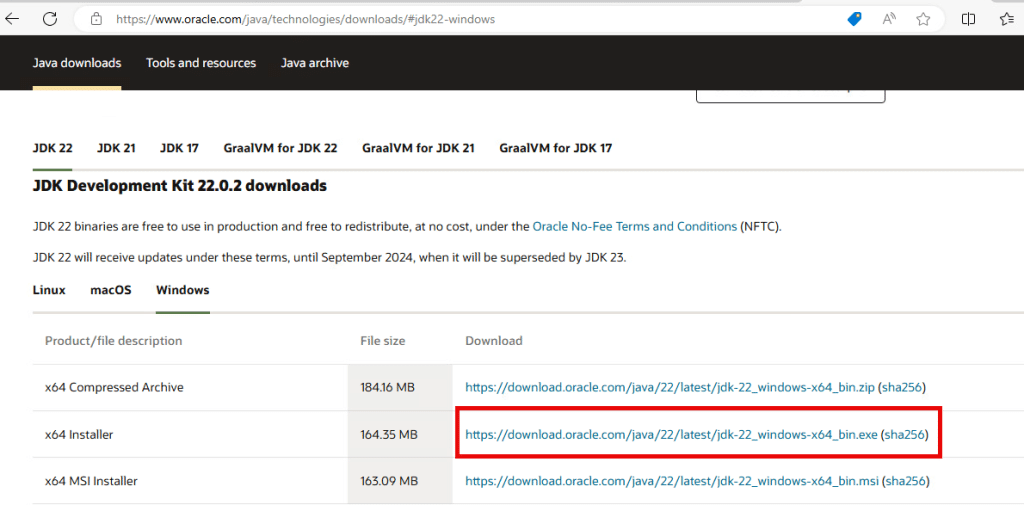
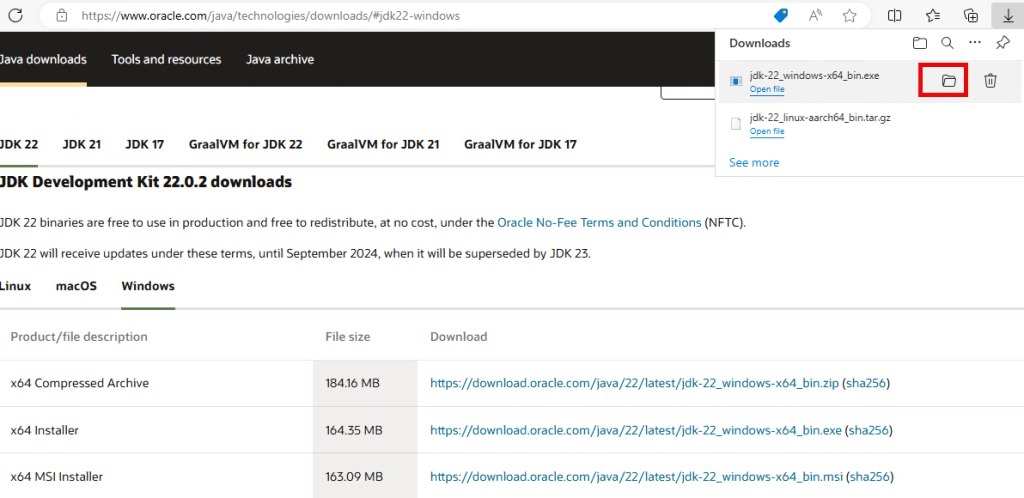
4. Click on the folder beside jdk-22_windows-x64_bin.exe.
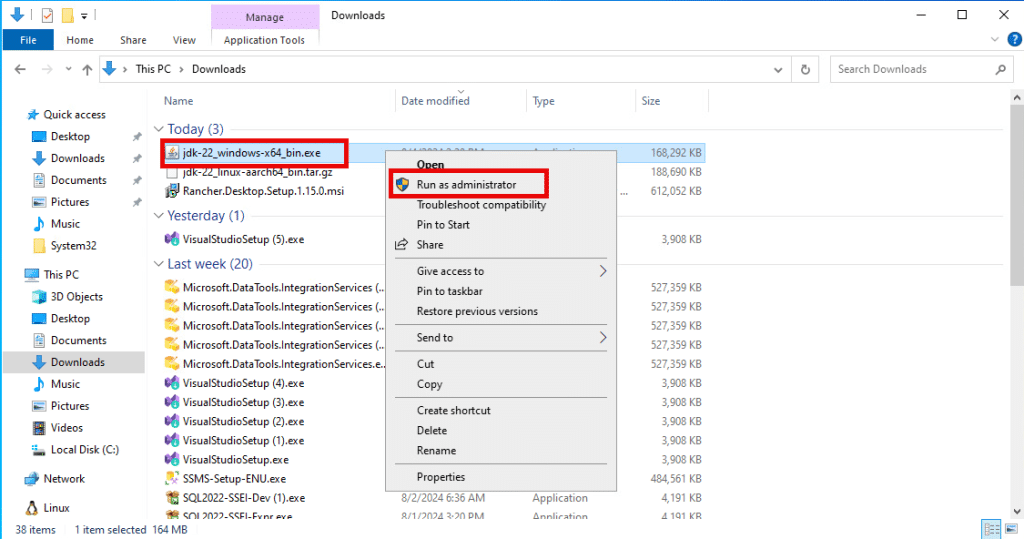
5. Now, right click on jdk-22_windows-x64_bin.exe and select Run as administrator.
6. Follow the instructions in Java setup wizard and cick Next.

7. You can change the path of the file where java must be installed by clicking on Change. Click Next.

8. Once the installation is complete, click on Close.

9. In the windows search bar, type and select Edit the system environment variables to add the new path.

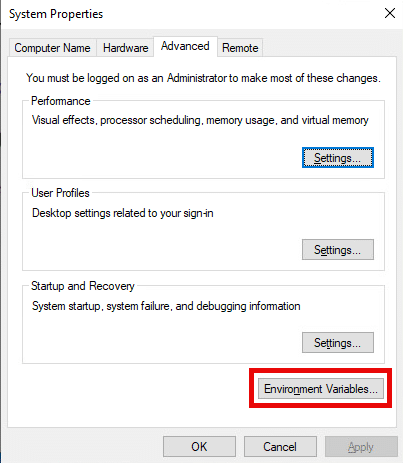
10. Under System Properties window, select Advanced, click on Environment Variables.
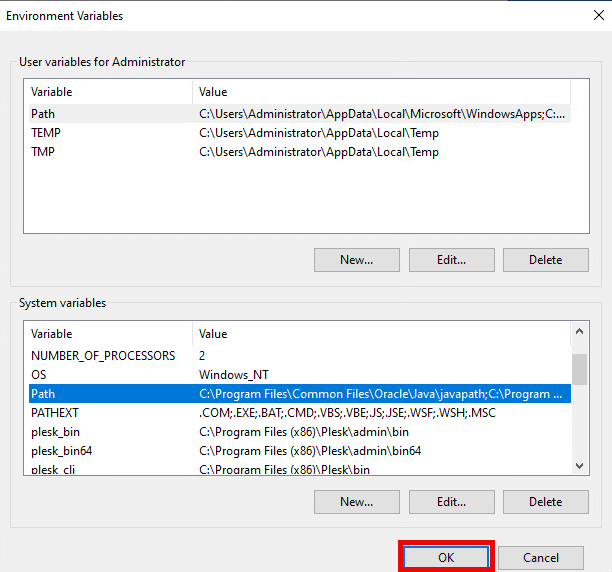
11. Under System Variables, select the path and click on Edit.

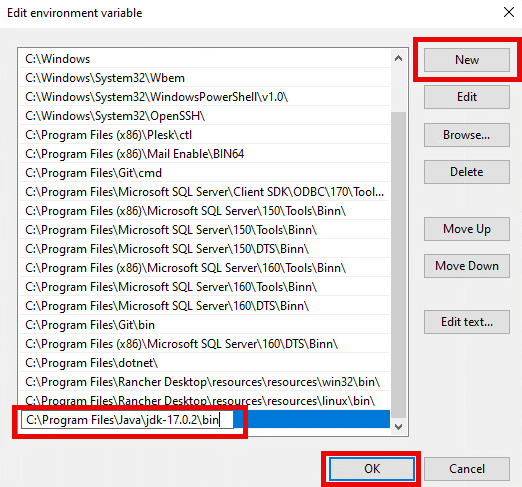
12. You can add the path of the new java file by clicking on New or you can click on Browse and select the path.
Click on Ok.
13. Click on OK.
14. Now, enter the
Variable name: JAVA_HOME
Variable value: your file path
Note: the file path is C:\Program Files\java\jdk-17.0.2
Click on OK.

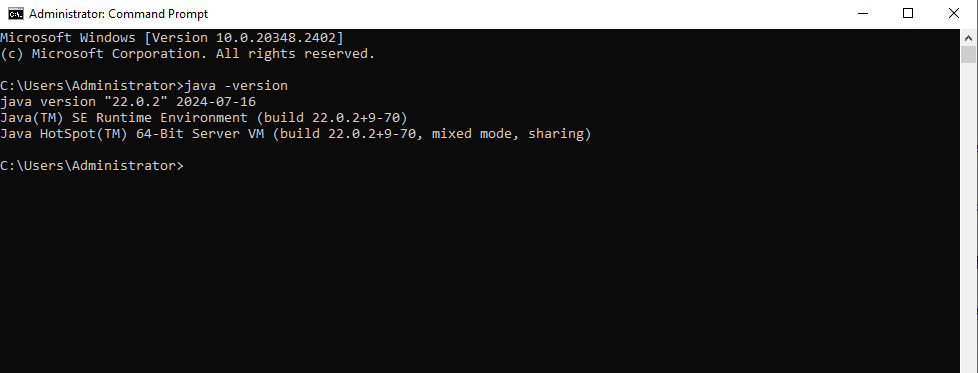
15. Now check whether Java is installed on your computer by running the below command in Windows PowerShell.
Command: java -version
If the installation is successful, it shows the version of the java installed.
Note: Here, java version “22.0.2” is installed.
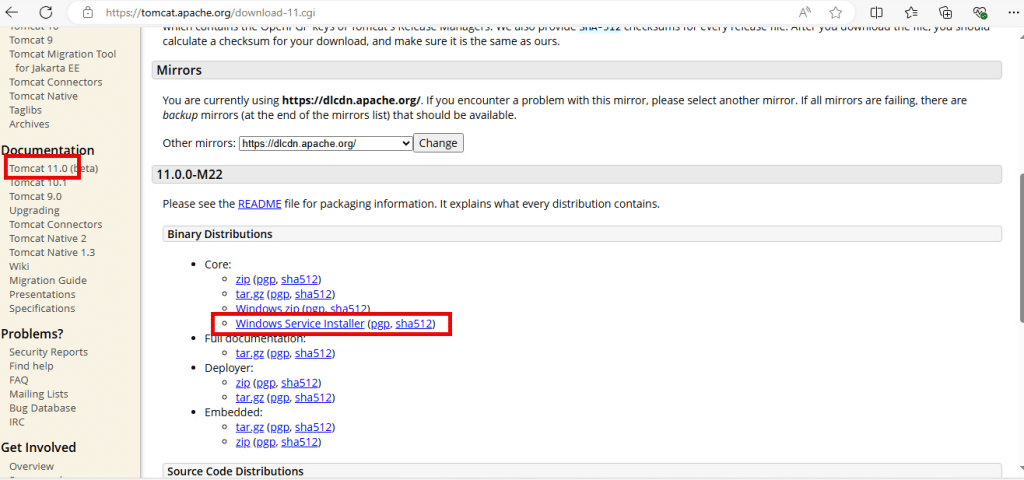
16. Now, on the left pane, under Documentation click on Tomcat 11.0 (beta), for which Java is installed. Then click on Windows service Installer (pgp, sha512).
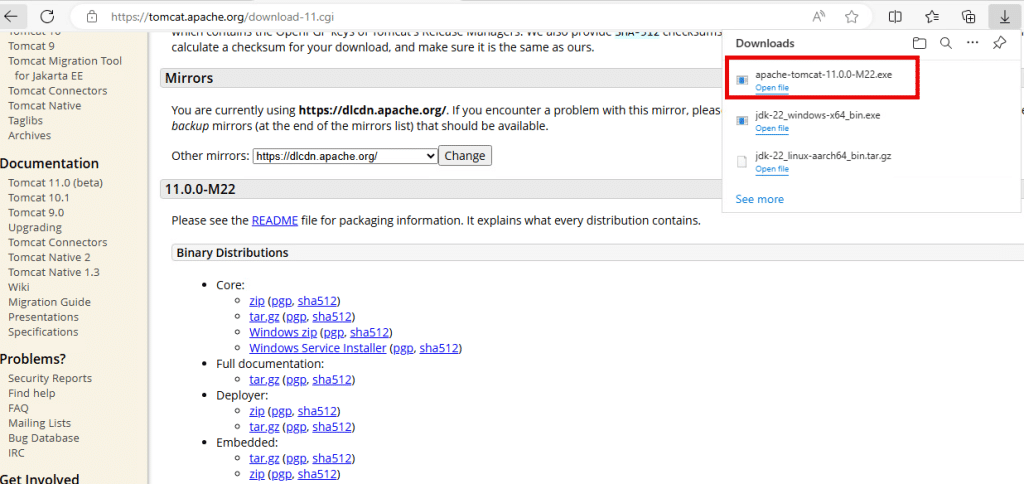
17. Now, click on Open file in Downloads.
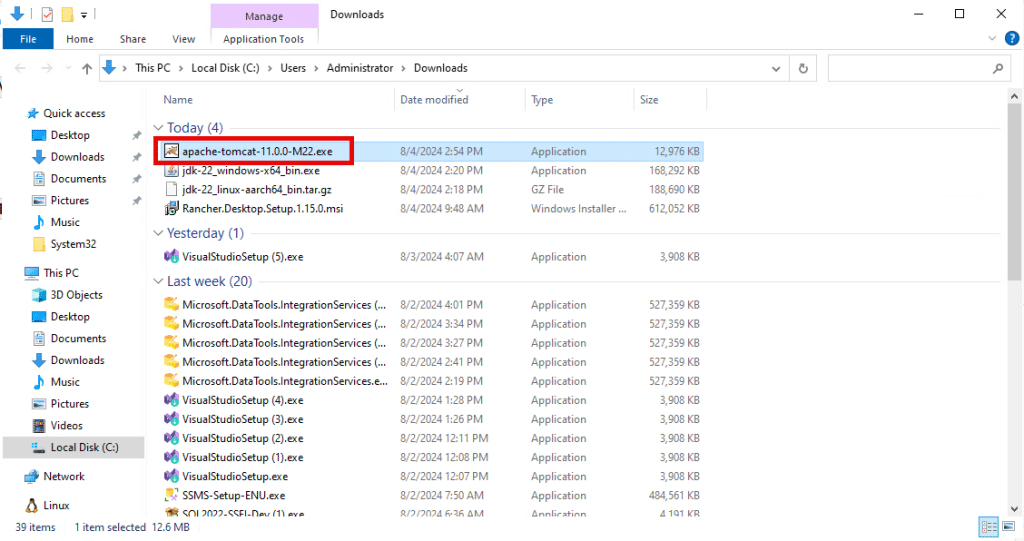
18. Double click on the Apache Tomcat executable file.
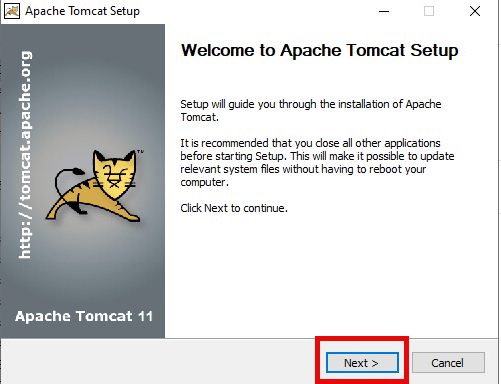
19. The Apache Tomcat setup wizard will open. Click on Next.
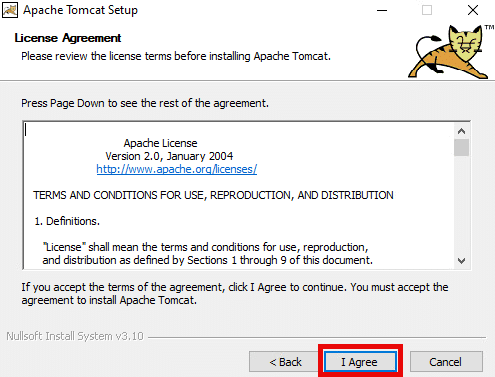
20. Read the License Agreement and click on I Agree.
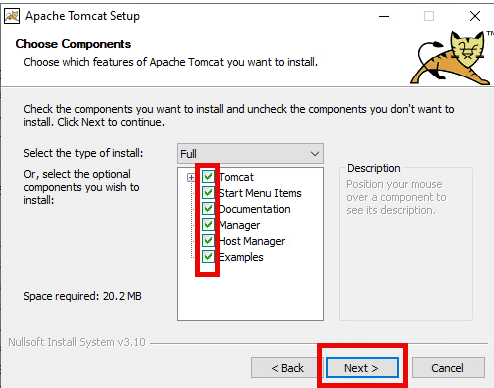
21. In Choose Components, click on Select the type of install drop down menu and select Full and check all the boxes for Tomcat, Start Menu Items, Documentation, Manager, Host Manager, Examples.
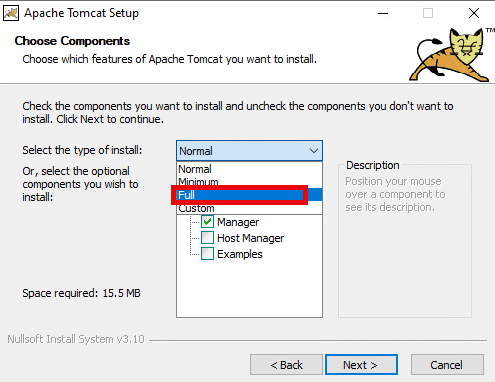
Click on Next.
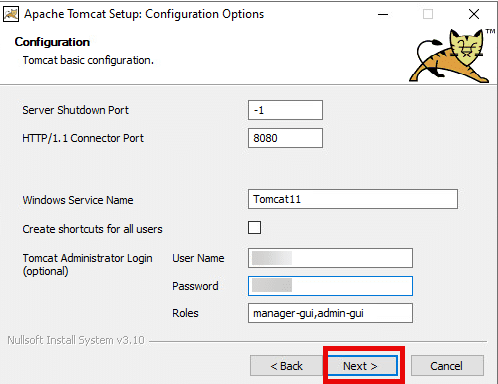
22. In Configuration, Enter the User Name and Password and click on Next. These credentials are useful when you try to login to Tomcat server.
Port 8080 is where Tomcat is accessible.
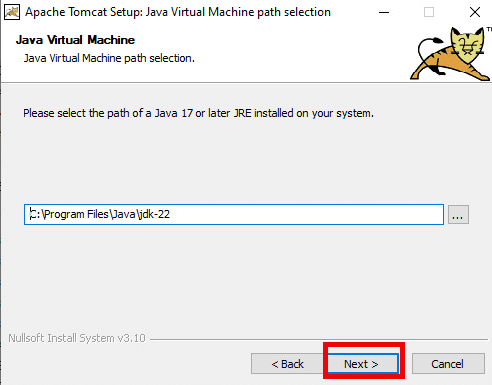
23. Select the path of the Java by clicking on 3 dots. Click on Next.
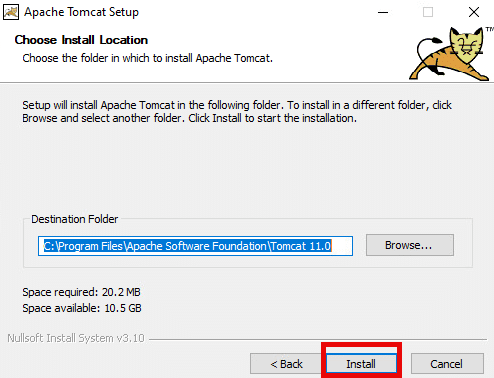
24. See the install location or you can change it by clicking on Browse. After the path is selected, click on Install.
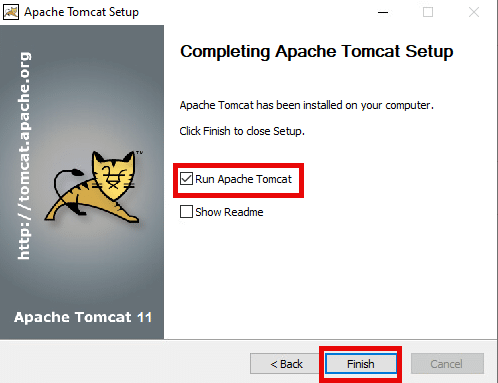
25. Now, you can check Run Apache Tomcat if you want to start it automatically otherwise uncheck it. Check Show Readme file to see the file otherwise uncheck it. Then, click on Finish.
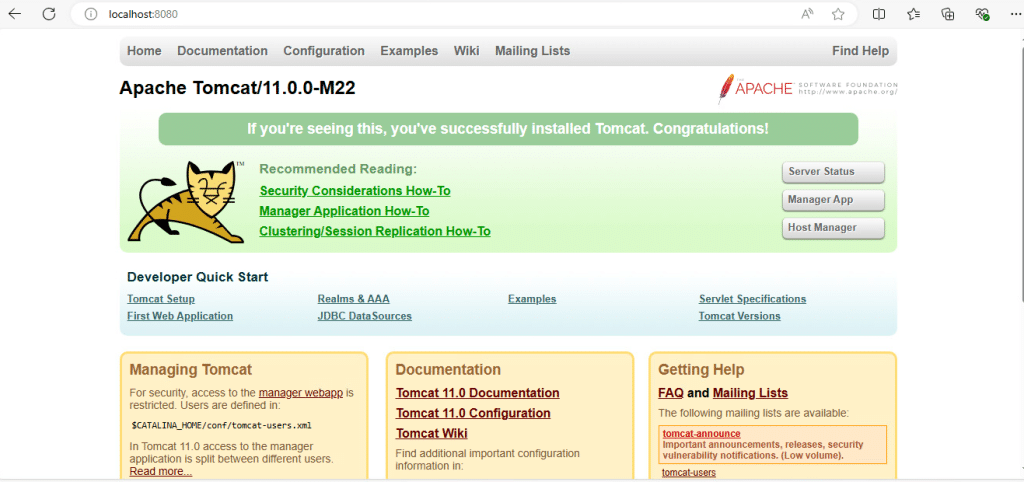
26. Go to the browser and type localhost:8080. You will see the Tomcat web UI.
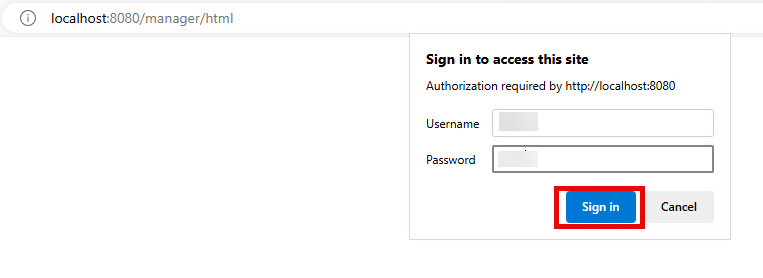
27. In the browser, type localhost:8080/manager/html, click on Sign in to access this site.
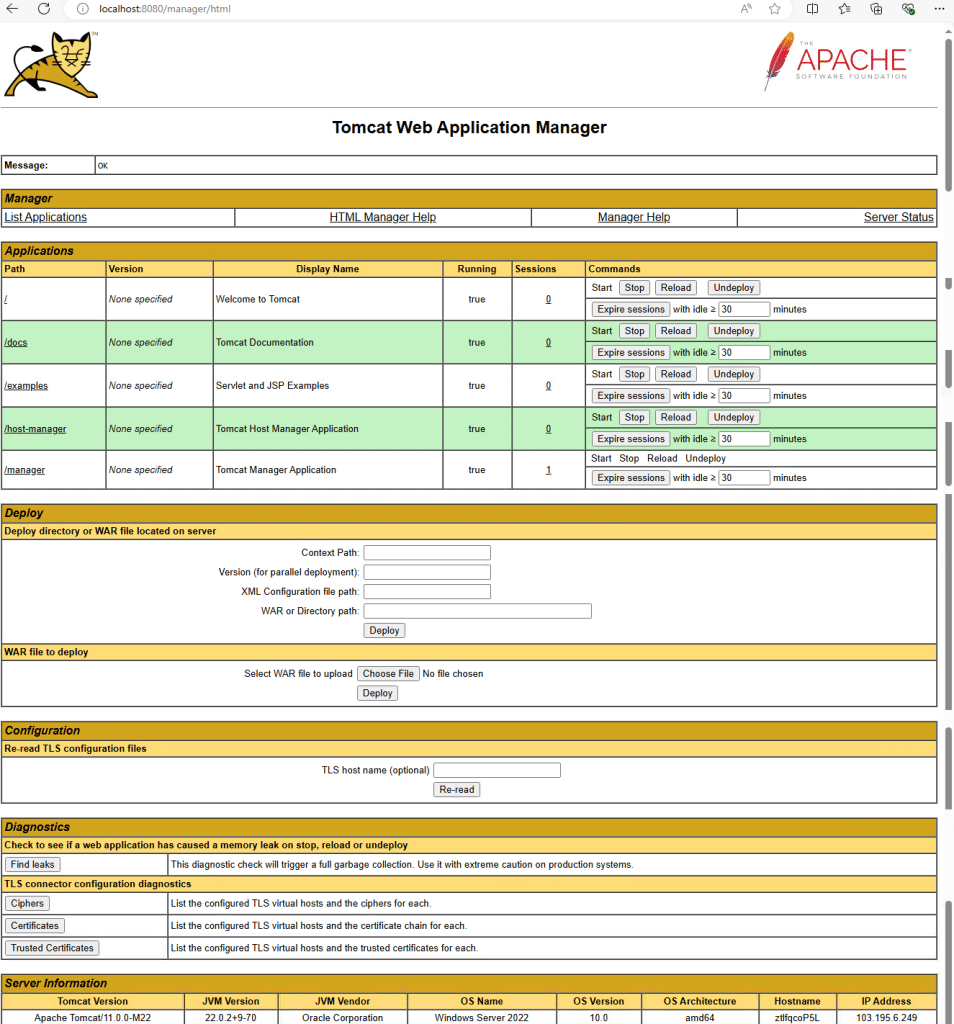
28. Now, you can see the Tomcat Web Application Manager.
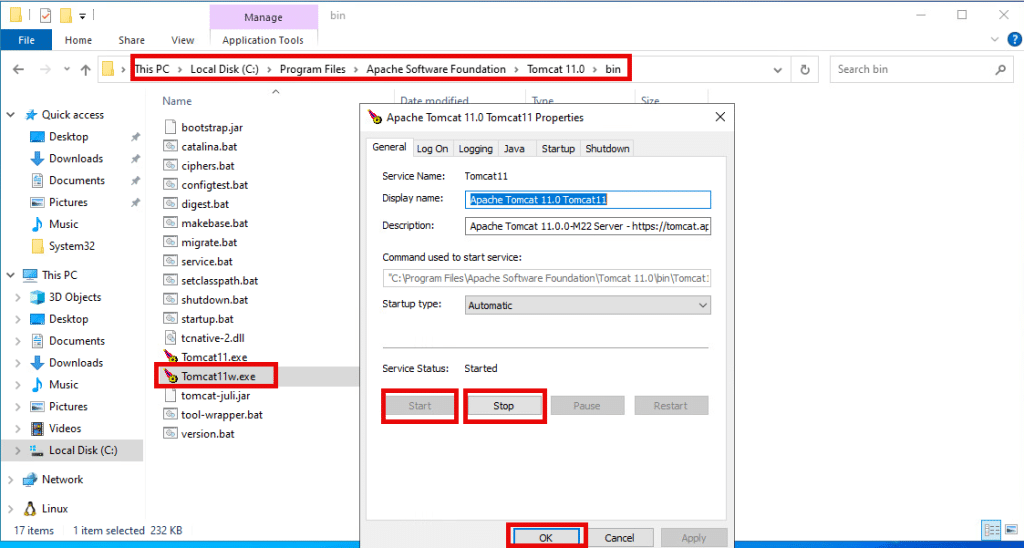
29. You can start and stop the Tomcat Server.
Note: Here the path is
This PC -> Local Disc (C) -> Program Files -> Apache software Foundation -> Tomcat 11.0 -> bin
Double click on Tomcat11w.exe
Now, In Apache Tomcat 11.0 Tomcat11 properties window, you can start or stop the server by clicking on Start and Stop.
If you want to configure, stop the server, save changes and start the server.
Go to the path where Tomcat is located.
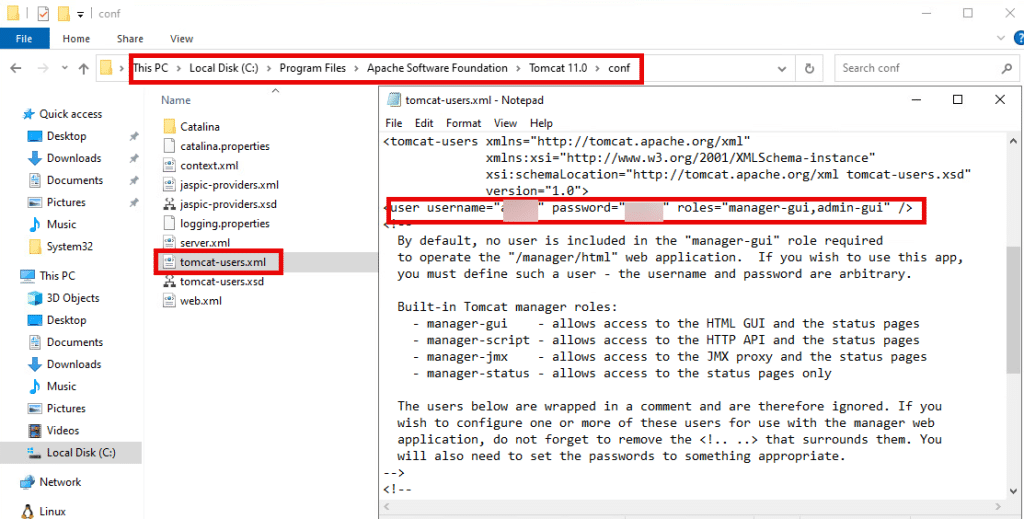
30. If you want to change the user name and password then go to the location where Tomcat is saved.
Note: Here the path is
This PC -> Local Disc (C) -> Program Files -> Apache software Foundation -> Tomcat 11.0 -> conf
Right click on tomcat-users.xml, select Notepad.
Now, you can change the username and password as shown below. Save the file and close the window.
Now, go to the browser localhost:8080/manager/html and try login with new credentials.
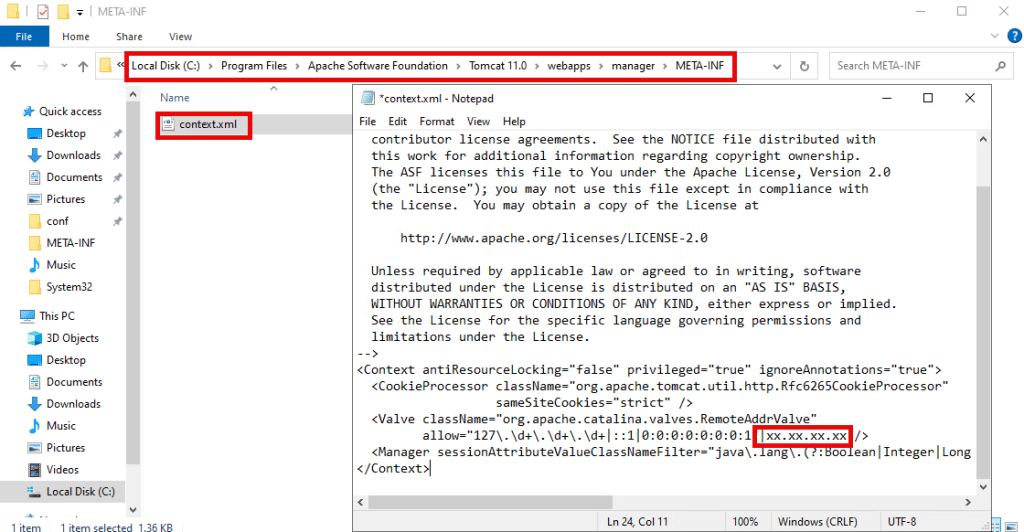
31. If you want to add your local machine IP address to the Tomcat server, go to the location where Tomcat is saved.
Note: Here the file path is
This PC -> Local Disc (C) -> Program Files -> Apache software Foundation -> Tomcat 11.0 -> webapps->manager-> META-NF
Right click on context.xml and open with Notepad.
In Valve className, you can add the IP address as shown below.
Example: | xx.xx.xx.xx (you must type special character vertical line and then add IP address.
Congratulations! You have successfully installed Tomcat on your Kamatera server. You can now explore the features of Tomcat in Tomcat Web Application Manager (step 28).


