Two-factor authentication (2FA) adds an extra layer of security to your cloud infrastructure by requiring a one-time verification code in addition to your regular password. While Kamatera does not offer built-in 2FA for account-level access, you can still enable it on individual servers, particularly SSH logins, by using tools like Google Authenticator or VPN-based authentication. In this guide, you’ll learn how to set up and configure 2FA on your Kamatera virtual machine (VM) to enhance login security and protect against unauthorized access.
Step-by-step guide
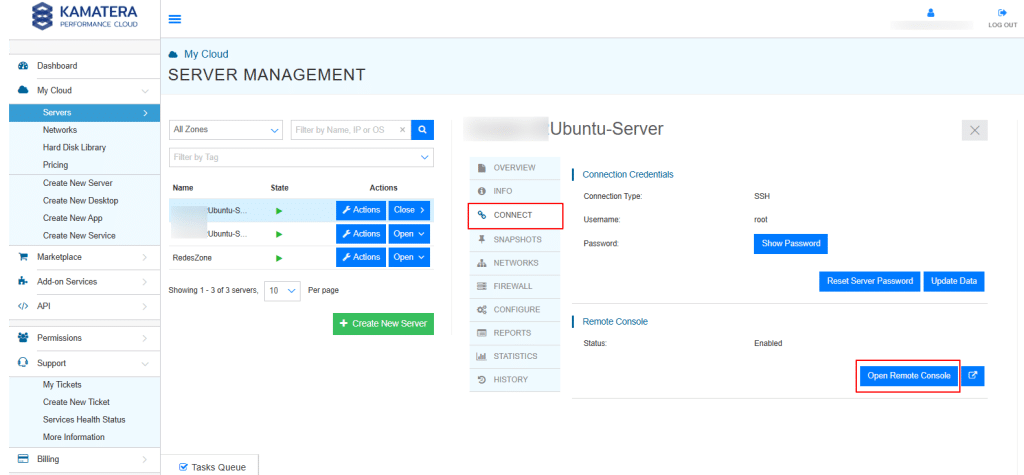
- First, create a Kamatera account and deploy an Ubuntu server. Your server will appear in the SERVER MANAGEMENT dashboard. Select the CONNECT tab, then click Open Remote Console.

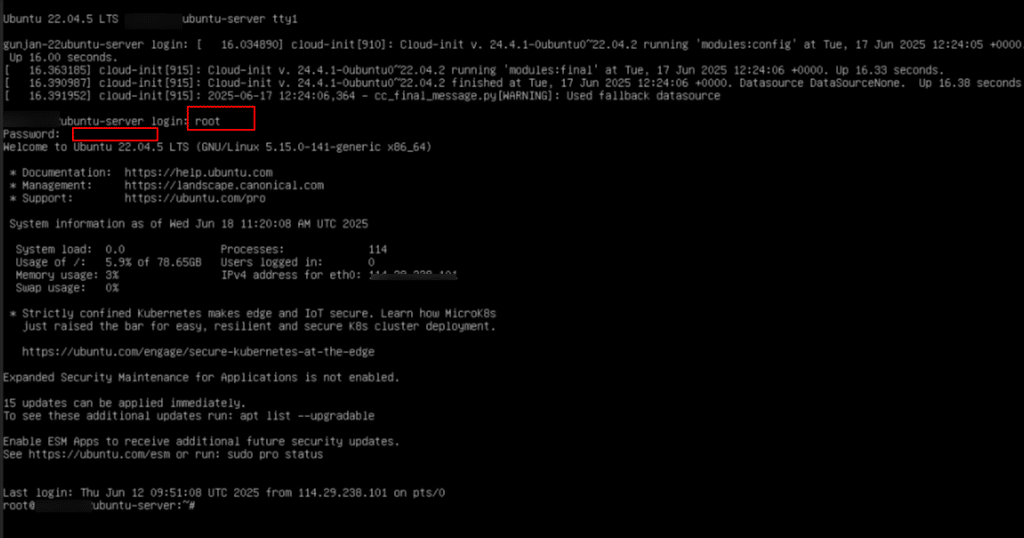
2. Enter your login credentials to access the Ubuntu terminal. Typically, you will use the username (such as root) and the password you specified while finalizing the server’s settings. Once authenticated, you will be logged into the server’s command-line interface.

3. Connect to it using SSH (Secure Shell) from your local machine. SSH allows you to securely access and manage your server’s terminal over the network.
Command:
ssh root@your-server-ip
Note: If this is your first time connecting to the server, you may receive a warning about authenticity. Type “Yes” to proceed. Then you will see a message “Permanently added IP address to the list of known hosts”. Enter the password when prompted. Now you will see root@ubuntu-server.

4. The below command is used to refresh the list of available software packages and their versions from the repositories configured on your Ubuntu system.
Command:
sudo apt update

5. The command below is used to install the Google Authenticator PAM module on Ubuntu or Debian-based systems.
Command:
sudo apt install libpam-google-authenticator
When prompted, type “y.”

6. The command below is used to install the OpenSSH server package on Ubuntu, if it is not installed.
Command:
sudo apt install openssh-server-y
Command:
ls /etc/ssh
Running this command will list the contents of the /etc/ssh directory, which contains SSH configuration files on a Linux system.

7. Configure SSH to require 2FA.
Open the config file in the nano editor by running the below command:
Command:
sudo nano /etc/ssh/sshd_config

8. In /etc/ssh/sshd_config, set:
UsePAM yes
ChallengeResponseAuthentication yes

Note: To exit the nano editor
- Press Ctrl+X: This begins the exit process.
- If you made changes, nano will prompt: Save modified buffer: Press Y to save the changes.
- Just press Enter to confirm and save the file with the same name.
9. Open the config file in the nano editor by running the below command:
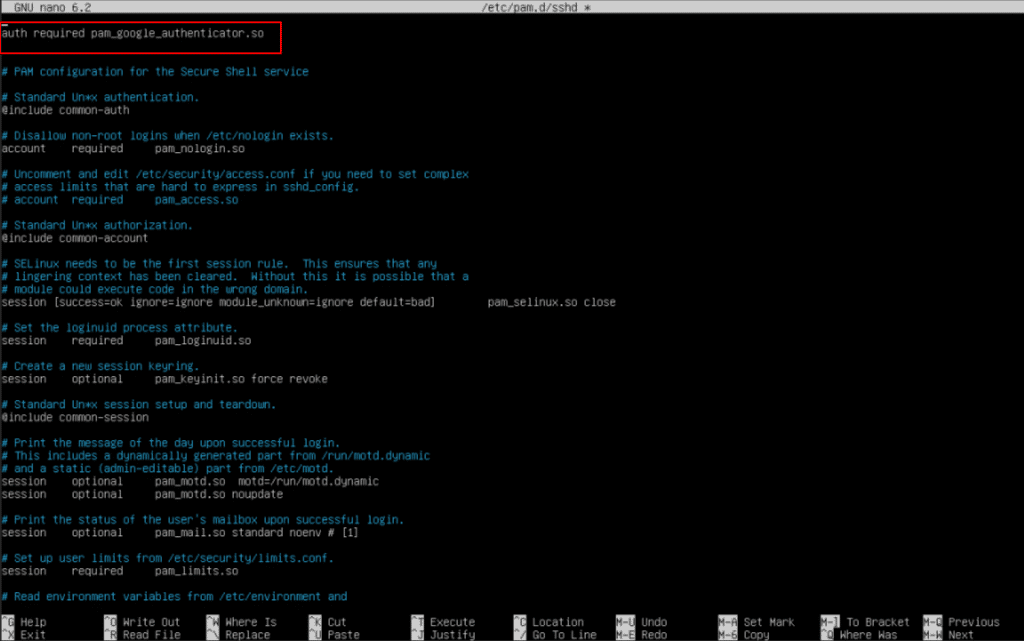
sudo nano /etc/pam.d/sshd

10. In /etc/pam.d/sshd, add at top:
auth required pam_google_authenticator.so
It tells the SSH service to enforce Time-based One-Time Password (TOTP) verification using the Google Authenticator module during user login.

Note: To exit the nano editor
- Press Ctrl+X: This begins the exit process.
- If you made changes, nano will prompt: Save modified buffer: Press Y to save the changes.
- Just press Enter to confirm and save the file with the same name.
11. This command restarts the SSH server (sshd) on your machine.
Command:
sudo systemctl restart ssh
Note: It’s commonly used after making changes to the SSH configuration file (/etc/ssh/sshd_config). Restarting applies the new settings without rebooting the server.
Command:
sudo systemctl status ssh
This command displays the current status of the SSH service. Whether sshd is active (running) or inactive/stopped.
From the screen below, you can see that the SSH service is active.

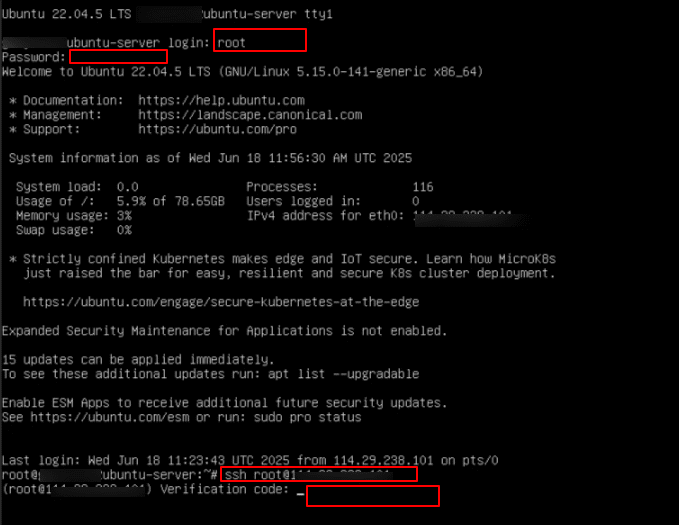
12. Now, try logging in again using your credentials. Connect to the server via SSH manually. After connecting, you will be prompted to enter the verification code from your authenticator app.

This confirms that Two-Factor Authentication has been successfully enabled on your server. Congratulations! Your SSH access is now protected with an extra layer of security.


