


Creating a clone disk image on the Kamatera platform allows you to save the complete state of a server including its operating system, configurations, installed applications, and data as a reusable custom image. This is especially useful when you need to deploy multiple servers with the same setup or back up a working environment for future restoration. In this guide, you’ll learn how to use Kamatera’s “Clone to Hard Disk Library” feature to create a clone image from an existing server and store it in your private image library for easy reuse.
Step-by-step guide
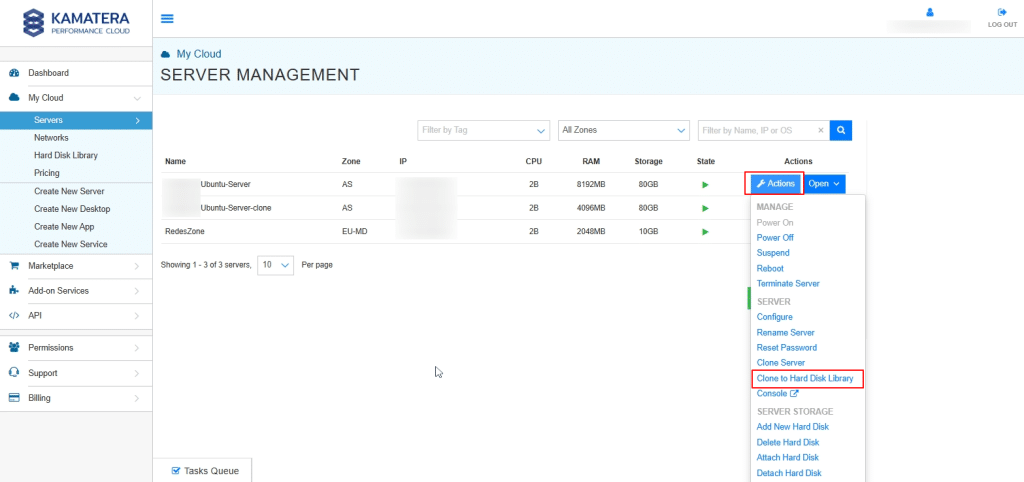
- First, create a Kamatera account and deploy an Ubuntu server. Your server will appear in the SERVER MANAGEMENT dashboard. Click Open next to the server to access its details and begin the cloning process.

2. Click on Actions, then select Clone to hard disk library from the dropdown menu.

3. If there are no active snapshots, you will see the screen below. Check the box next to Hard Disk 1, enter a name in the Disk Name field, and click Clone Selected Disks to proceed.

4. Under the Tasks Queue, you will see a Success message next to the Clone to Hard Disk Library operation.

5. From the left-hand navigation menu, go to the Hard Disk Library. Then, select the appropriate Zone (data center location) where the clone was created. Click on the MY PRIVATE IMAGES tab to view your custom images. Your newly cloned disk image should now be listed there, ready to be used for creating new servers.

6. Click on the Actions button located next to your cloned disk image. A dropdown menu will appear with several options, including:
- Edit: Modify the name of the image.
- Clone Image: Use this option to create a new server using the selected image.
- Delete: Permanently remove the image from your Hard Disk Library.
- Permissions: Manage access rights.

7. When you click on Clone Image, as shown in the screen above, a new window will appear. In this window, select the Destination Zones and enter a Disk Name. Once completed, click Clone Image to initiate the cloning process. The system will then create a copy of the original image in the specified zone, and you can monitor the progress in the Tasks Queue section.

And that’s it! By following these steps, you can easily create and manage clone disk images in Kamatera.