In this article, we will give you a step-by-step guide to connecting to your server. Whether you’re using a Windows, Linux, or macOS server, getting started requires going through the right sequence of steps. This guide will walk you through the process, ensuring a smooth setup for your server connections. Below are detailed instructions tailored to each operating system, providing you with a clear path to successful server management.
How to Connect to a Windows Server
Step 1: Locate Server IP
Find the IP address in your web console after creating the server/desktop.
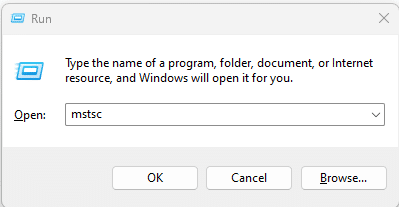
Step 2: Open Run Window
Press “Win key + R” and type “mstsc” in the search bar.
Step 3: Enter Server IP
In the “Computer Name,” insert your server’s IP.
Step 4: Enter Login Details
When prompted, select additional choices and input:
User name: administrator
Password: [Your chosen password]
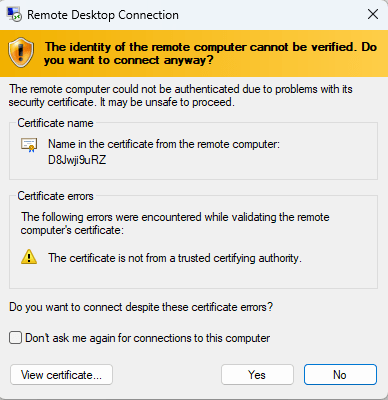
Step 5: Handle Security Warnings
Step 6: Verify Connection
You should now be connected to your server.
Note: For Windows Home Edition, a third-party RDP application is required. Check your OS version using the “winver” command in the Run window.
How to Connect to a Linux Server
Note: To connect to the server based on one of the Linux distributions, you will need to use SSH, not RDP.
Step 1: Initiate SSH Client
Open PuTTY for SSH connections.
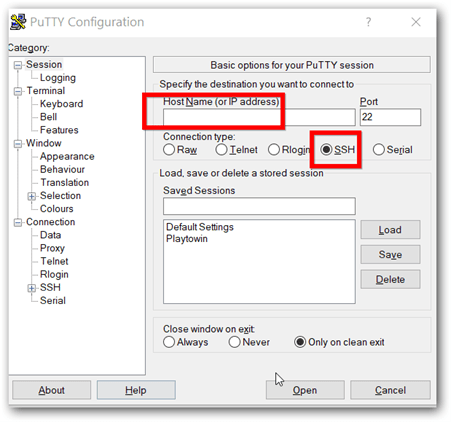
Step 2: Enter SSH Details
Input your server’s SSH IP and port, then click Open.
The default SSH port is 22 (root@**.**.**.**)
Step 3: Login
Enter the default username (root) and your SSH password.
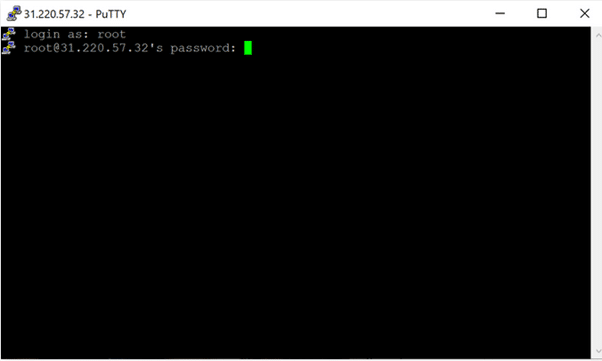
Step 4: Confirm Connection
You should now be connected to your server via PuTTY.
How to Connect to a MacOS Server
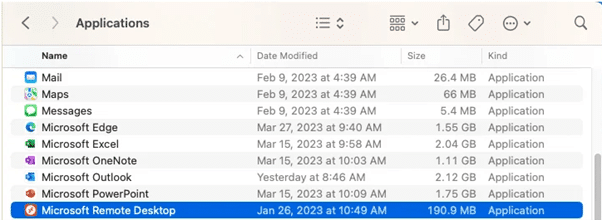
Step 1: Install Microsoft Remote Desktop
You download this from the Mac App store.
Step 2: Set Up Connection
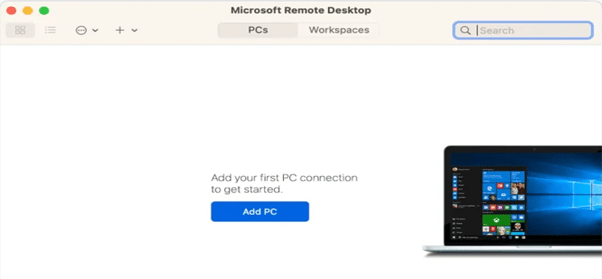
Open Microsoft Remote Desktop, click “Add PC,” and enter the server’s IP.
Step 3: Input Credentials
Provide the administrator username and your chosen password.
User name: administrator

Password: *the password you chose when creating the server*

Step 4: Establish Connection
Double-click the saved connection to start.
In Microsoft Remote Desktop, find the connection you just created and double-click it to initiate the connection.
Step 5: Use Your Remote Desktop
You can now operate the Windows server from your Mac.
And that is the end of our tutorial. With these steps, you can successfully set up and connect to a server on Windows, Linux, or MacOS systems.


