Network File System (NFS) is a protocol that allows the computer to access files over a network as if they were on its local hard drive. It’s commonly used in Unix and Linux environments, but implementations are available for other operating systems as well.
Here is a step-by-step guide on how to install and configure NFS (Network File System) on a Kamatera Windows server.
Installing and Configuring NFS on Windows Server
1. In the search bar, type Server Manager and select it.

2. In the Server Manager dashboard, click on Add roles and features.

3. In Before you Begin, Click on Next.

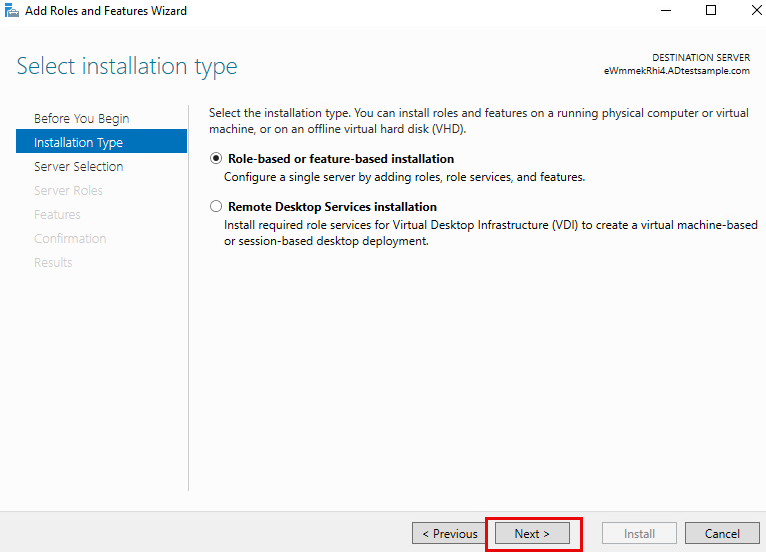
4. In Select installation type, select Role-based or feature-based installation and click Next.
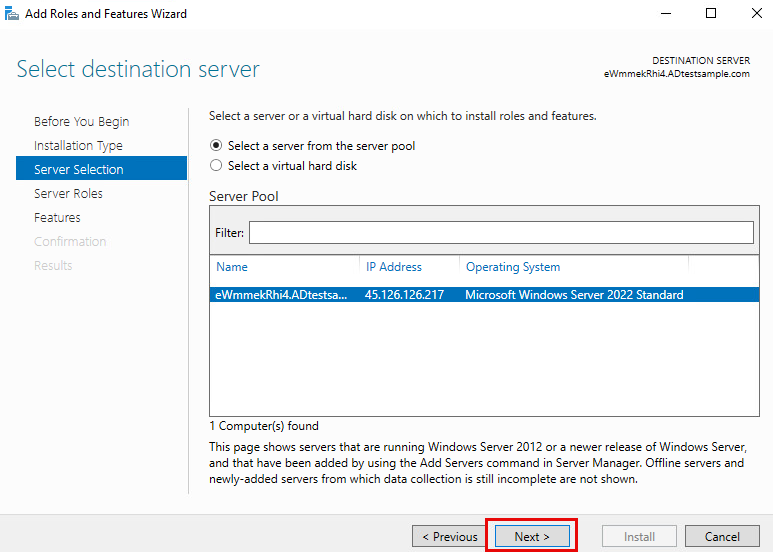
5. In Select destination server, select Select a server from the server pool and click Next.
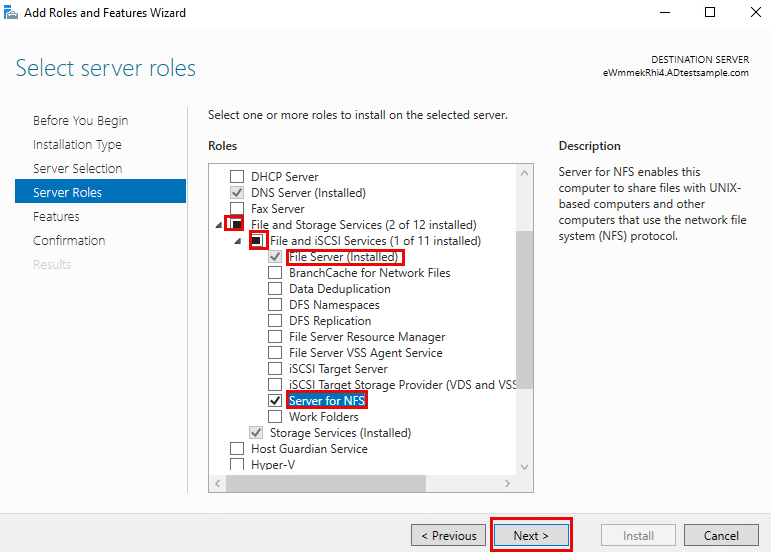
6. In Select server roles, check File and Storage services,
check File and iSCSI services, under this check File server and Server for NFS.
Click on Next.
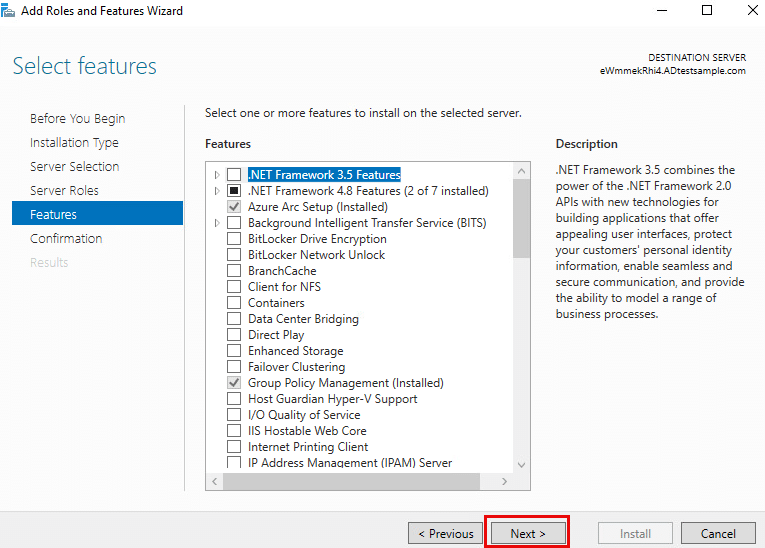
7. In Select features, select Next.
8. In Confirm installation selections, click on Install.
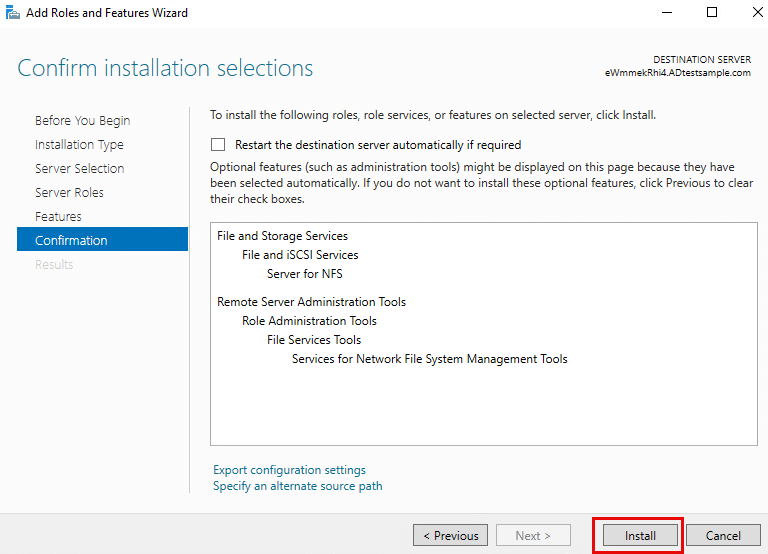
9. You can see the installation is in progress. Once it is finished, click on Close.
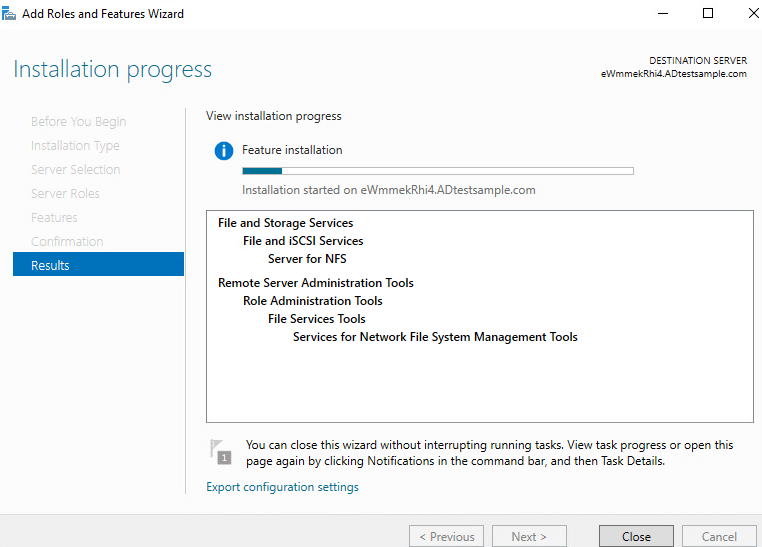
Create a new folder.
Note: TestNFSShare is the new folder that is created to share.

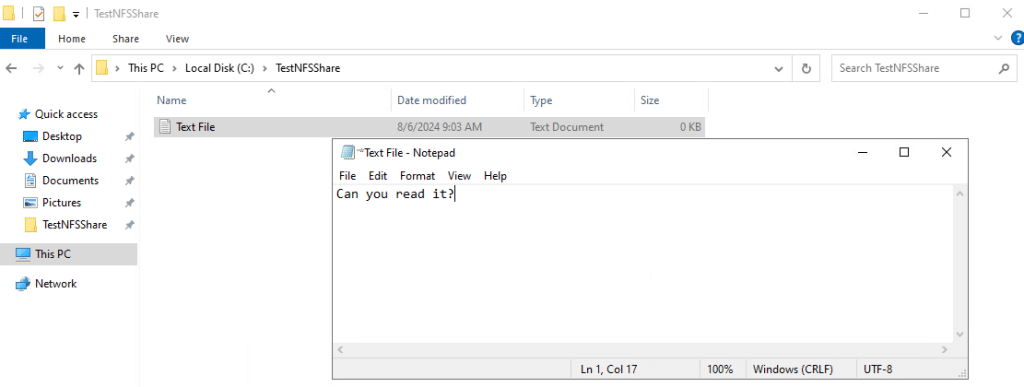
11. In the new folder, create a Text File.
Note: Right click on Text File and open it with Notepad. Enter text and save the file.
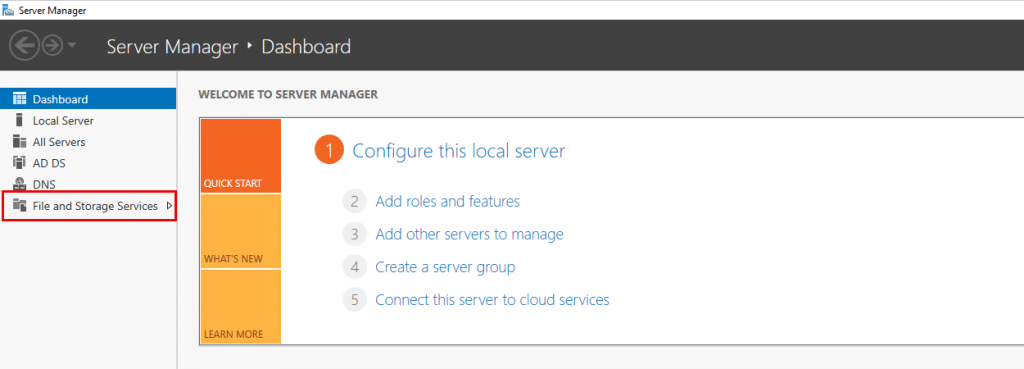
12. Now, go to Server manager Dashboard and click on File and Storage Services.
13. Click on Shares on the left pane.

14. You can see that your server is listed in the middle pane. Click on Tasks drop down menu and select New Share.

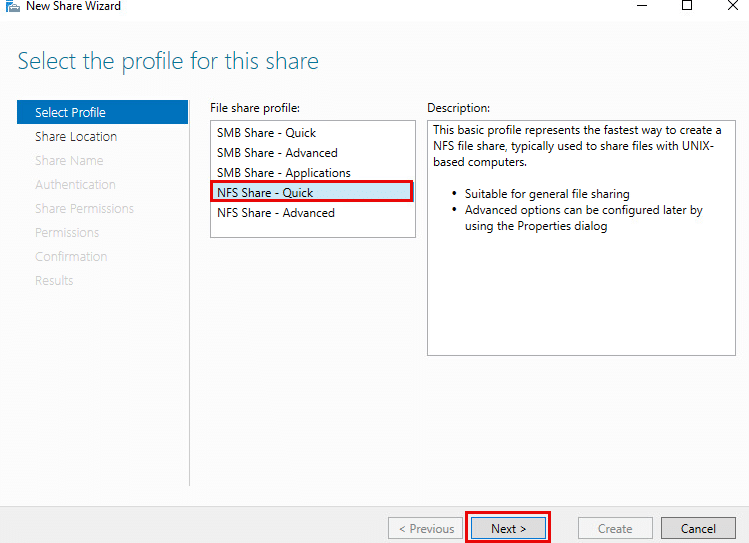
15. Under Select Profile tab, select NFS Share – Quick under File share profile.
Click Next.
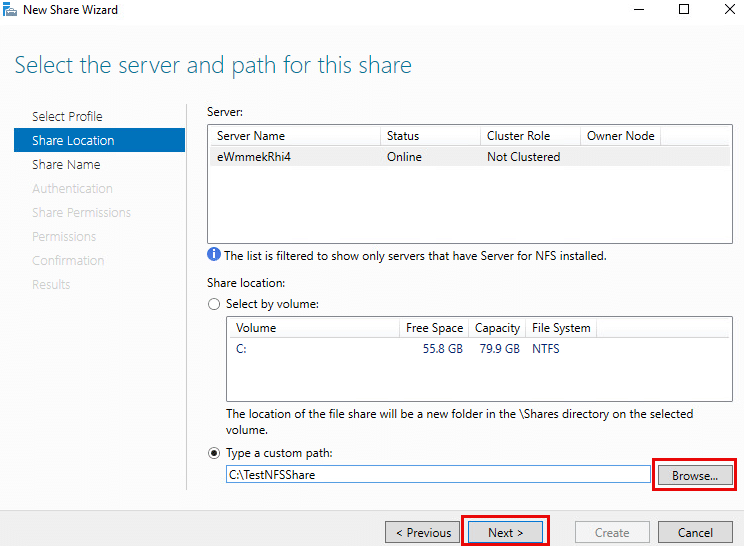
16. Under the Share Location tab, select Type a custom path and click on Browse the file you want to share.
Click Next.
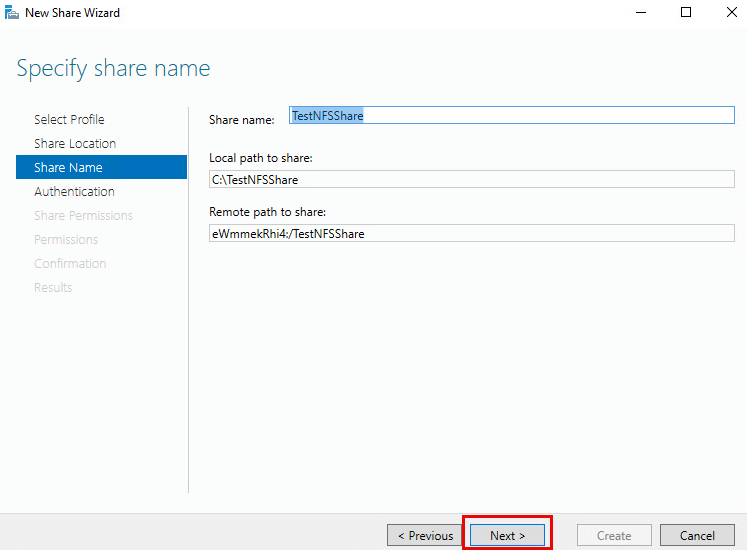
17. Under Share Name tab, go through the information and click on Next.
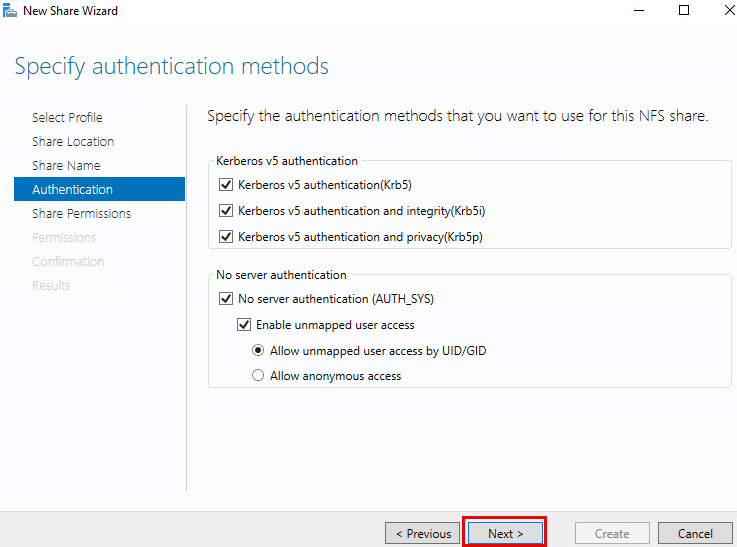
18. Under the Authentication tab, check the boxes as shown below and click on Next.
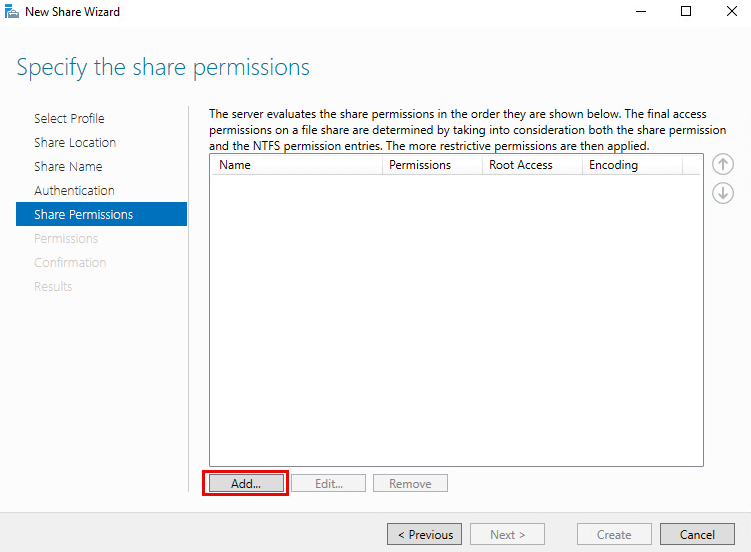
19. Under the Share Permissions tab, click on Add to hostname to share your file.
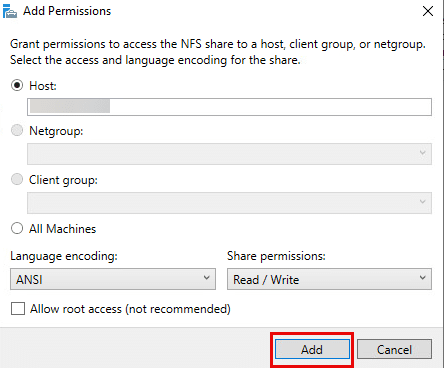
20. In the Add Permissions window, Enter Host (mentmention the IP address our computer, client, or NAT group) you want to share the file.
Under Share permissions drop down menu, Select Read/Write.
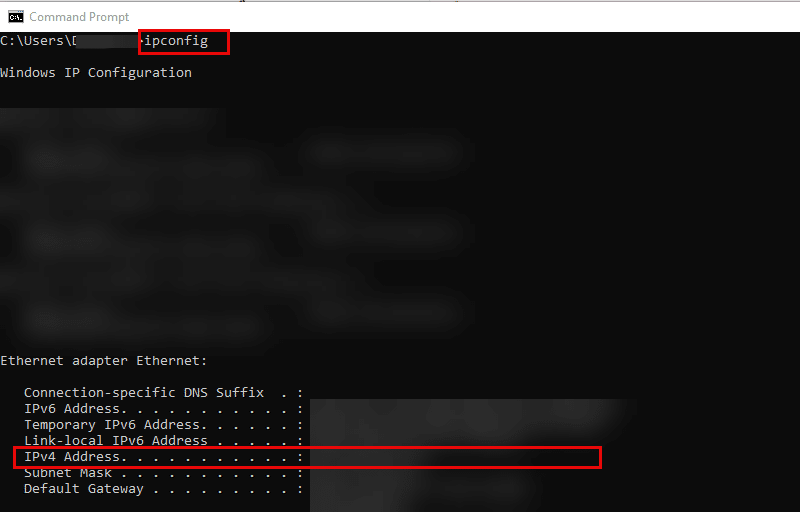
You can IP address of your computer by running the below command
Command: ipconfig
Enter the Host and click on Add.
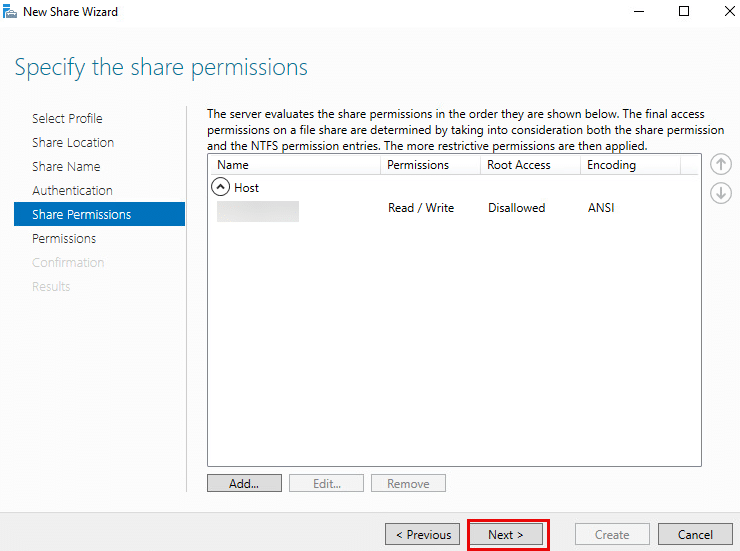
21. Under the Share Permissions tab, you can view the Host name added. You can add more hosts by clicking on Add.
Now, click on Next.
22. Under Permissions tab, click Next.
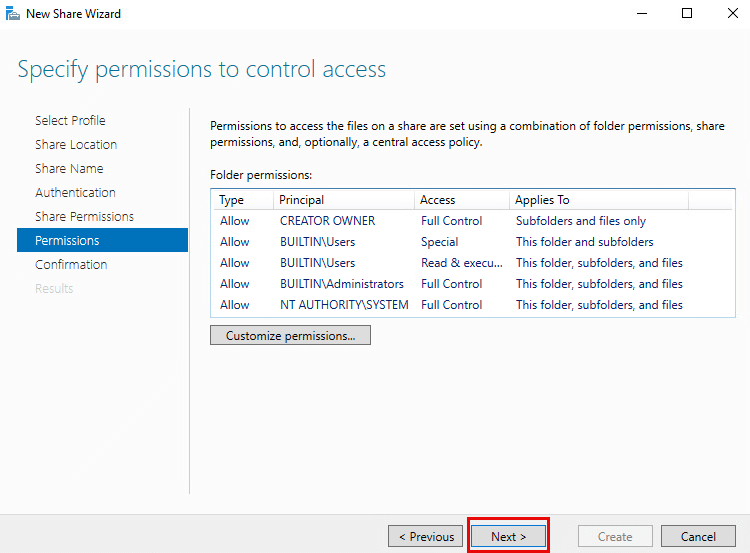
23. Under the Confirmation tab, click on Create to create a new share.

24. Under the Results Tab, once the share is successfully created, click on Close.
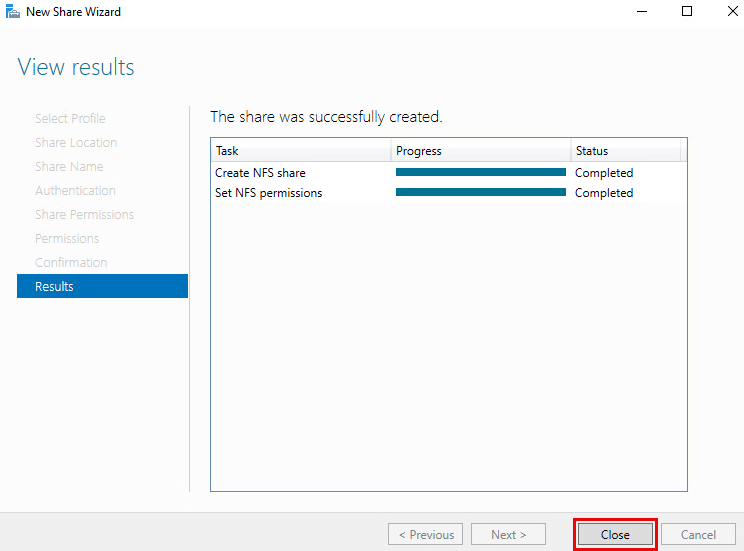
25. Now, you can see the new share that was created under the Shares tab.

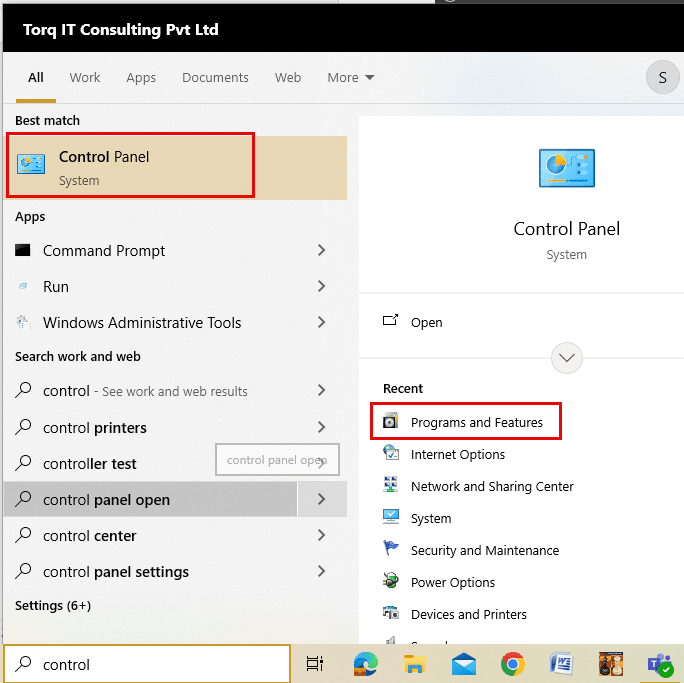
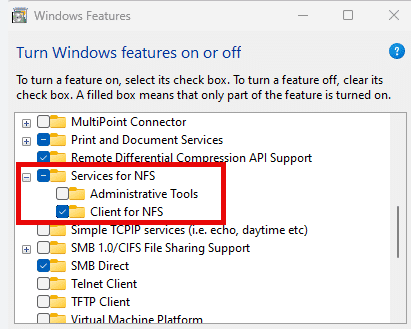
26. Now, in Windows 11, go to Control Panel->Programs and Features
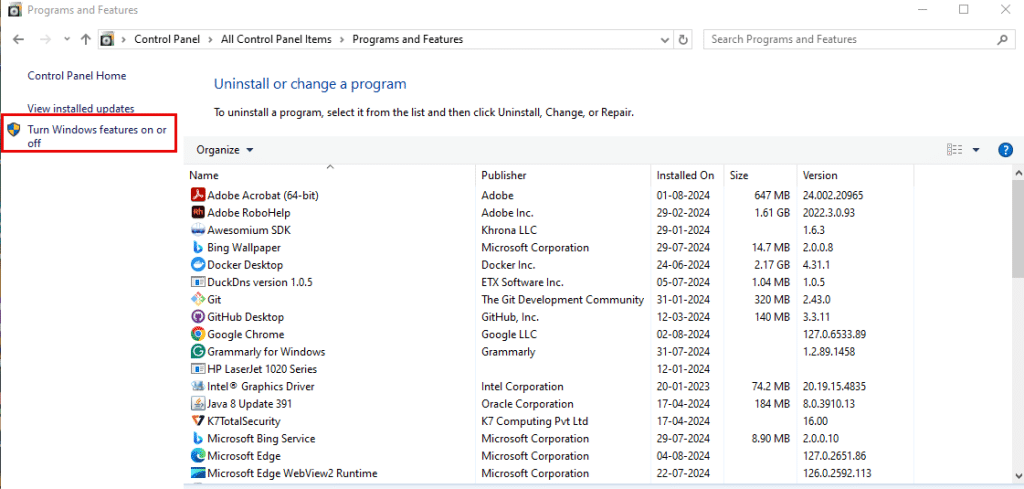
Select Windows features on or off.
A Windows features opens, check Services for NFS and Client for NFS.
Click on Ok.
Note: Services for NFS feature is not available in Windows 10 home.
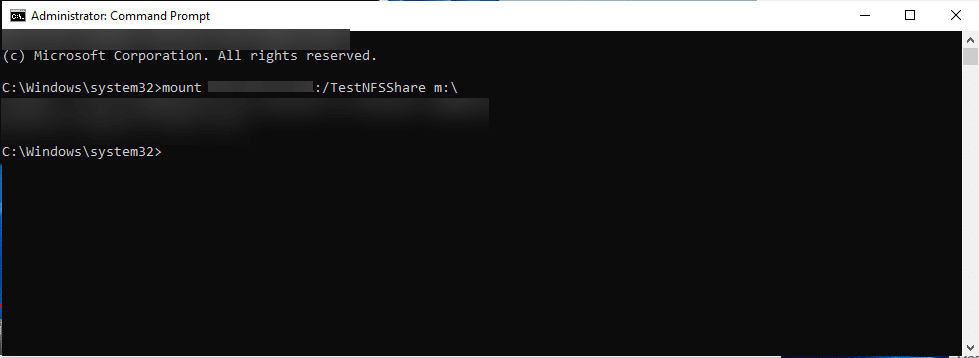
27. Go to Command prompt and select Run as administrator
Run the command below to mount the file from Windows Server to Windows 11.
Command:
mount <server_ip>:/name_of_the_shared_folder m:\
Note: server_ip: IP address of your Windows Server.
name_of_the_shared_folder: Name of the folder that you created in windows server.
After this command is run, you can see the message as: The command completed successfully.
28. Go to This PC -> C drive, you can see the new shared folder that we created on Windows Server and mapped as a network drive. When you double click on it, you can see the file and you can edit the file, too.
Sharing files between Windows and Ubuntu Systems
- Go to This PC-> C: drive
Create a new shared folder. Right click on the new folder and select Properties.
Note: sharedfolderw is created.

2. Under the General tab, click on OK.

3. Under the Sharing tab, click on Share.

Select the user to share with and give permissions to the user by right clicking on it.
Click on Share.
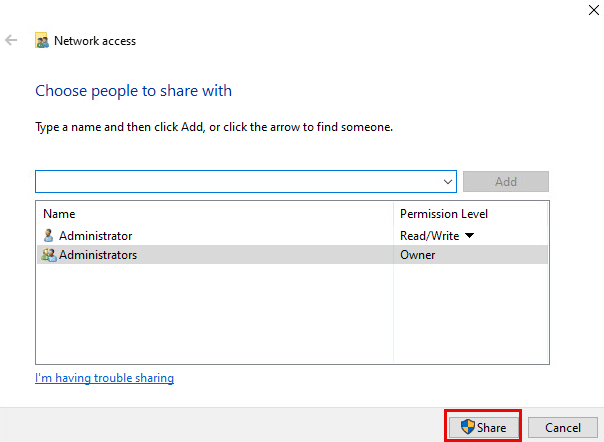
Click on Done.

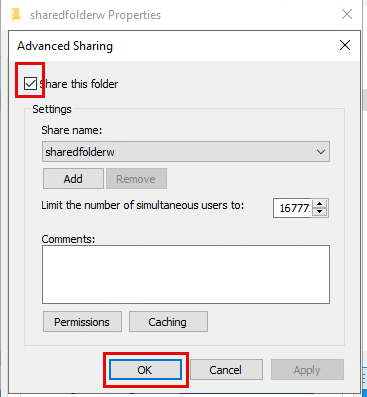
4. Now, click on Advanced Sharing
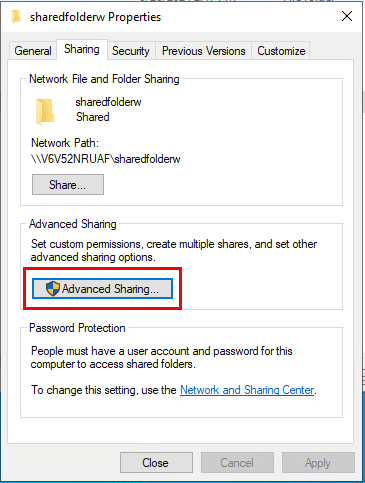
Check Share this folder and click OK.
5. Under the Security tab, select the user and allow permissions by clicking on Edit.
Click on OK.

6. Go to Networks, and type the IP address of the system. The shared folder will be visible.

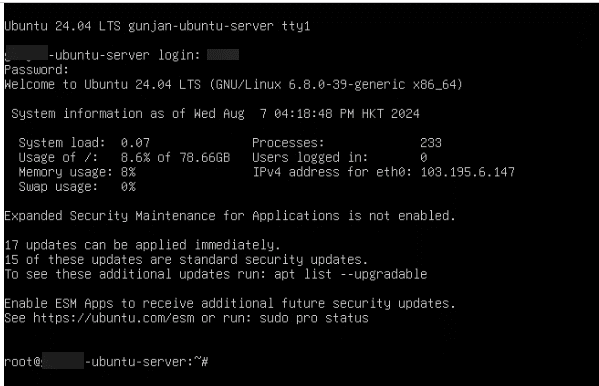
7. Go to Ubuntu Server and enter your login credentials.
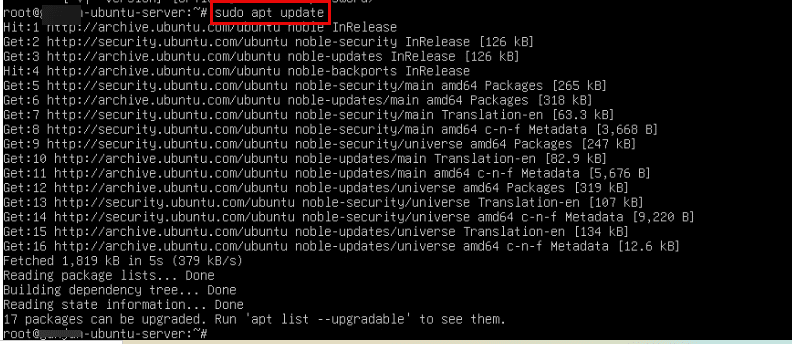
8. Run the command below to update any latest packages.
Command: sudo apt update
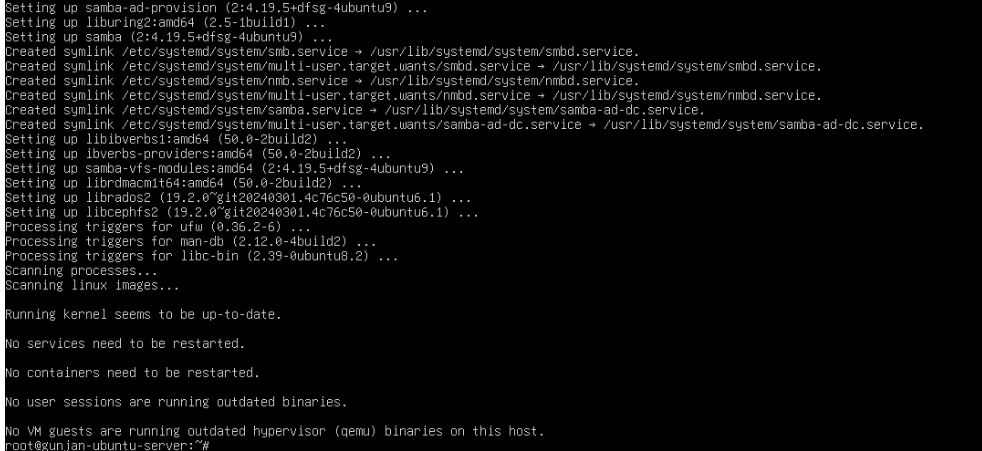
9. Install samba packages to share the files between windows and ubuntu servers.
Command:
sudo apt install samba -y

Installation is successful.
10. Create a new mountpoint called name_of_the_shared_folder in the mount directory.
Note: sharedfolderw is the folder that is created in windows.
Command:
sudo mkdir /mnt/shared_folder_name

11. Now, the below command will access the shared folder on windows from ubuntu.
Command:
sudo mount -t cifs //<server_ip>/shared_folder_name /mnt/shared_folder_name -o username=admin, password=1
//<server_ip>/ shared_folder_name: Path of the shared folder on Windows.
/mnt/shared_folder_name : Mount point on the Ubuntu system.
Username and Password: Username and password on Windows.
12. To access shared folder on Windows we use cd command in Ubuntu.
Command:
cd /mnt/shared_folder_name
13. To display all the files in the folder, run the below command.
Command:
ls -a
Note: This command displays all the files in the folder including hidden files.
14. By default, the mount point is available until the system is restarted, to maintain mount point, specify it in /etc/fstab file by running the below command.
Command:
sudo vim /etc/fstab
In this file, write the new content.
For ex:
//<server_ip>/shared_folder_name /mnt/shared_folder_name -o username=username_on_windows, password=password_on_windows
Press ctrl+X, y, enter- this will save the changes and exit the editor.
Note: To edit /etc/fstab file, you need sudo privileges. You can use a text editor such as nano, vim, or vi to edit the file.


