Cloning a server is the process of creating an exact replica of an existing server, including its operating system, applications, configurations, and data. This technique is widely used for tasks such as setting up test environments, scaling infrastructure, migrating systems, or creating reliable backups. Whether you’re working with cloud-based instances or physical machines, cloning helps save time and ensure consistency across environments.
We have already created an Ubuntu server using a server image provided by Kamatera. Now, in this guide, we will walk you through the steps to clone the server using Kamatera’s built-in functionality. We’ll also cover how to create and manage snapshots, which allow you to preserve the current state of your server for backup or rollback purposes. By the end of this guide, you’ll understand when to use cloning versus snapshots, and how to effectively apply both for better server management and operational continuity.
Cloning a Kamatera server
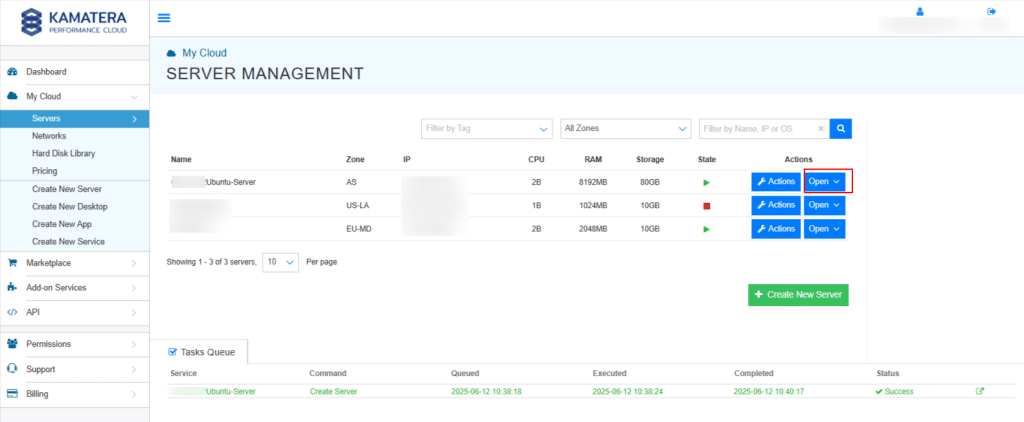
- First, create a Kamatera account and deploy an Ubuntu server. Your server will appear in the SERVER MANAGEMENT dashboard. Click Open next to the server to access its details and begin the cloning process.
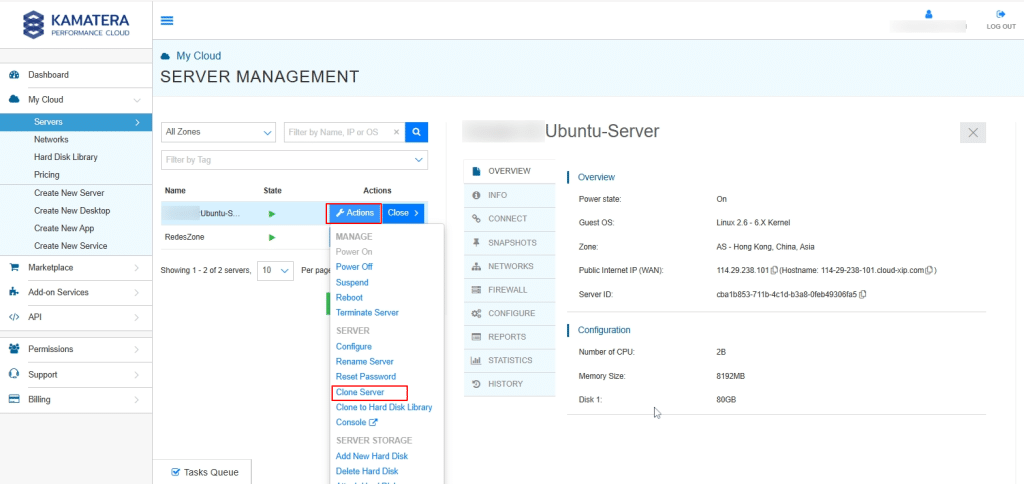
2. The next step is to clone the server using Kamatera’s built-in tools. Click on Actions, then select Clone Server from the dropdown menu.
3. If you try to clone server when an active snapshot has already been created, you will see the screen below.
Note: A snapshot is a point-in-time backup of your server’s disk state. It captures the operating system, files, and configurations, allowing you to revert the server back to that exact state if needed. Snapshots are especially useful before performing critical updates or system changes, as they provide a quick recovery option in case something goes wrong.

4. Before cloning the server, make sure to delete any existing snapshots, as Kamatera may restrict cloning when active snapshots are present. To do this, go to the Snapshots tab and remove any listed snapshots.
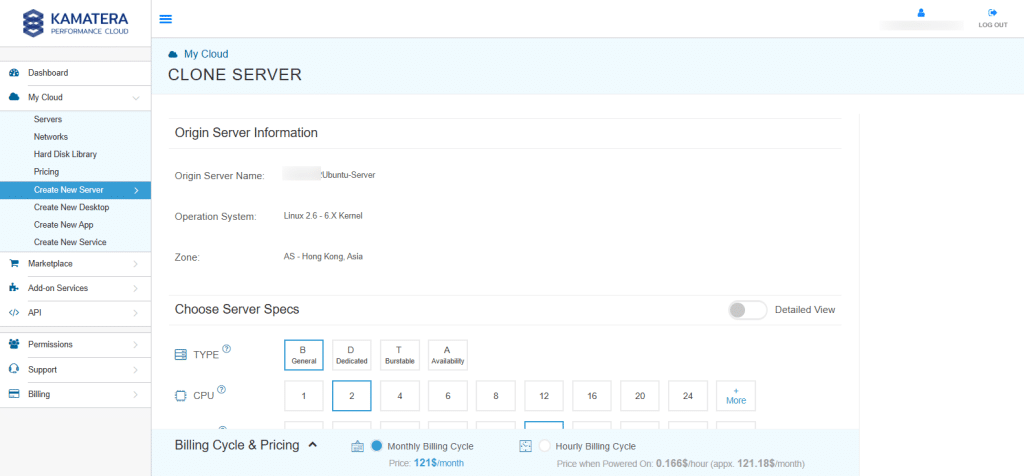
Once the snapshots are deleted, return to the SERVER MANAGEMENT dashboard. Click on Actions next to the server you want to clone and select Clone Server from the dropdown menu. This will open the configuration screen, where you can customize the settings for the cloned server.
Under the Origin Server Information section, you’ll see details such as the Origin Server Name, Operating System, and Zone.
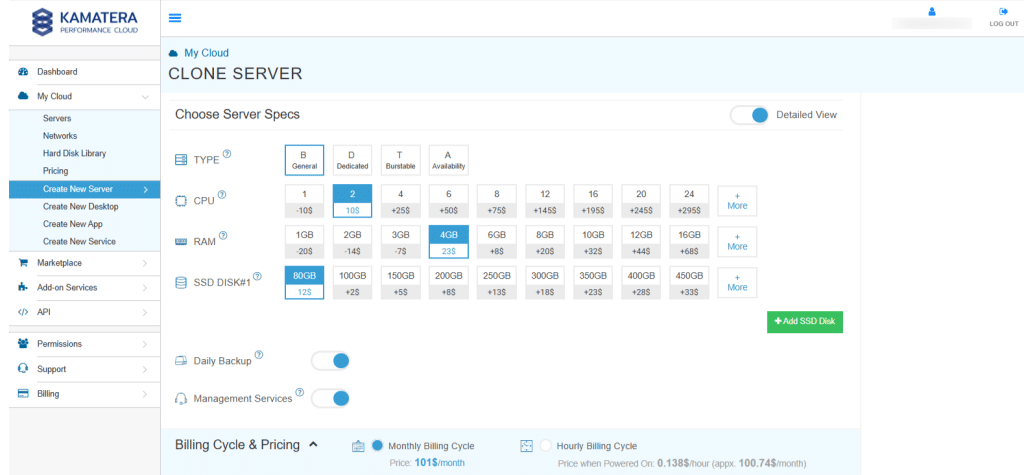
5. In the Choose Server Specs section, toggle the Detailed View switch to ON. This will allow you to select the desired Server Type, CPU, RAM, and SSD DISK before proceeding with the deployment.
Toggle the Daily Backup and Management Services switch to ON.
6. Select Simple Mode or Advanced Mode based on your specific requirements. 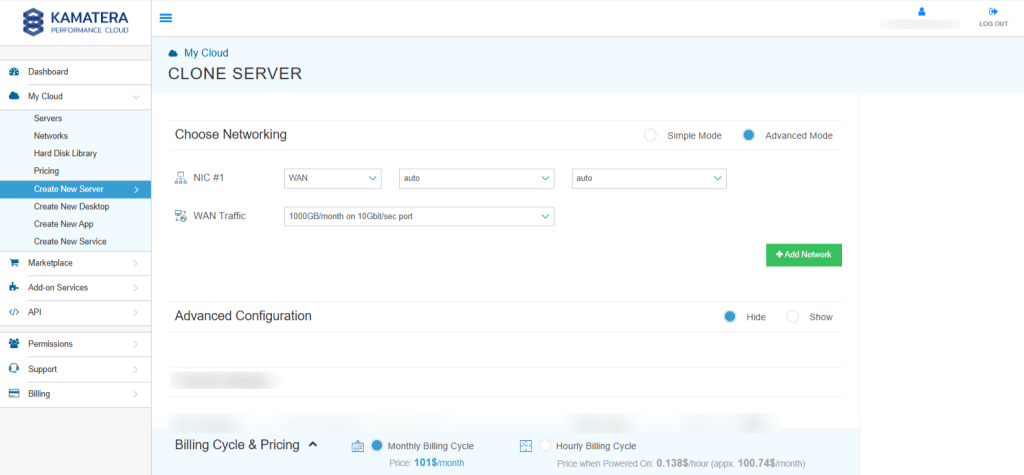
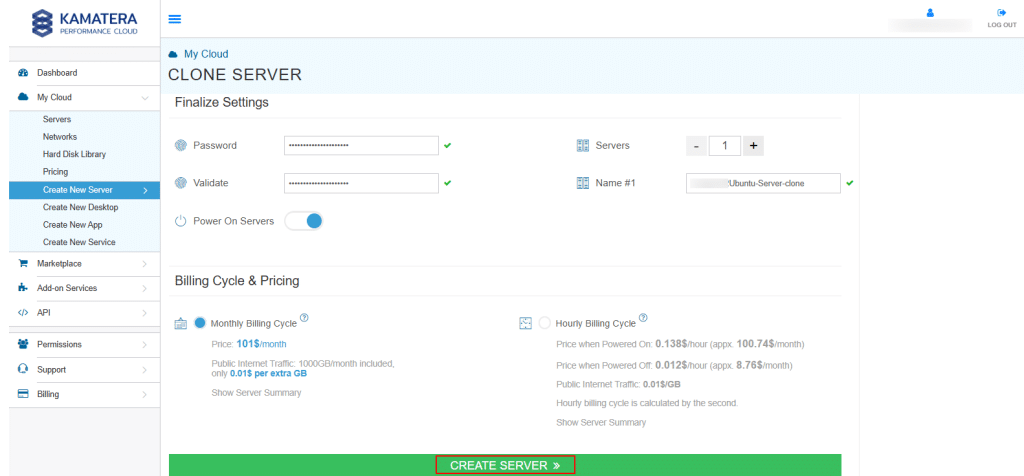
7. Under the Finalize Settings section, enter and confirm the password, then specify a name for the cloned server. Click CREATE SERVER.
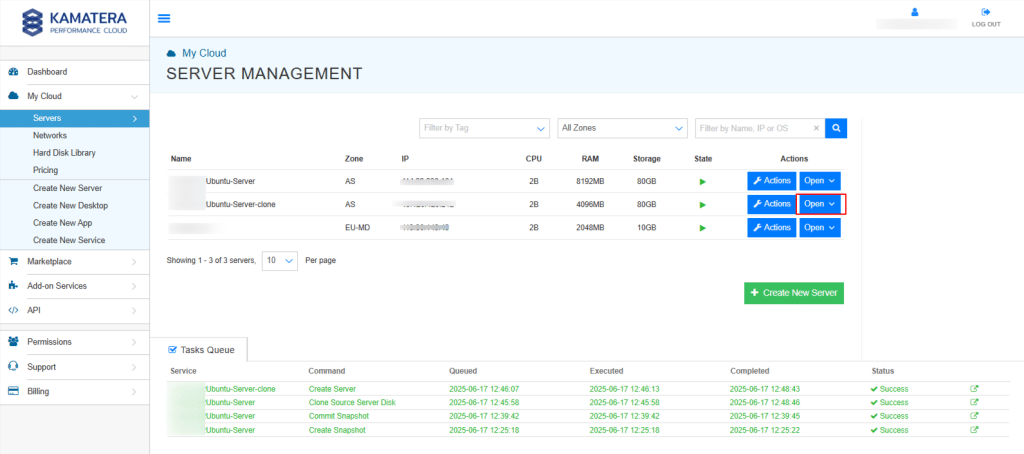
8. Once the cloned server is created, it will appear in the Server Management dashboard. Click Open next to the server to access its details.
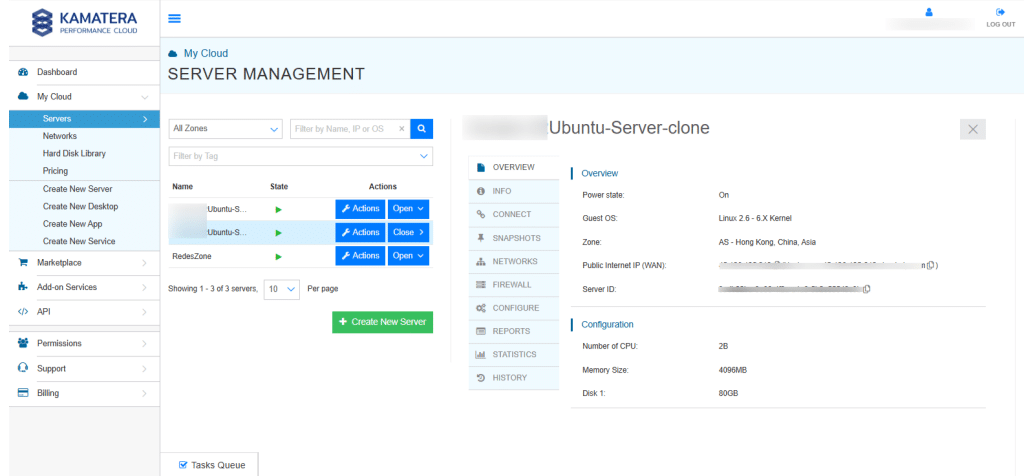
9. In the screen below, you will see an overview of the cloned server named Ubuntu-Server-clone. This section displays key information such as the Power State, Guest OS, Zone, IP Address, and Server ID.
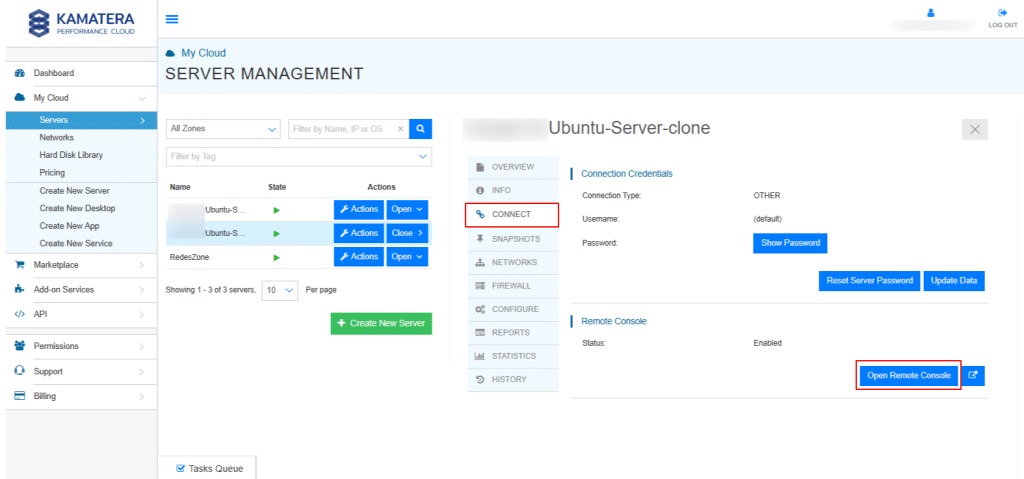
10. Now, click on Connect, then select Open Remote Console to access the server.
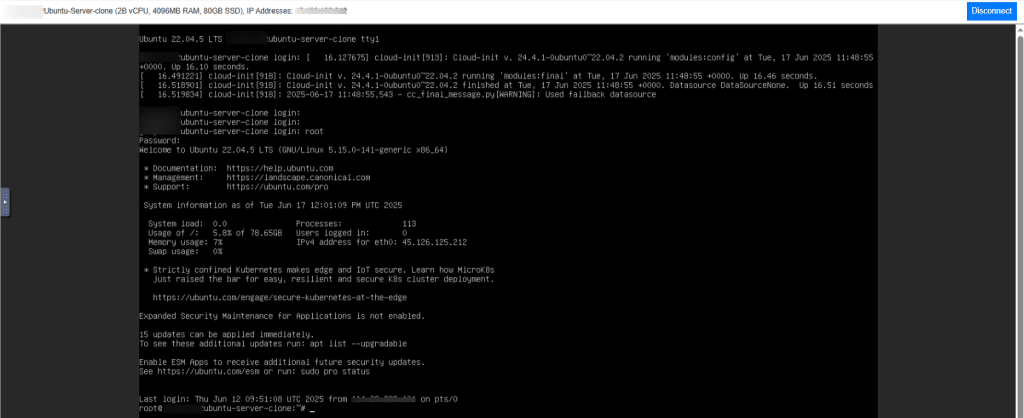
11. Enter your login credentials to access the Ubuntu terminal. Typically, you will use the username (such as root or a user you configured during setup) and the password you specified while finalizing the cloned server’s settings.
Connect using SSH manually
12. Once your cloned server is up and running, you can connect to it using SSH (Secure Shell) from your local machine. SSH allows you to securely access and manage your server terminal over the network.
Open your terminal and enter the following:
Command:
ssh root@your-cloned-server-ip
Replace your cloned server-ip with the actual public IP address of your cloned server, which can be found in the Server Management dashboard.
Note: If this is your first time connecting to the server, you may receive a warning about authenticity. Type “Yes” to proceed. Then you will see a message saying: “Warning: Permanently added <IP address> to the list of known hosts.”
When prompted, enter the password you set during server creation. Once authenticated, you will be logged in and see a prompt like root@ubuntu-server-clone:~#
This indicates you now have terminal access to your cloned Ubuntu server.

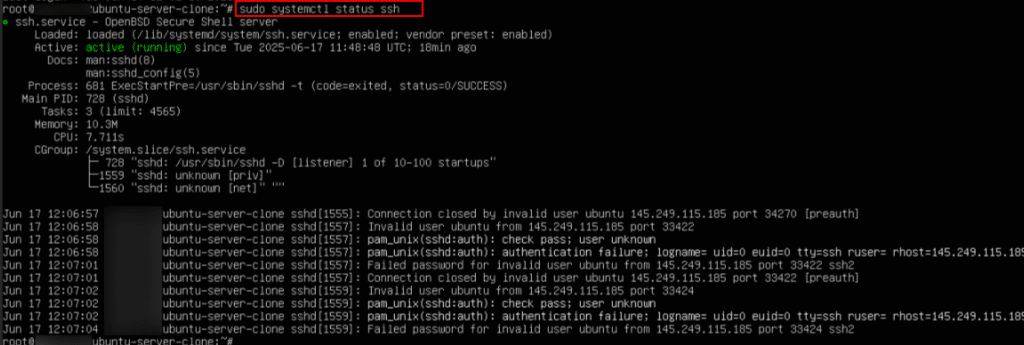
13. Run the following command to check SSH status
Command:
sudo systemctl status ssh
If it returns **active (running)**, that means the SSH service is running properly on your cloned Ubuntu server.
Note:
- If it is not active, run the below command
Command:
sudo systemctl start ssh
- To ensure it starts on boot, run the below command
Command:
sudo systemctl enable ssh
Creating and using snapshots
A snapshot is a point-in-time image of your server’s entire state, including the operating system, configuration, applications, and data. In Kamatera, snapshots serve as a fast and reliable backup method, allowing you to capture the current condition of a server before making major changes such as software updates, configuration tweaks, or system upgrades.
- Since the Ubuntu server is set up and running, let’s proceed to create a snapshot. Navigate to the Snapshots tab and click Create Snapshot.
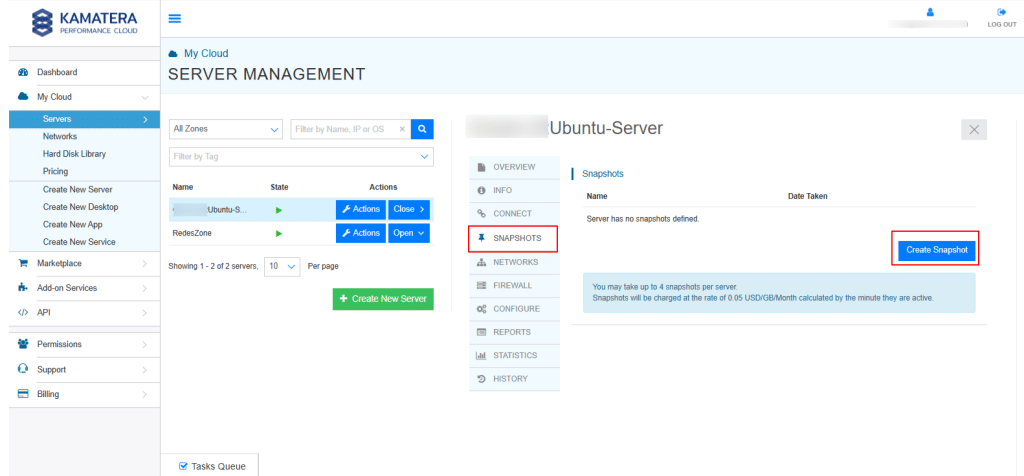
2. Enter the name for the snapshot and click Create Snapshot and wait for the snapshot to complete.

3. Once the snapshot is created, it will appear under the Snapshots tab. You will see two available options: Revert and Commit.
Click on Revert option.

4. When you click on Revert, the following screen will appear.
Click on Revert to Snapshot.
Note: This action restores the server’s hard disk to the exact state it was in at the time the snapshot was taken. It is especially useful for rolling back changes made during software updates, configuration modifications, or in the event of system failures.

5. In the screen below, you will see that the server state is OFF. Click on the Actions button and select Power ON to start the server.
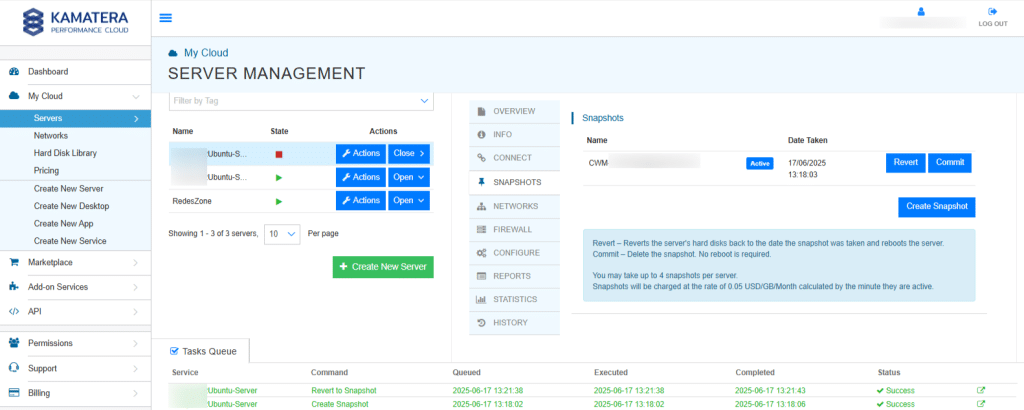
6. When you click on the Commit button, a confirmation pop-up window will appear. Click on Commit Snapshot to proceed with deleting the snapshot. This action is typically performed after confirming that the system is stable, and the snapshot is no longer needed for recovery.

You’ve now learned how to take a snapshot, use it safely, and clone a server in Kamatera. This process will help you back up your server, make changes with confidence, and quickly create copies when needed.


