This guide will teach you how to configure domain controllers for Active Directory Services. First, we will guide you through installing Active Directory Domain Services. Active Directory is a database and a suite of services that connect users with the network resources needed to complete their tasks.
The directory, or database, contains essential information about the environment, including details about users and computers, as well as their permissions. For example, the database might list 100 user accounts, including each person’s job title, phone number, and password, along with their permissions.
The services manage much of the activity within the IT environment. They ensure that each user is authenticated, typically by verifying their user ID and password, and authorized, granting access only to the data and resources they are permitted to use.
Install Active Directory Domain Services
To set up Active Directory, you first need to install Active Directory Domain Services on your Windows Server. After the installation, the server can be promoted to a Domain Controller. Follow these steps:
- From the dashboard:
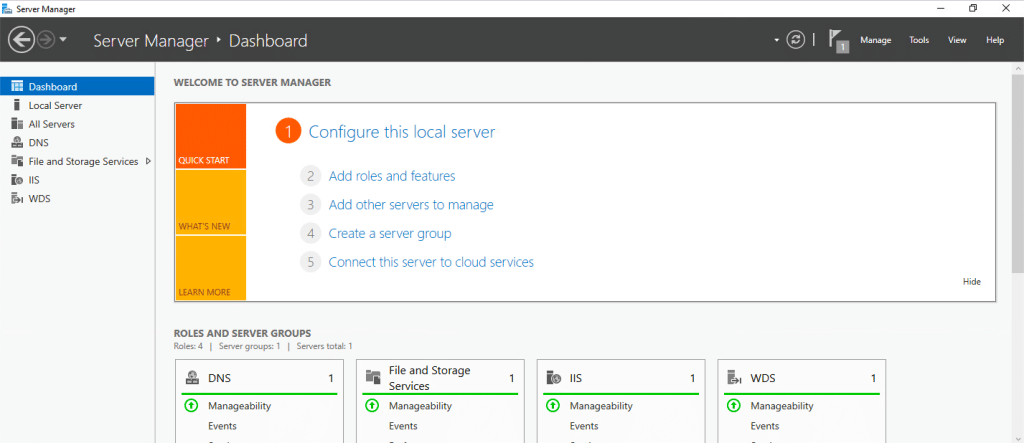
- Click on Add Roles and Features. A new screen opens.
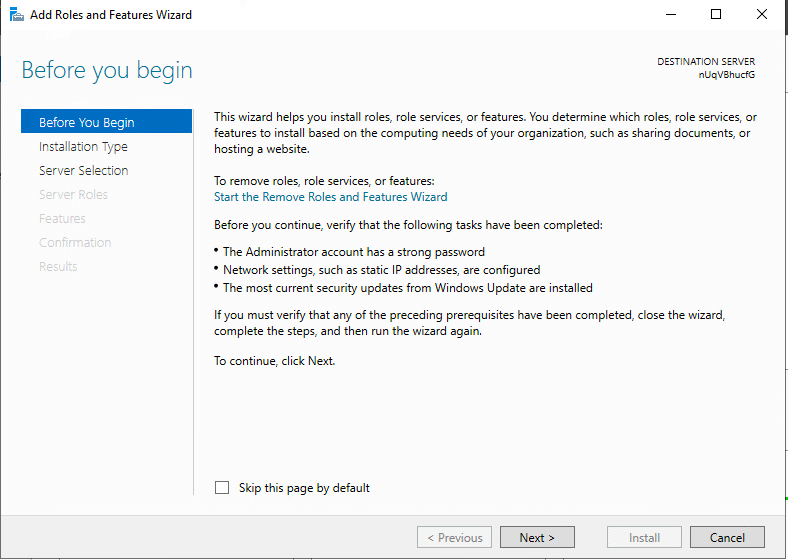
- Click Next
At Select Installation Type, select Role-based or feature-based installation.
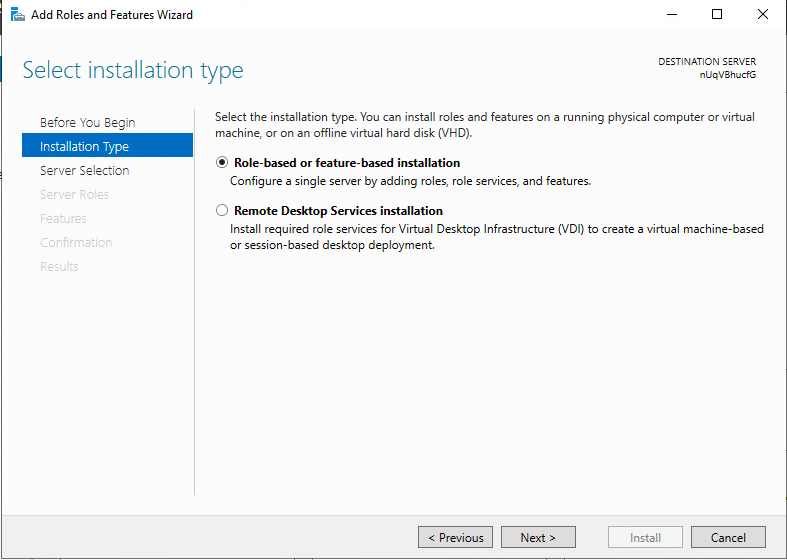
- Click Next.
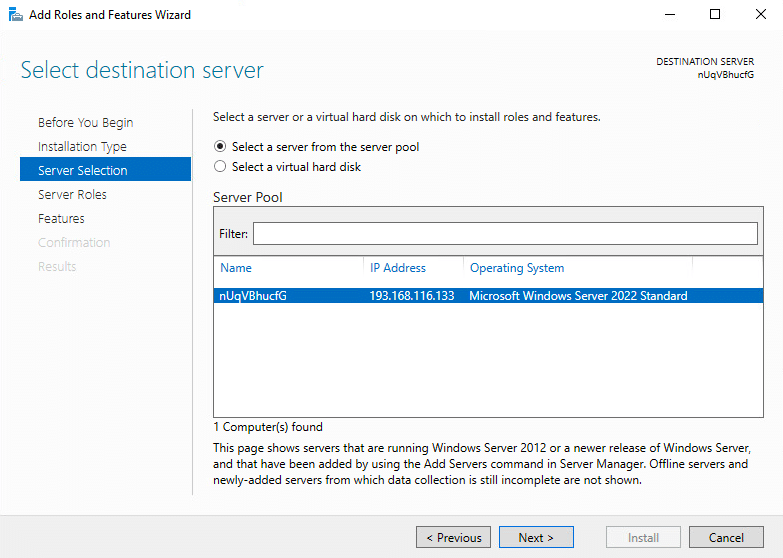
Select a server from the server pool. In Server Pool, make sure that your local computer is selected.
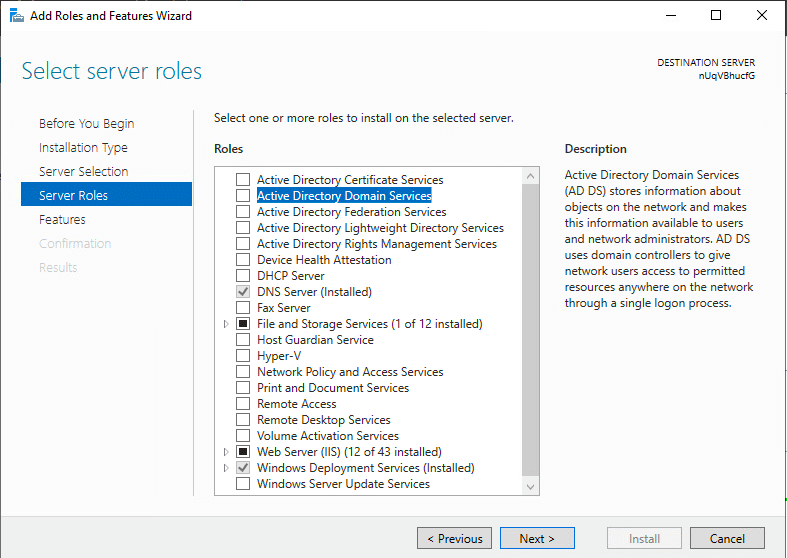
- Click Next.
Select Active Directory Domain Services checkbox from Roles.
- Click Next
Next, you’ll be prompted to add the required features. Click Add Features to proceed.
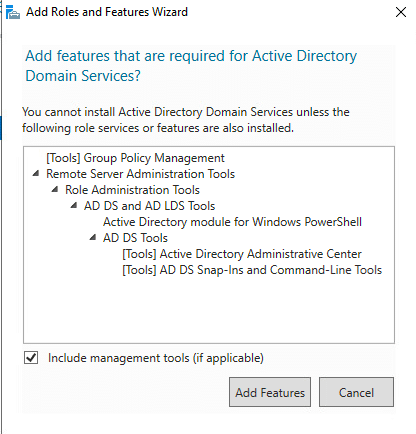
- Click on Add features to proceed.
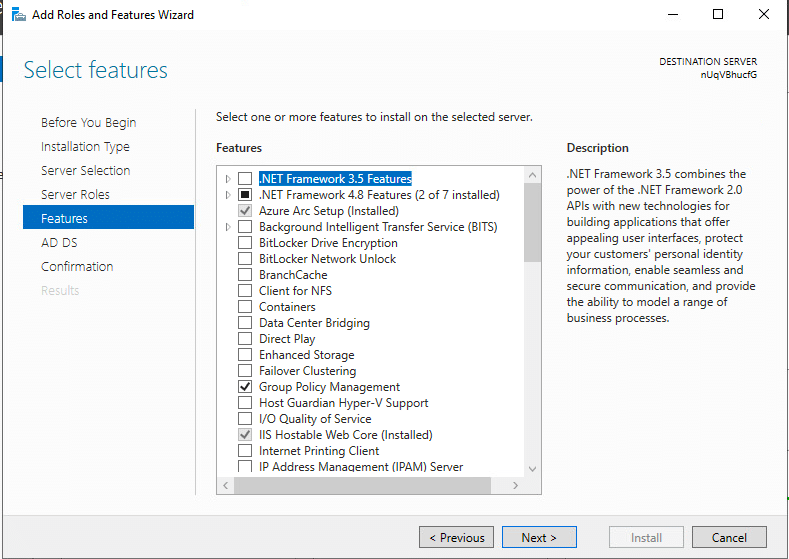
- Click Next
Make sure you read the information on the Active Directory Domain Services dialog.
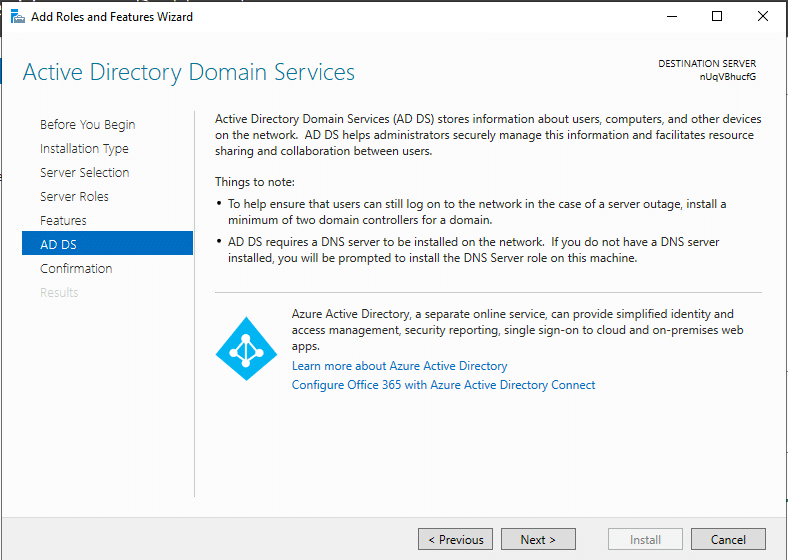
- Click Next
In the Confirmation dialog, click Install to install the selected roles, role services, and features on your server.
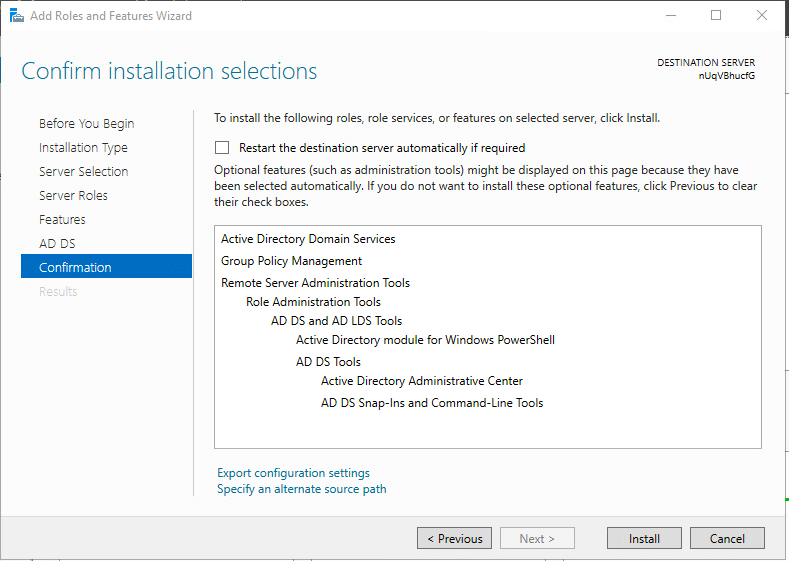
- The installation process will start. Once it’s finished, click Close to exit the wizard.

Promote Your Server to Domain Controller
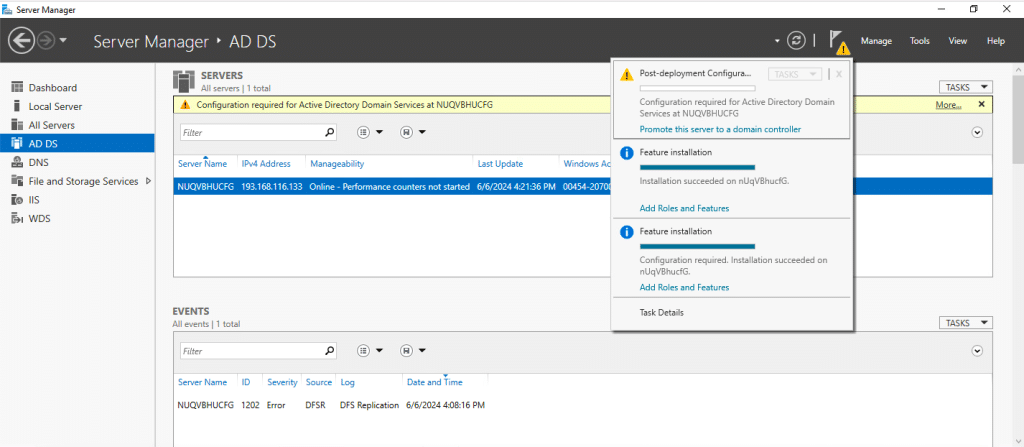
- When the installation is complete, click Notifications in Server Manager.
- Click the link titled Promote this server to a domain controller.
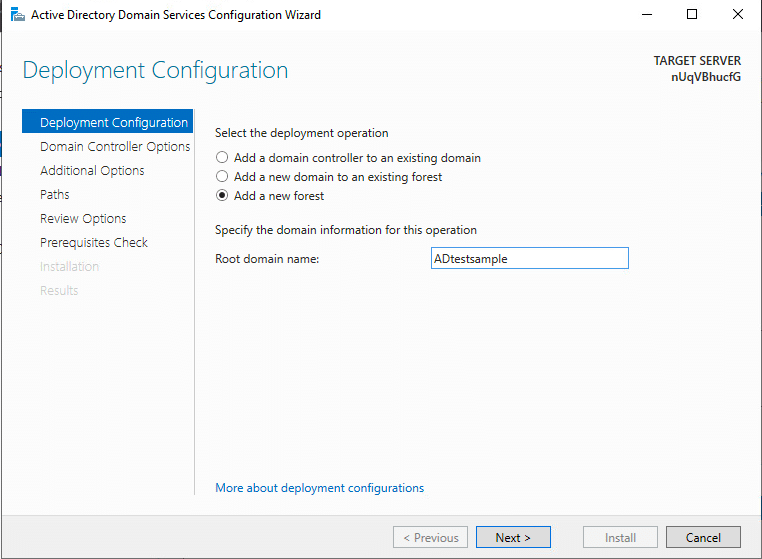
- Once the Active Directory Domain Services Configuration Wizard dialog opens, select Add a new forest and enter the Root domain name.
In the Domain Controller Options dialog, leave Forest functional level and Domain functional level enabled as default.
Provide a secure password (kamatera@2024) for Directory Services Restore Mode.
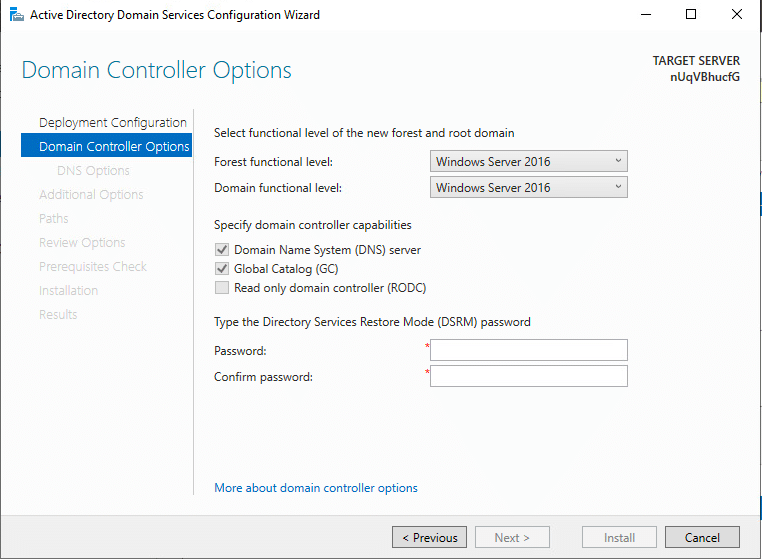
- Click Next
Note: Ignore the warning given on the DNS Options dialog.
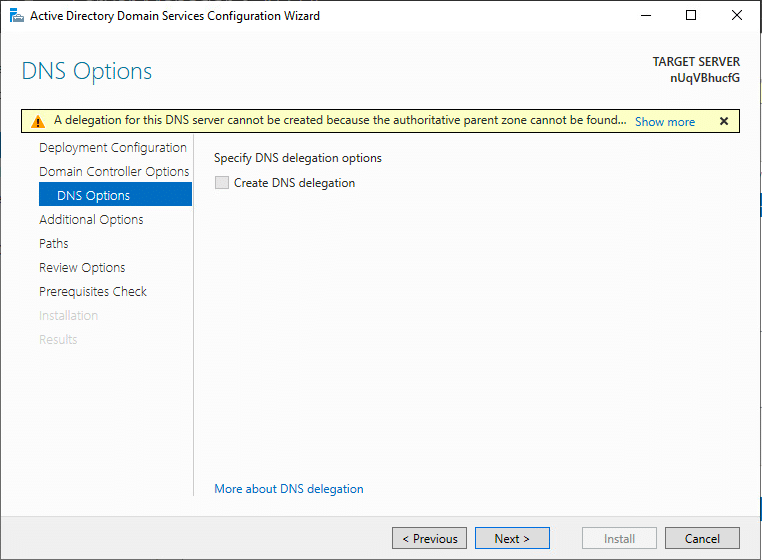
- Select Next.
Verify your server’s NetBIOS domain name (SAMPLETESTDOMAI) and select Next.
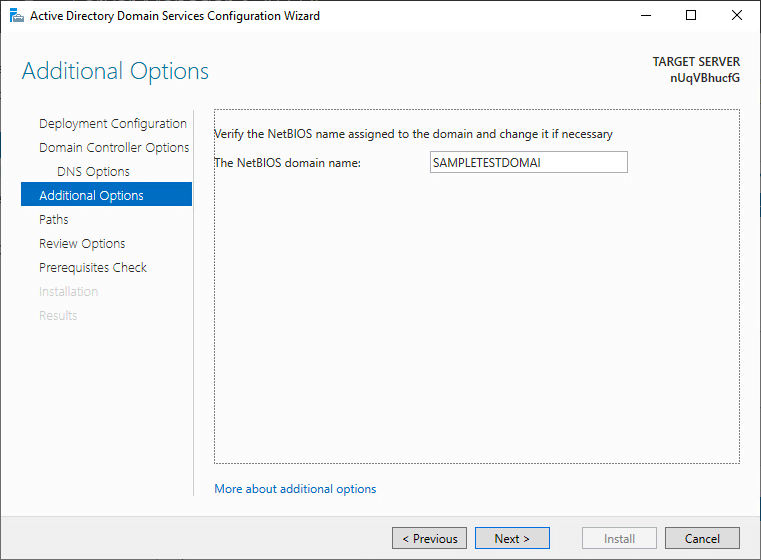
6. Select Next.
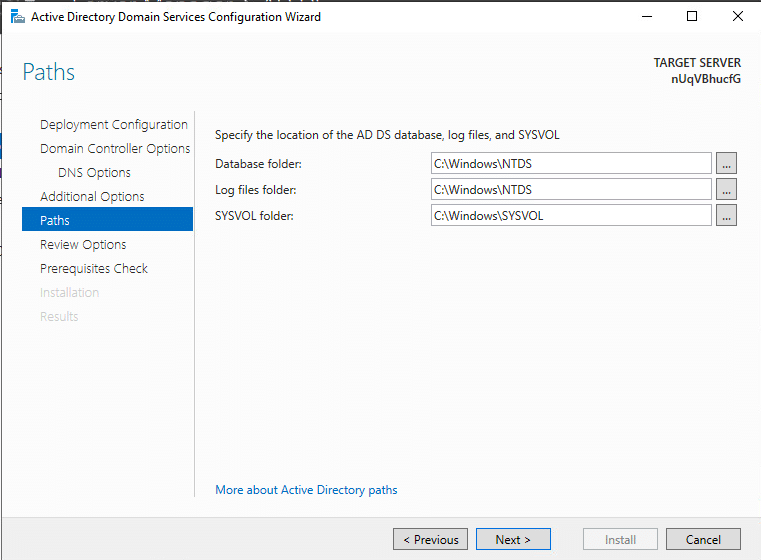
7. Specify the locations for the following:
- AD DS Database folder
- Log Files folder
- SYSVOL folder
Unless you have a specific enterprise use case, it’s advisable to leave everything as default.
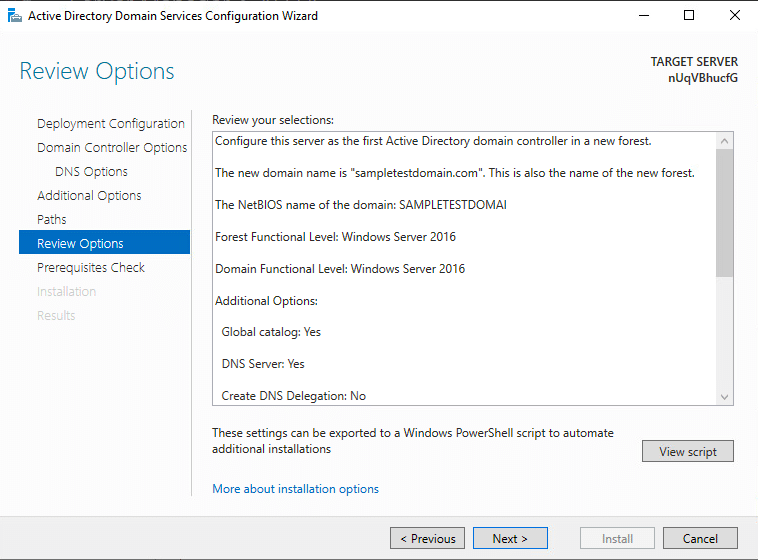
- Review your selections carefully, and once satisfied, click Next to proceed.
The installation wizard will perform validation of prerequisites before proceeding with the installation of AD DS. Once all the checks are passed successfully, select Install to initiate the installation process.
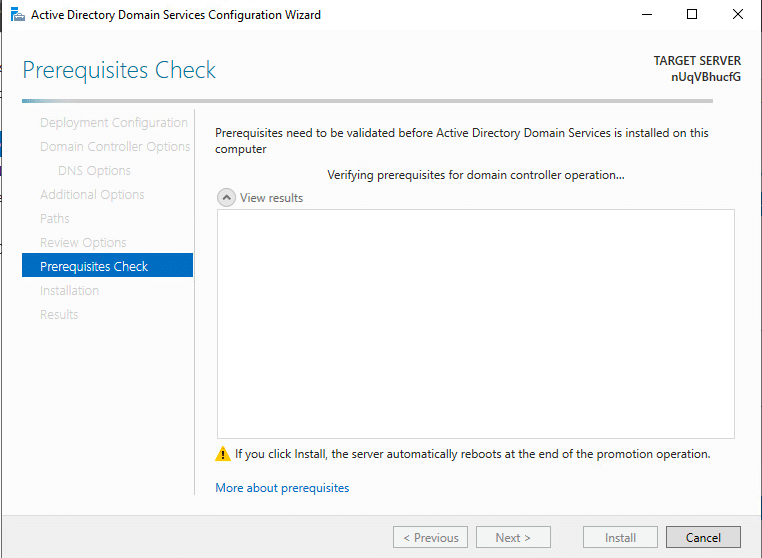
Indeed, like magic, the installation process will commence. Let’s hope for a smooth and successful installation!
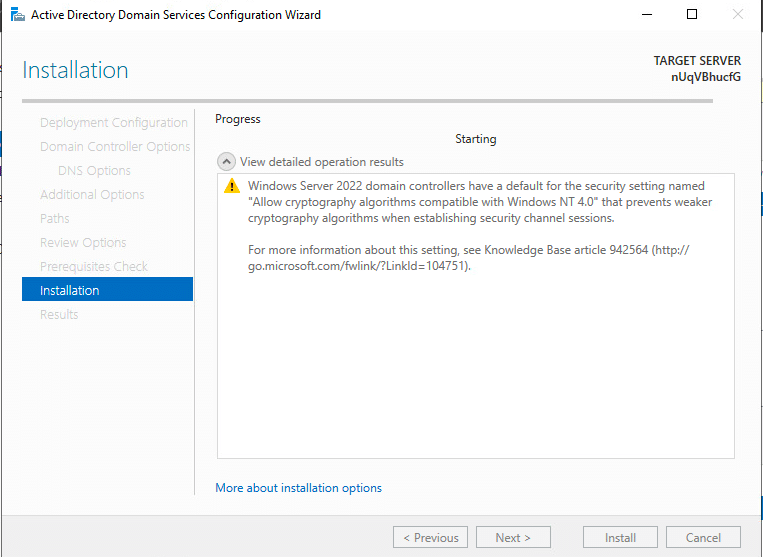
Once the installation is complete, click Close to finish the wizard. The system will restart.
Your Active Directory Services have now been installed successfully. Your machine will be rebooted automatically to apply the changes.


