Directus is an open-source platform which combines the utility of a headless CMS providing backend as a service. Directus can handle APIs, authentication permissions, and admin, so users can focus on building apps and websites. It has a user-friendly interface for managing database content and it allows users to interact with their databases through a web-based dashboard without the need to write code.
First, let’s create an account on Kamatera.
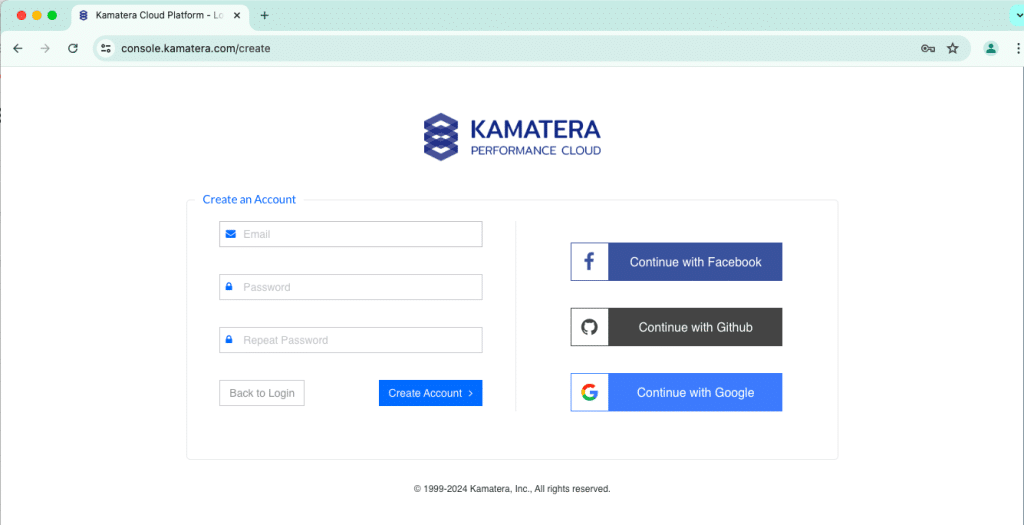
Go to console.kamatera.com and sign up for an account by providing the following information:
- Verify Your Email: Click the verification link sent to your email by Kamatera.
- Password: Enter your password.
- Repeat Password: Re-enter your password and click Create Account.
Access the Kamatera Management Console
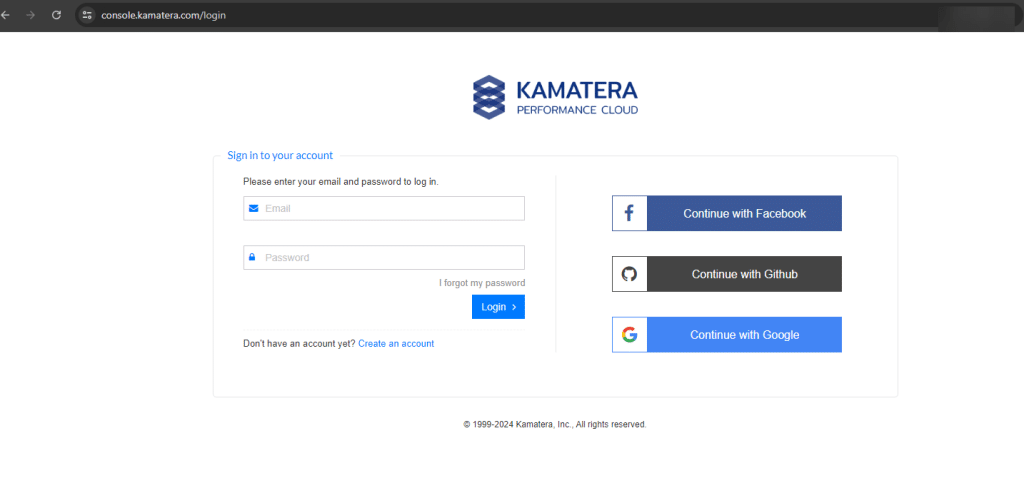
Enter your username and password and click Login to access Kamatera Management Console.
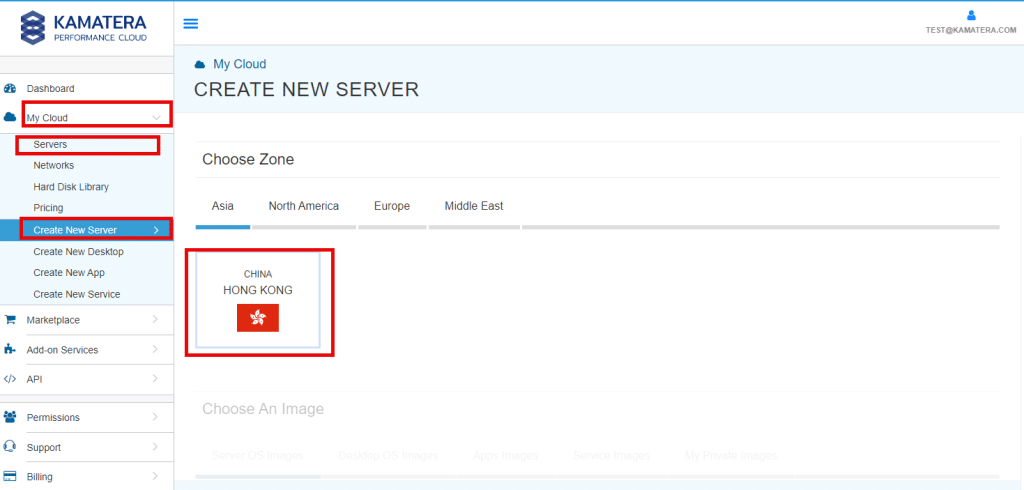
- Navigate to My Cloud on left hand side, select Servers and click on Create New Server.
Choose a zone from the following options:
- Asia
- North America
- Europe
- Middle East
Note: For this setup, we used the Asia server domain to set up the Windows Server.
2. Choose an image
Kamatera offers a variety of App and Server Images to help users set up preconfigured resources. Users can choose from the following options:
- Server OS images
- Desktop OS images
- App images
- Service images
- My private images
In this, select Apps images and select Directus. Choose the latest version of Directus.
Note: Here the latest version is: directus-6.4.9-ubuntuserver-24.04-apache-php-7.2-mysql8.
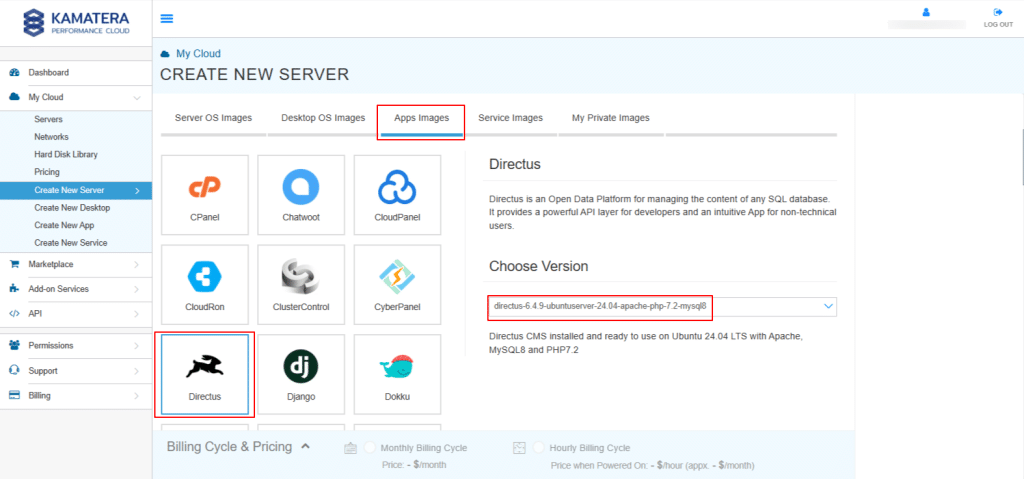
Once the version is selected, you can see the following message:
“Directus CMS installed and ready to use on Ubuntu Server 24.04 LTS with Apache, MySQL8 and PHP7.2.”
3. Toggle the Detailed view button to enable you to view the detailed description, including the price.

Choose the server specs
| Field | Description |
| Type | Type B-General Purpose: Server CPU are assigned to a dedicated physical CPU thread with reserved resources guaranteed.
Type D–Dedicated: Server CPU are assigned to a dedicated physical CPU Core (2 threads) with reserved resources guaranteed. Type T-Burst: Server CPU are assigned to a dedicated physical CPU thread with reserved resources guaranteed. Exceeding an average usage of 10% will be extra charged for CPUs usage consumption. Type A-Availability: Server CPUs are assigned to a non-dedicated physical CPU thread with no resources guaranteed. Note: More information on CPU types is available on the My Cloud- Pricing page. |
| CPU | Choose the number of vCPUs that will be installed on the server. Type B/T can be configured with upto 104 vCPUs per server. Based on Intel’s latest Xeon Processors, 2.7 GHz+. |
| RAM | Choose the amount of RAM that will be installed on the server. Type B/T/D can be configured with upto 512GB RAM per server. |
| SSD DISK | Choose SSD Storage Size. You can add upto 15 SSD Disk. SSD Storage includes unlimited IOPS and unlimited storage bandwidth, free of charge. |
| Daily backup | Toggle the switch to enable extended daily backups of your server’s storage to external backup storage. |
| Managed Services | Toggle the switch to enable Managed Services to the server’s operating system by Kamatera’s technical support team. |
4. Choose Networking
Users can select the network they wish to use, whether it’s a public Internet network or a private local network.
Simple Mode

| Field | Description |
| Public Internet Network | Check to connect the server to a network interface connected to Public Internet Network. |
| Private Local Network | Check to connect the server to a network interface connected to Private Local Network. |

| Field | Description |
| NIC #1 | Select WAN from the options available in the drop-down menu.
Select auto from the options available in the drop-down menu.
Select auto from the options available in the drop-down menu.
|
| WAN Traffic | Select 5000 GB per month/ on 10 Gbit per second port. |
5. Advanced Configuration
- Hide: If you want to hide the advanced configuration.
- Show: If you want to see the advanced configuration.

| Field | Description |
| Install Script | Enter the script here to execute once the server is created.
Note: For Windows system use Power Shell. |
| Keep Server On Failure | Do not terminate server if Start up Script or Provisioning Fails |
| Server Notes | Enter any server notes to be noted. |
| Tags | Select the Tags from the drop-down menu and click Add Tag. |
6. Finalize Settings
Finalize settings by setting the password, re-validating it, selecting the number of servers, specifying the server name, and enabling the Power On Servers option.

| Field | Description |
| Password | Select password
Password allowed characters: a-z, A-Z,0-9 !@#$^&*()~ and must need the following requirements:
|
| Validate | Re-enter the password to validate. |
| Servers | Select the number of servers the user wants. |
| Name # 1 | Enter the name of the server. |
| Power On Servers | Switch on the toggle button to see the details |
Note: Once the user enters the details in Finalize Settings, they can select monthly or hourly billing.
7. Billing Cycle and Pricing

The user can choose between the Monthly Billing Cycle and Hourly Billing Cycle.
Note: The Server Summary displays the location, operating system (including server specifications), add-on services, servers, and pricing.
Click Create Server.
8. In Tasks Queue, you can see Directus is downloading.

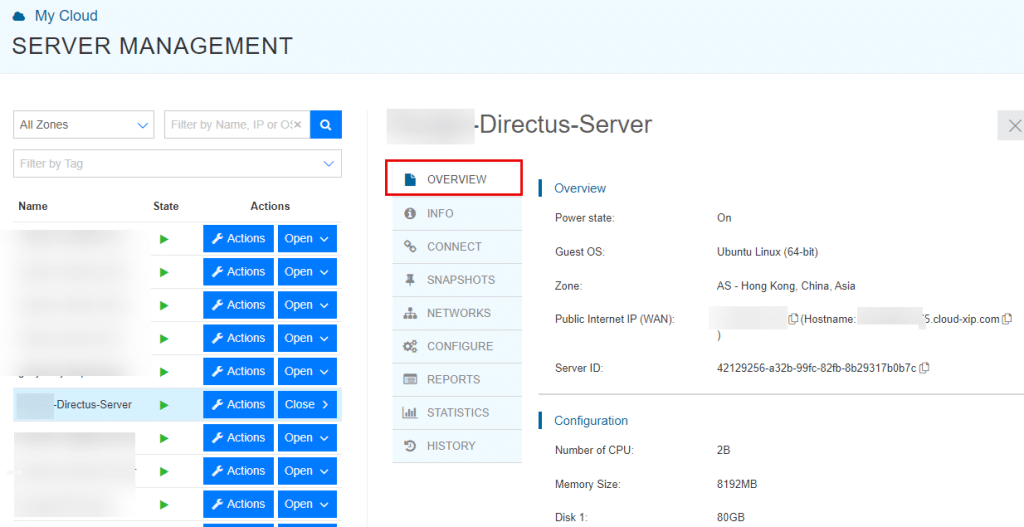
9. Once the installation is successful, Directus-server is reflected in the Server Management dashboard. Click on Open, beside the Directus server.

10. Overview in the center displays information like Power state, Guest OS, Zone, Public Internet (WAN), Server ID of the server and Configuration-Number of CPU. Memory Size, Disk 1.
11. Click on Connect to connect to the server and Click on Open Remote Console.
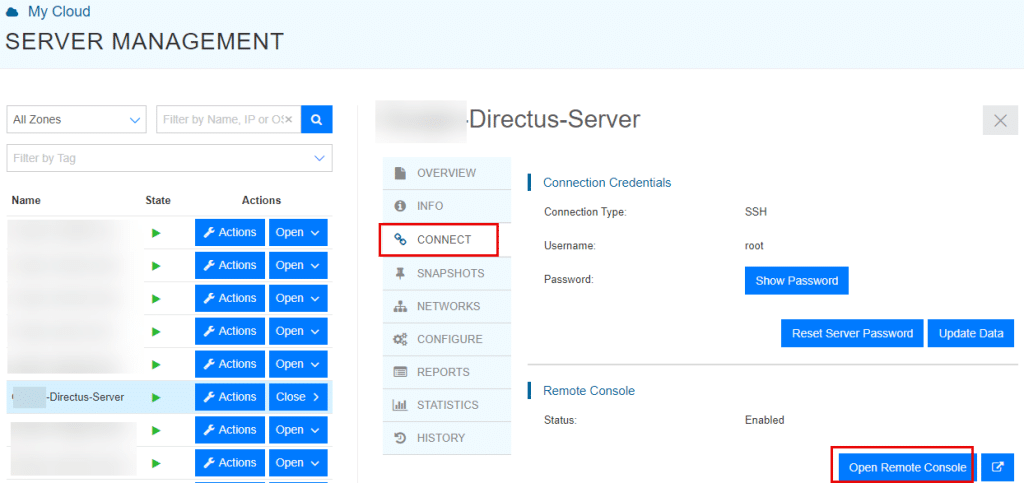
12. In the terminal, enter the Username and Password that you submitted while creating a server (Step 6).

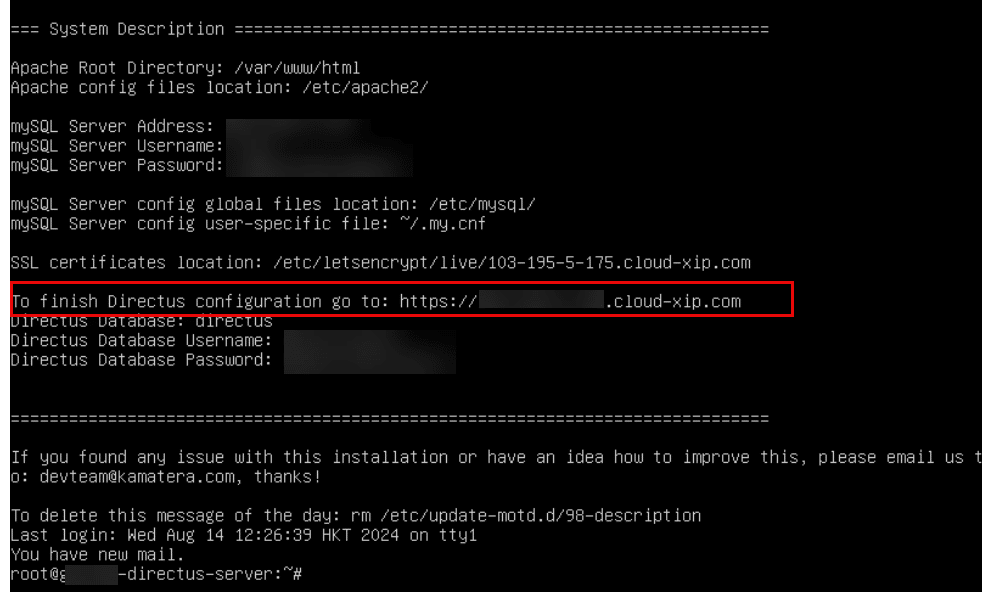
13. After entering your username and password, the screen below shows information about mySQL Server Address, mySQL Server Username, and mySQL Server Password, SSL Certificates location, Directus Configuration link, Directus Database, Directus Database Username, Directus Database Password.
We must use these credentials to login to Directus and configure.
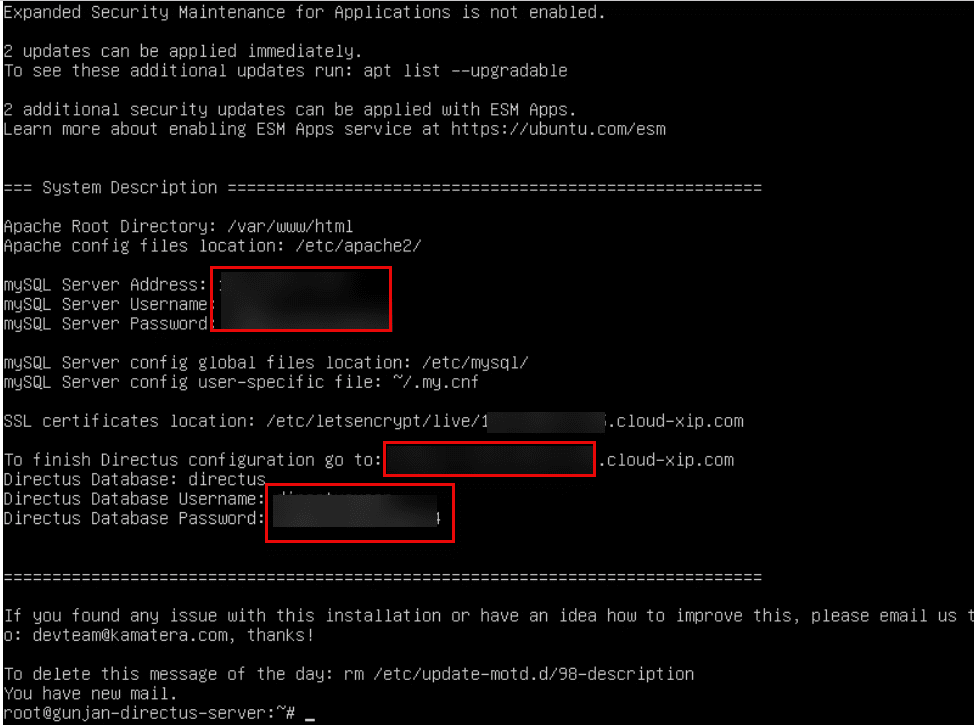
14. To finish Directus configuration, go to browser and in the new tab, mention the URL as shown in the screen below (that is https://xxx-xxx-xx-xxx.cloud-xip.com).
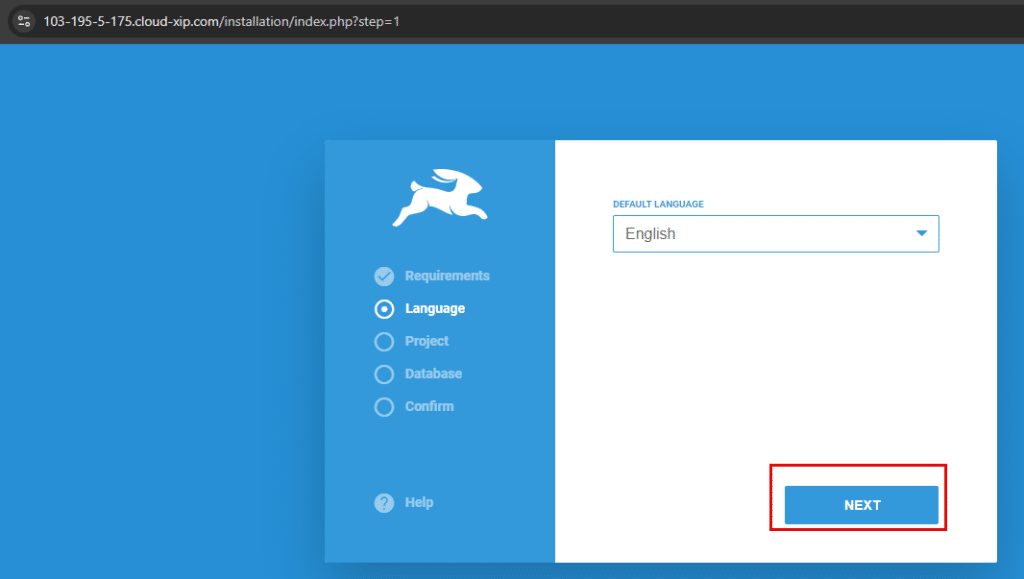
15. Directus configuration page appears as shown below.
Select the Language from the drop-down menu and click NEXT.
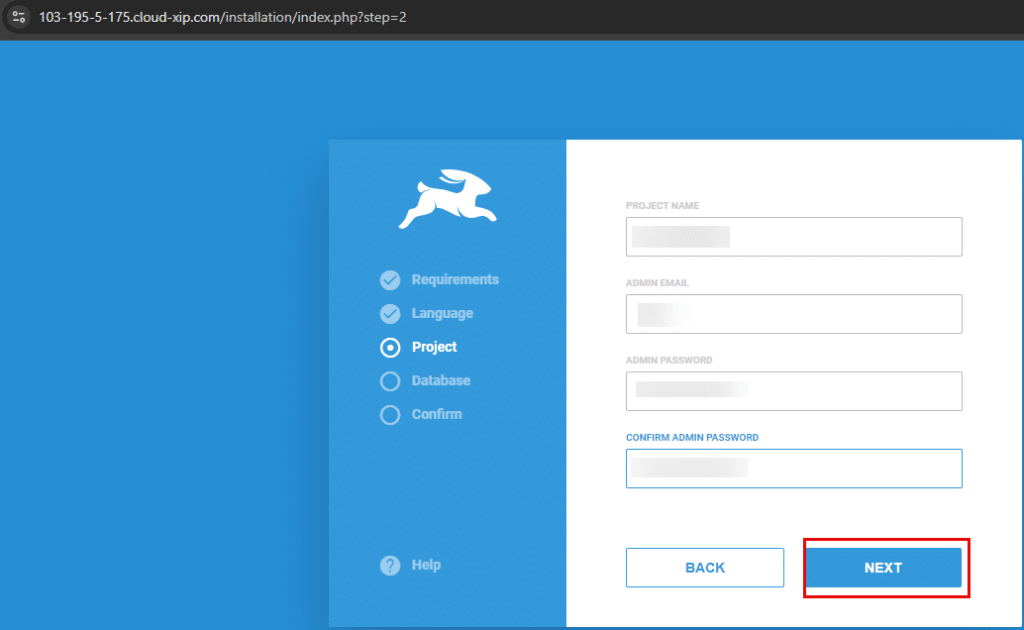
Enter PROJECT NAME, ADMIN EMAIL, ADMIN PASSWORD, and CONFIRM ADMIN PASSWORD, and click on NEXT.
Enter DATABASE TYPE, HOST, PORT, USER, PASSWORD, DATABASE NAME, INITIAL SCHEMA.
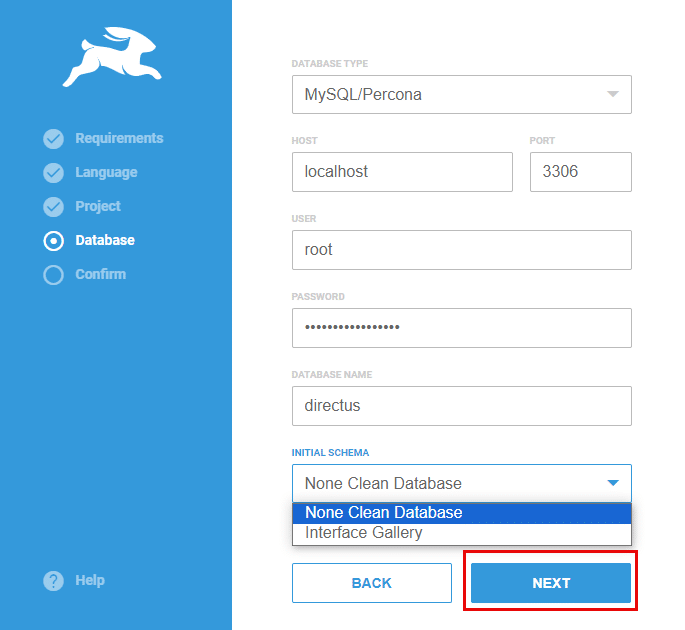
| Fields | Description |
| DATABASE TYPE | Select database type from the drop-down menu. |
| HOST | Enter localhost or enter the host from where you want to use the databases. |
| USER | Enter MySQL Server Username or username of the database type that you selected. |
| PORT | Port 3306 is the standard port used by MySQL databases to listen for incoming client connections. |
| PASSWORD | Enter the password for your selected database type. |
| DATABASE NAME | Enter the database name. |
| INITIAL SCHEMA | Select NONE CLEAN DATABASE or INTERFACE GALLERY. |
After filling in the information, click on NEXT.
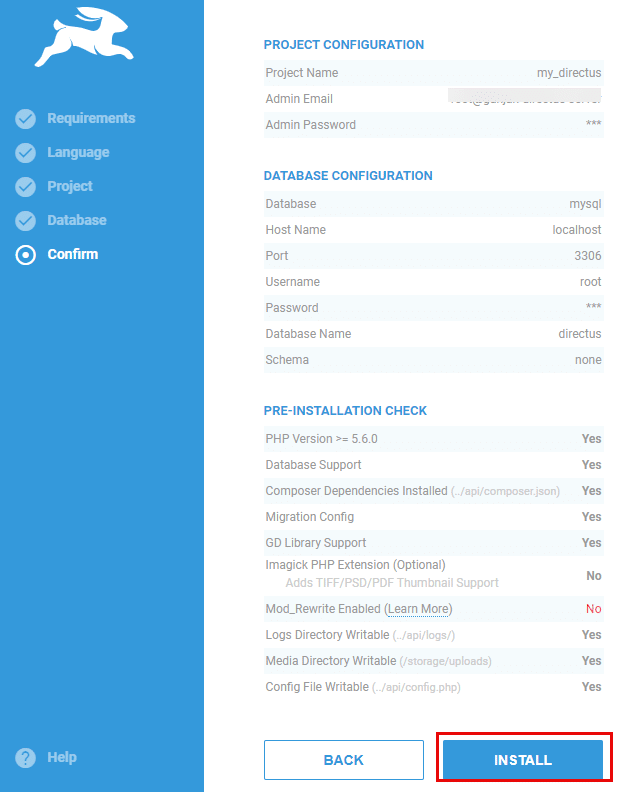
Next, it shows the PROJECT CONFIGURATION, DATABASE CONFIGURATION, PRE-INSTALLATION CHECK.
If you want to make changes, click on BACK. Otherwise, click on INSTALL.
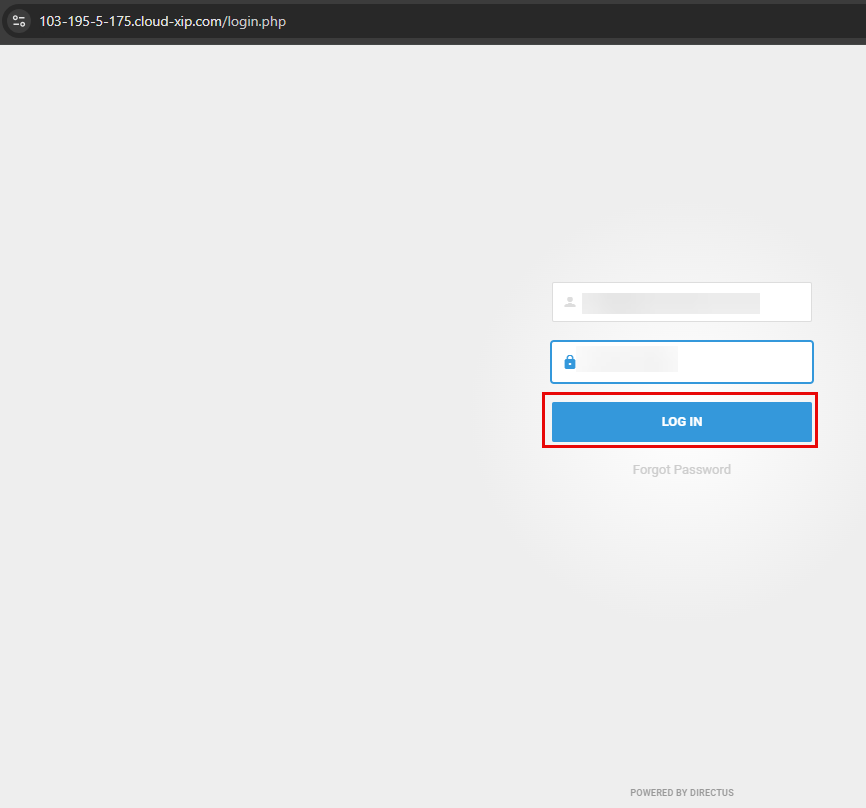
16. After installation, go to browser and in the new tab enter the URL (mentioned in step-14) that is https://xxx-xxx-xx-xxx.cloud-xip.com.
Now, the Directus login page opens. Here enter the details and click on LOG IN.
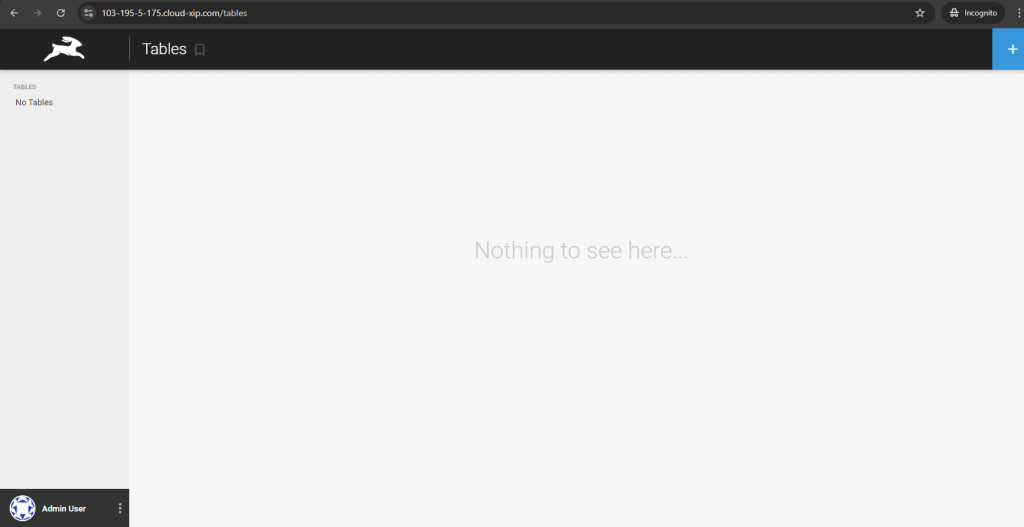
17. After logging in, you will see ‘Tables’ in the left navigation menu, if any exist. Clicking on it will take you to the Tables page in Directus.
Note: As tables are not created, you see the blank screen. If there are any tables from the database type you selected, then all those tables will be displayed.
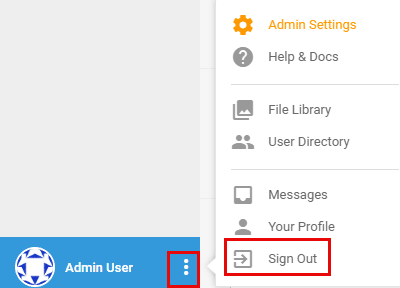
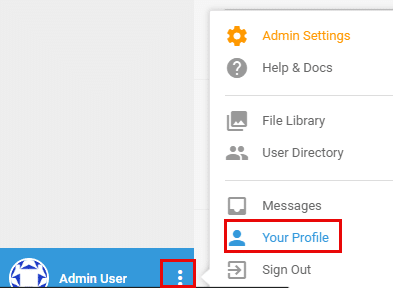
18. On the bottom right corner, click on 3 dots beside Admin User– select Admin Settings from the list.
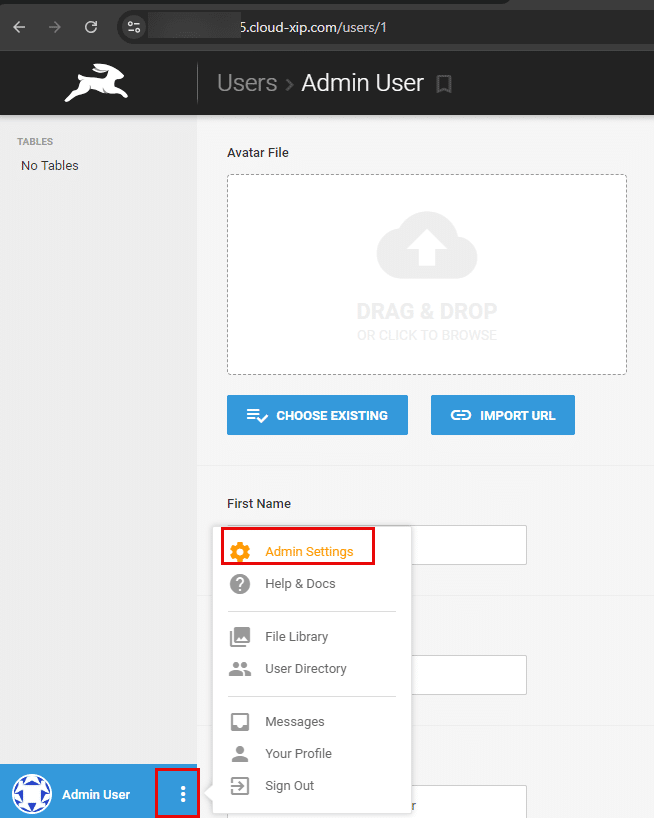
- Once the Admin Settings page opens, fill in the required information and click on the blue tick mark which is on the top right corner.
- If you don’t want to save the changes or go with the default ones, click on the red x, which is on the top right corner.
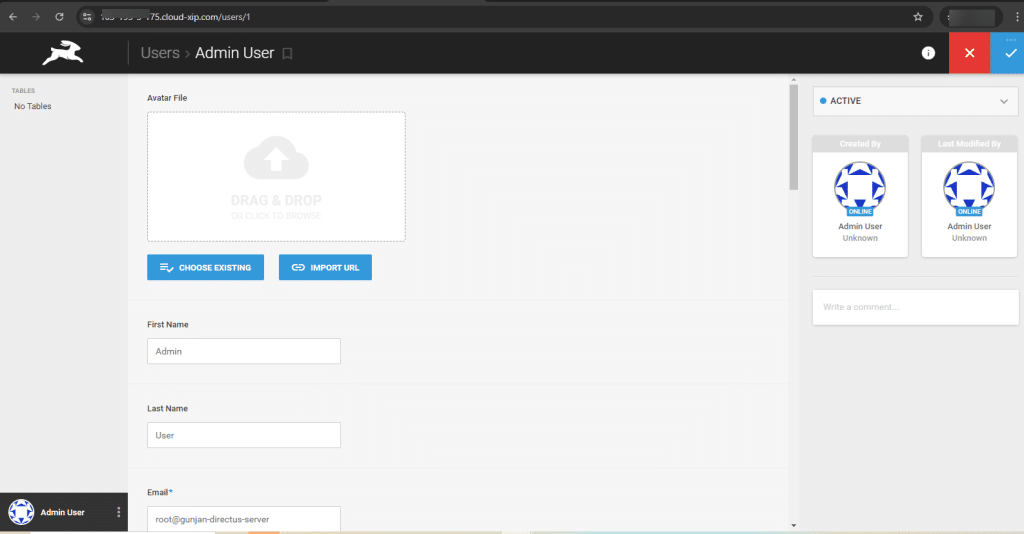
| Field Name | Description |
| Avatar File | You can change the background of the screen by selecting
DRAG & DROP: you can drag and drop the image from your local machine. CHOOSE EXISTING: you can choose from the existing files. IMPORT URL: you can even enter the URL of the image. |
| First Name | Enter your first name. |
| Last Name | Enter your last name. |
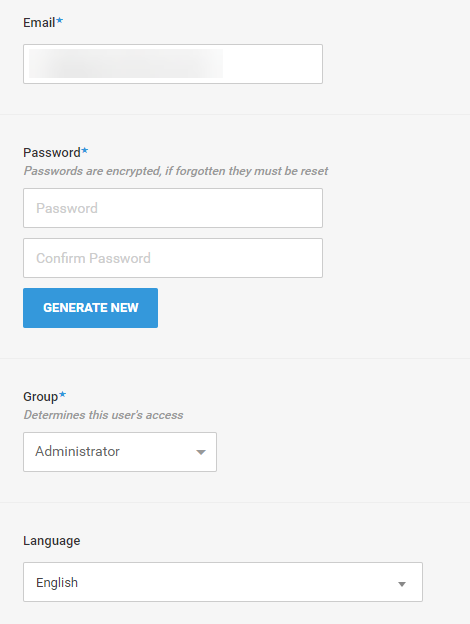
| Field | Description |
| Default Email id is mentioned in this field. | |
| Password | Change the password if forgotten. Click on Generate to get new password. |
| Group | Determines the user access. |
| Language | Select the language from the drop-down menu. |
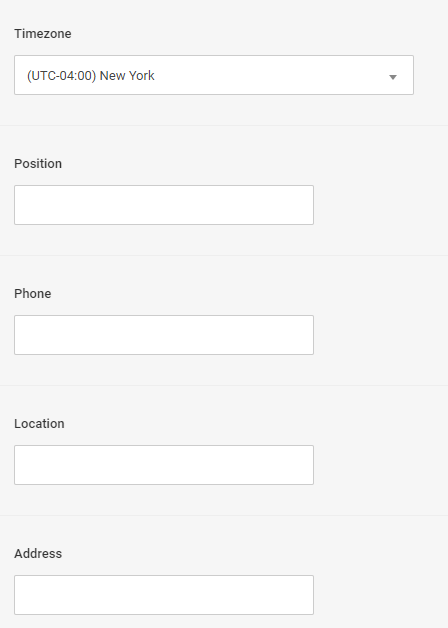
| Field | Description |
| Time zone | Enter the time zone where you live from the drop-down menu. |
| Position | Mention your position |
| Phone | Enter your phone number |
| Location | Enter your location |
| Address | Enter the address |
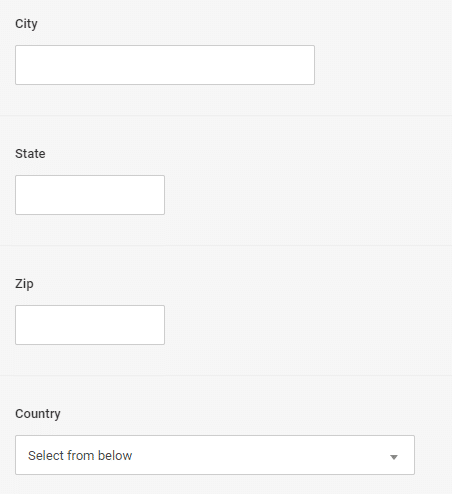
| Field | Description |
| City | Enter the city name |
| State | Enter the state name |
| Zip | Enter the zip code |
| Country | Select the country from the drop-down menu. |
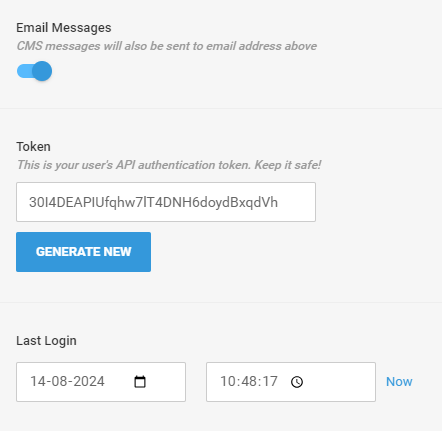
| Field | Description |
| Email Messages | Use the toggle switch to send CMS messages to email addresses including the above. |
| Token | This is your user’s API authentication token. You can generate new one by clicking on GENERATE NEW. |
| Last login | You can see the login date and time. |
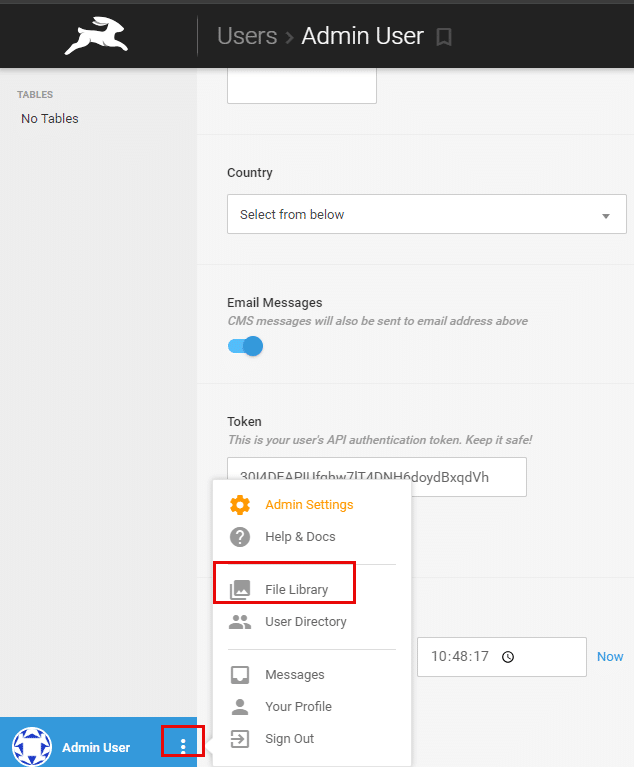
19. Click on 3 dots beside Admin User and select File Library.
The Files page opens, and you can see the default file.
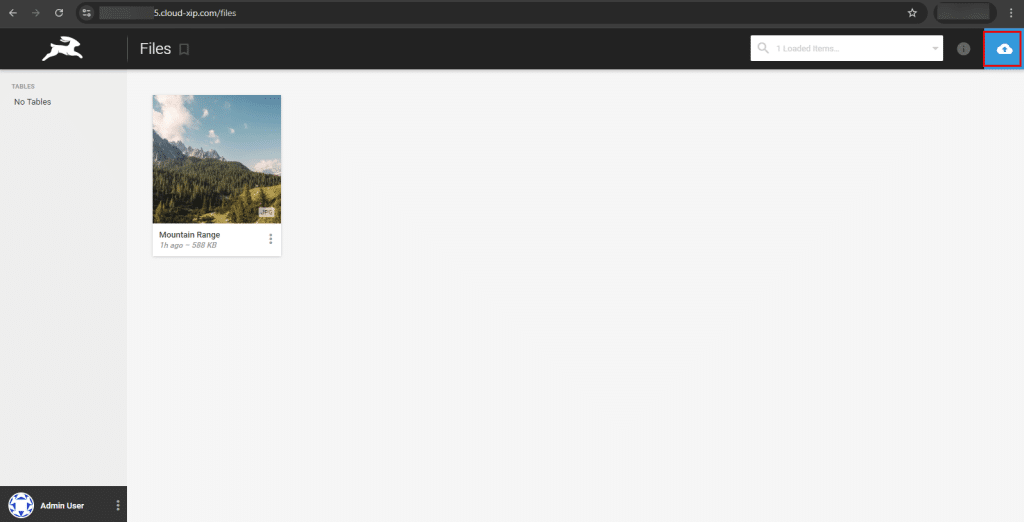
If you want to add more files, click on the cloud icon (blue color) on the top right corner of the page.
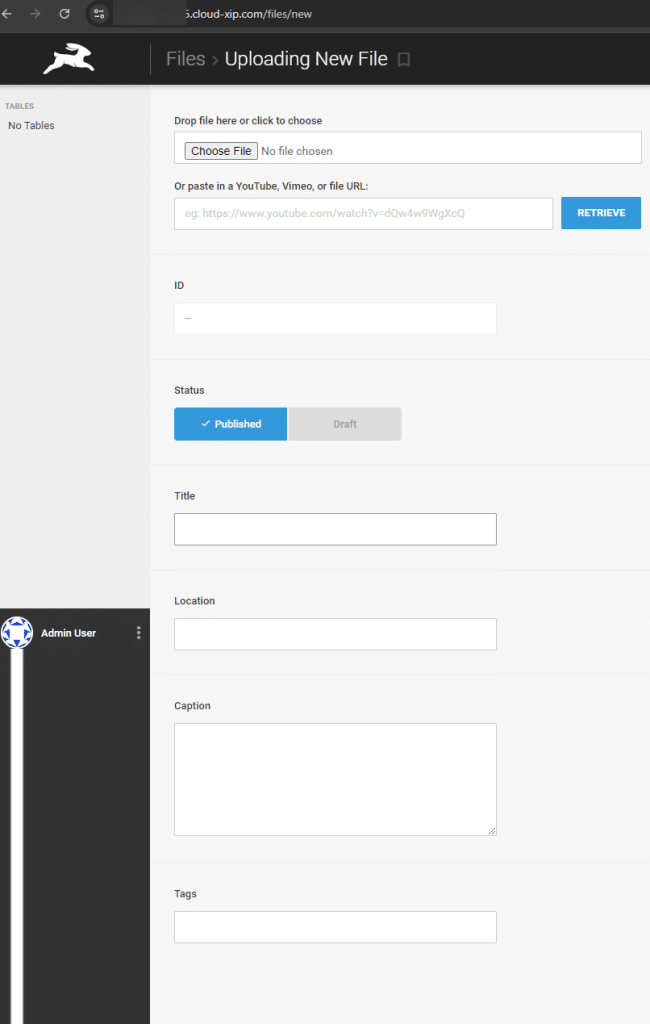
| Field | Description |
| Drop file here or click to choose | Drag and drop the file from your local machine. |
| Or paste in a YouTube, Vimeo or the URL | Or you can paste in YouTube, Vimeo or file URL by clicking on RETRIEVE. |
| ID | Get the unique ID for the file. |
| Status | Status can be set by clicking on Published or Drafts |
| Title | Give title for the file. |
| Location | Store the file in the assigned location. |
| Caption | Give caption to the file. |
| Tags | You can even include tags for the file. |
20. Click on 3 dots beside Admin User and select User Directory.
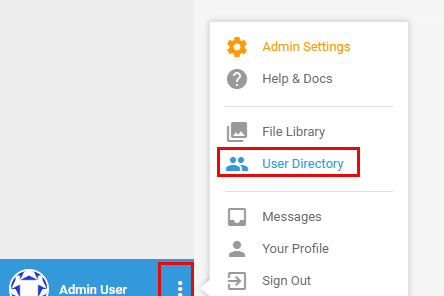
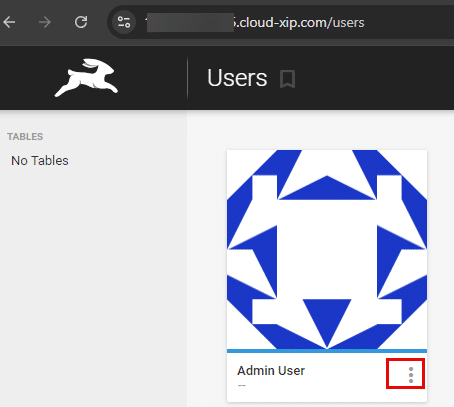
In the Users page, click on 3 dots beside Admin User.
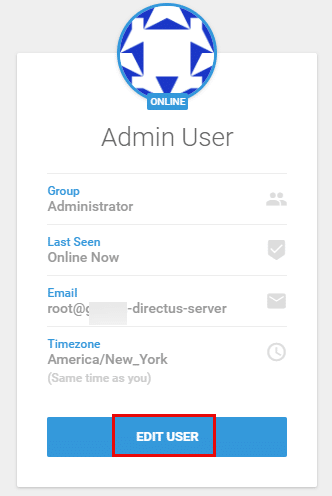
A new window opens, showing the details of the Admin User. If you want to edit information, then click on EDIT USER.
If you want to add more users, then click on the + icon (blue color) on the top right corner of the page.
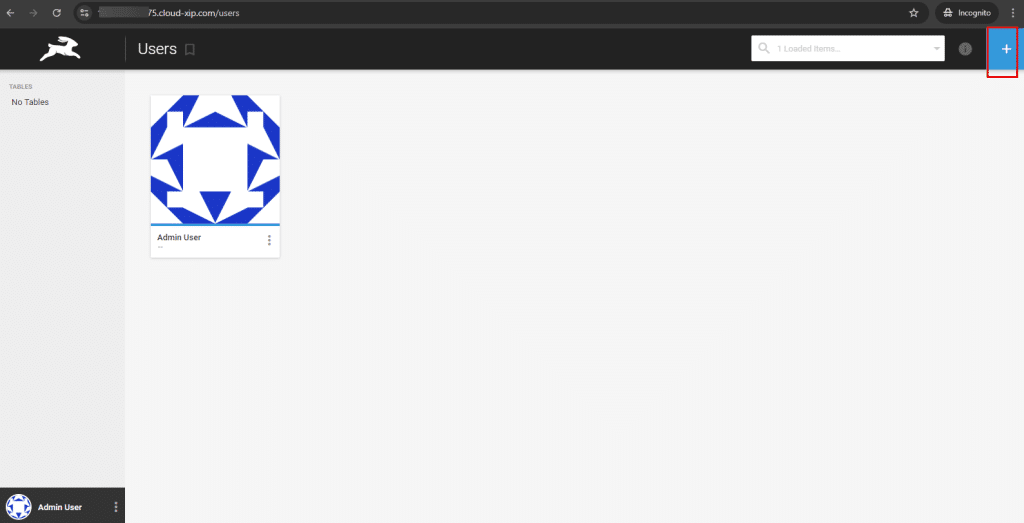
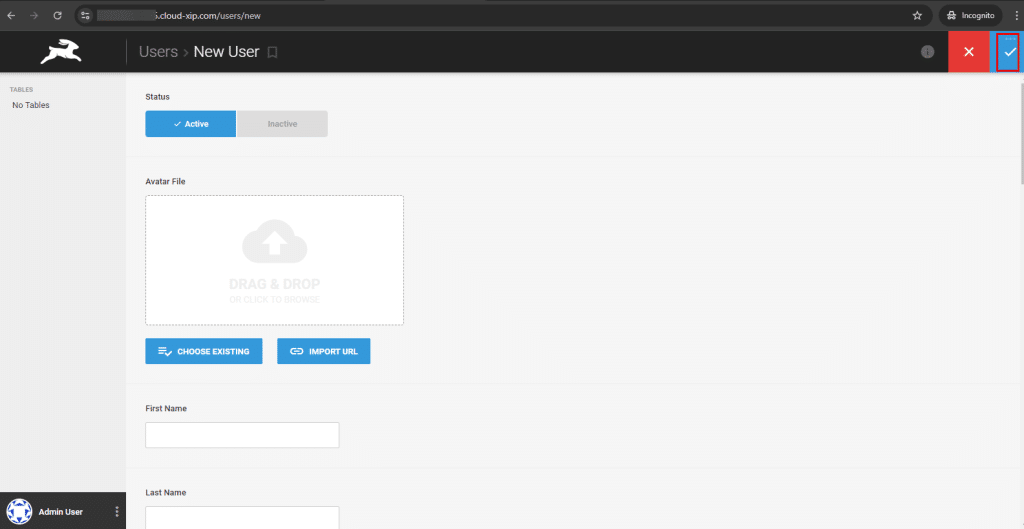
- A new page opens, fill in the required information and click on the tick mark (blue color) on top right corner of the page to save the changes (follow Step 19).
If you don’t want to save the changes or exit this page, then click on the red x on top right corner of the page.
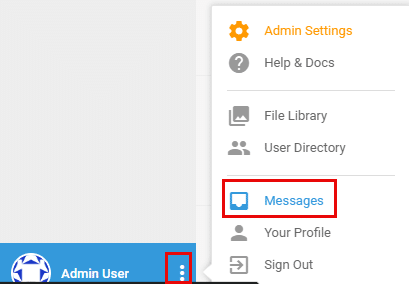
21. Click on 3 dots beside Admin User and select Messages.
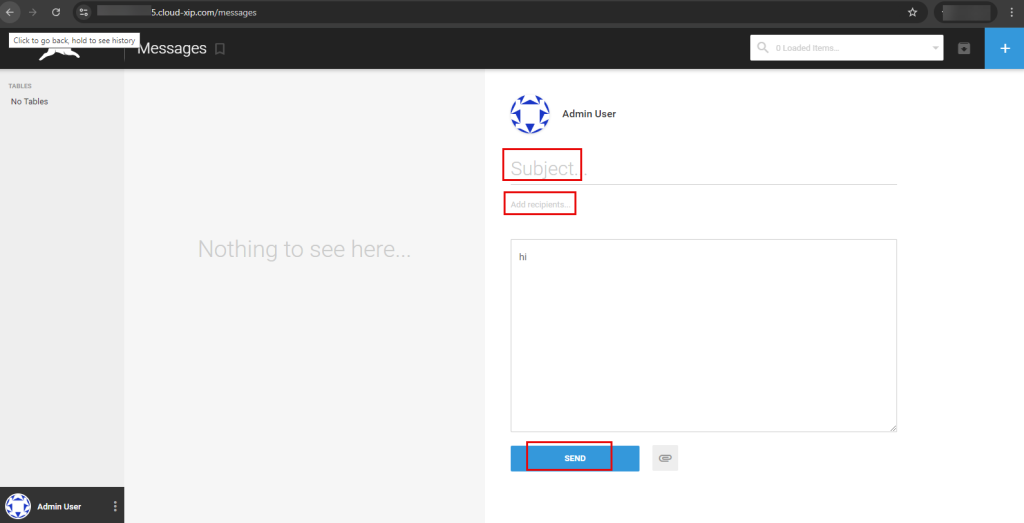
You can send messages to the all the Users. Fill in Subject, Add Recipients, Body and click on SEND. You can even attach the files by clicking on the Attach file icon (beside the SEND button).
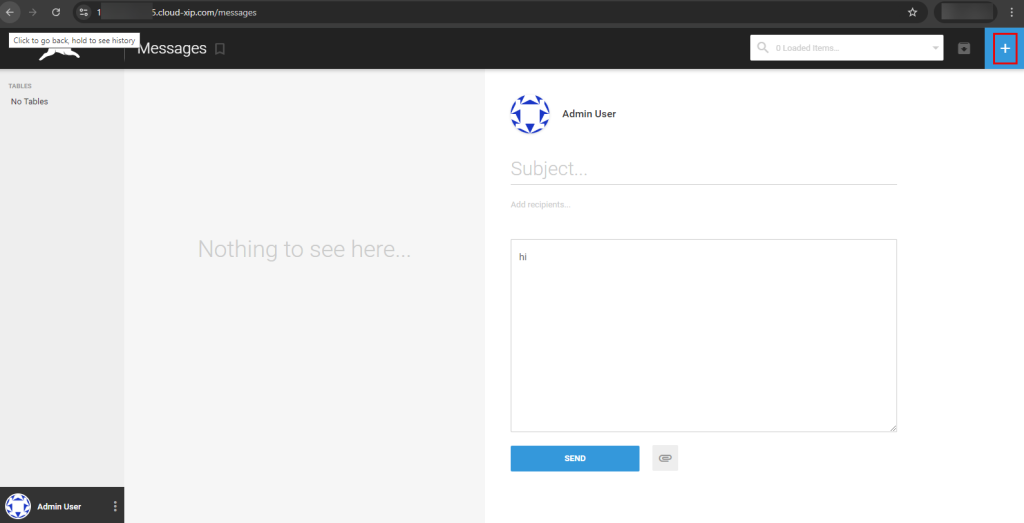
You can add more recipients by clicking on + icon on the top right corner of the page.
22. Click on 3 dots beside Admin User and select Your Profile.
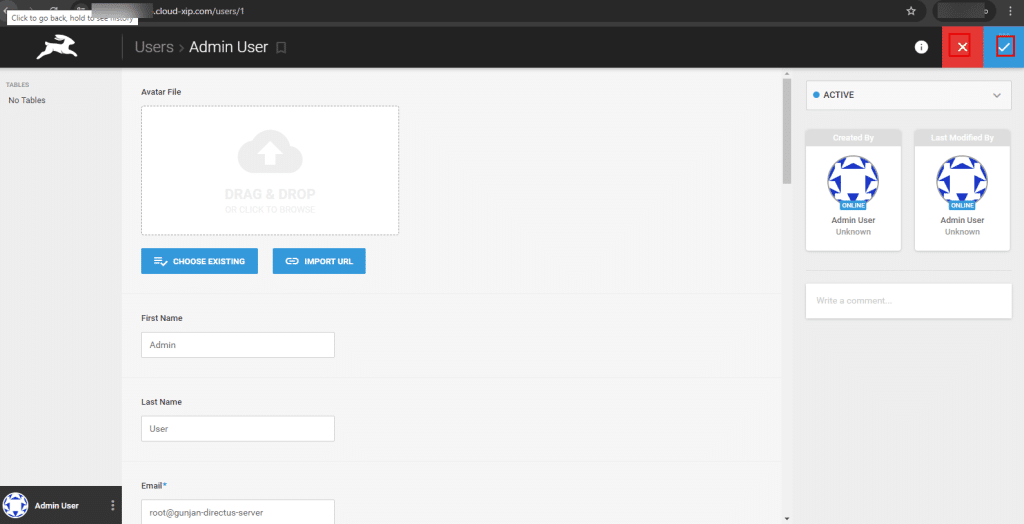
- In this page, you can edit the information and click on tick mark (blue color) on top right corner to save the changes.
- If you don’t want to save the changes or exit the page, click on the red x on the top right corner of the page.
23. Click on 3 dots beside Admin User and select Sign Out to exit from Directus.
