


Plesk is a web hosting control panel. It is designed to simplify the management of websites, email accounts, and server settings. It provides a user-friendly graphical interface for managing server resources and hosting services. Here is a step-by-step guide on how to install Plesk on a Kamatera Windows server.
-
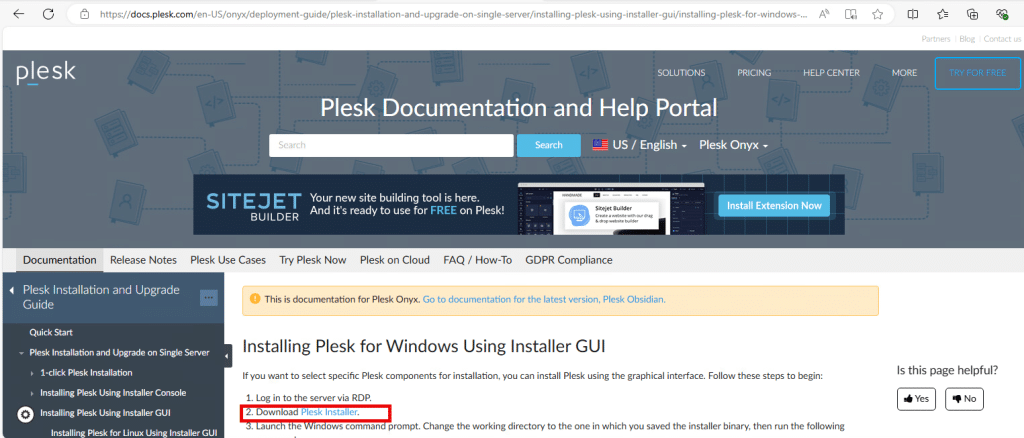
- Go to https://docs.plesk.com and click Plesk Installer.
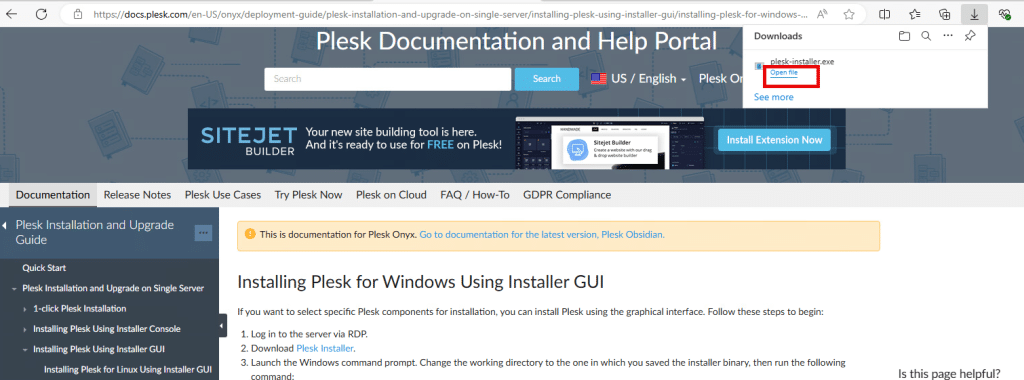
2. You can see Downloads in the top right corner. Click Open file (Plesk installer.exe).
3. Once the Plesk installer is open, you can access it in 2 ways:
- Through the command line prompt. Don’t close the command prompt.
- In a browser, where you will need to enter password and click Login.


4. Now, click Install and Update Plesk.

5. Select the check boxes and click Continue to start installing Plesk.

6. After a few seconds the below screen shows up. Select Recommended in installation type, check the box and click Continue.

7. Select the components you want to install.
Note:
- Here, MySQL Server is selected.
- MSSQL 2022 server or MSSQL 2019 server must be selected, according to your requirements.
Click Continue once the required components are selected.

Click Continue once the required components are selected.

8. Below screen shows up showing the path where Plesk is stored. Enter the Administrator Password, which was given in Step #4. Click Continue.

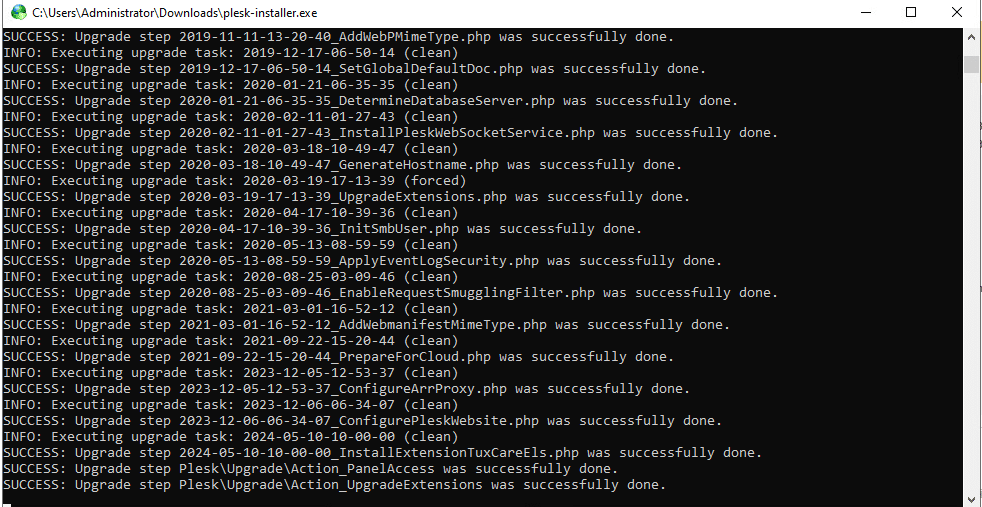
9. Installation will start.

10. After the installation is complete, you can see the message- Plesk is successfully installed. Now, click ok.

You can see in the command prompt also that Plesk is successfully installed.
11. A summary of the Plesk installer screen will appear.
- Add/remove components: If you forgot to add some components while installing, you can add them now.
- Install or update Product: You can update product.
Update components: You can also update components.

12. When you click on Update Source and Installation settings, it will show you path of the file. It’s better not to change the file path.
Click Save.

Go to desktop and click on the Plesk icon.

14. It navigates to https://localhost:8443. And the below screen shows up. Enter your username and password and click Login.

15. The Plesk welcome screen will appear, and you can enter your details when you scroll down.

Enter Your Contact name, Email id, Password (type your password instead of generating the password).
Select License- paid version or trial version, depending on your choice.
Note: here, trial version is selected.
Click Enter Plesk.

16. The screen below shows the components that are being initialized.

17. Now, you can explore the features of Plesk by adding and managing domains.

Congratulations! You have successfully installed Plesk on your Kamatera Windows server.